Battle Tile Tokens

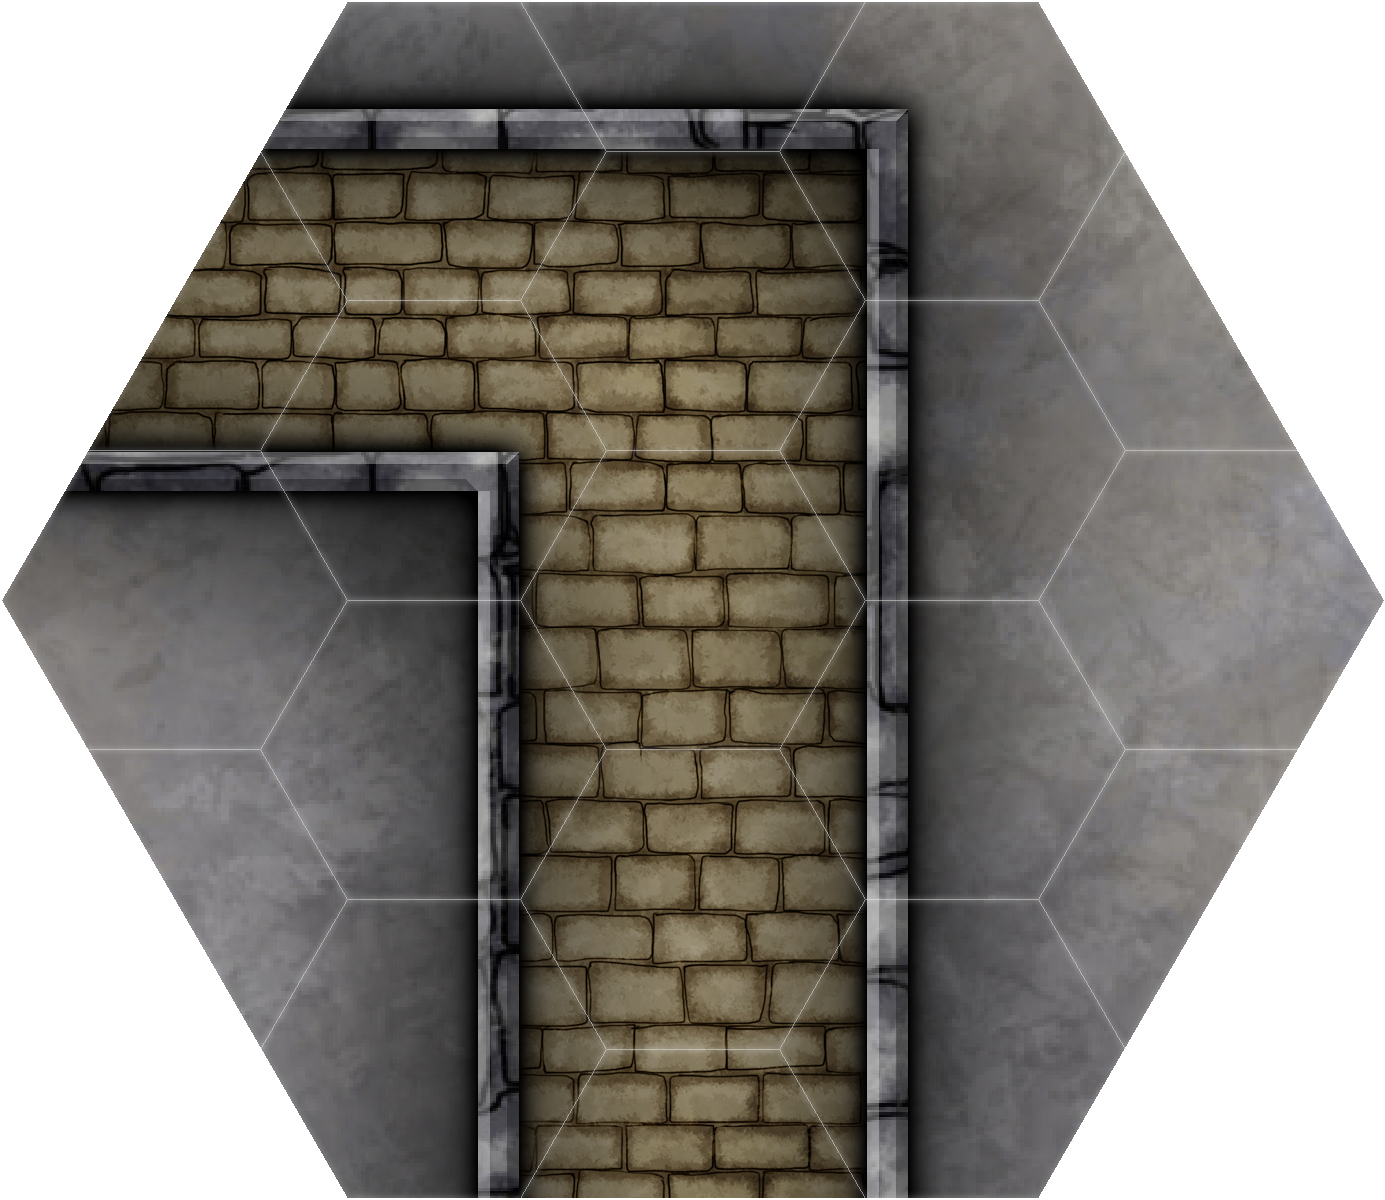
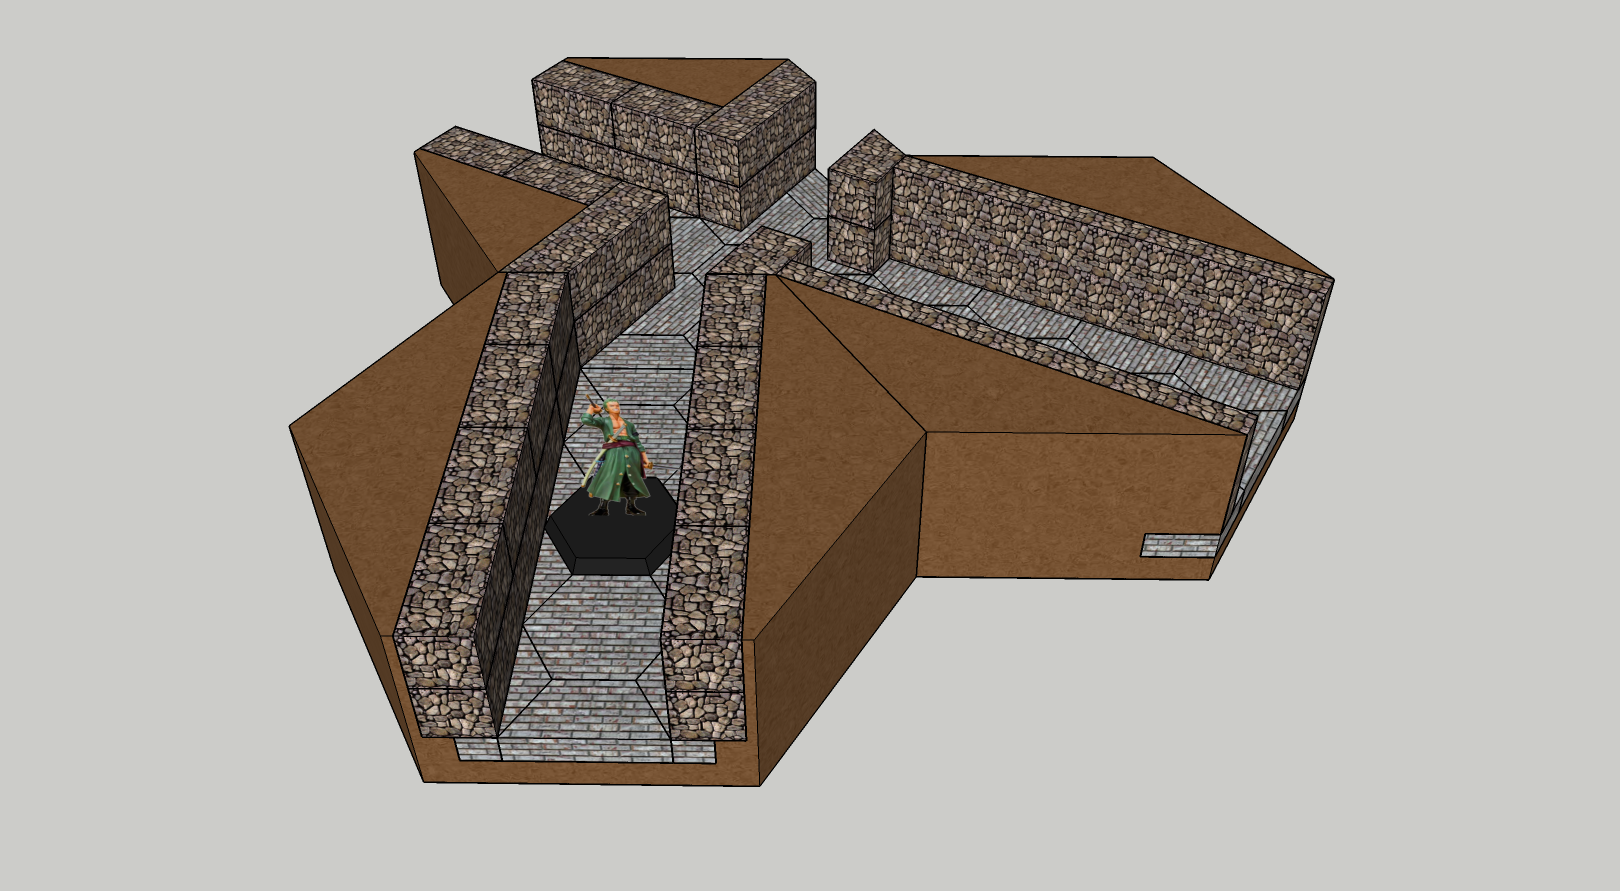
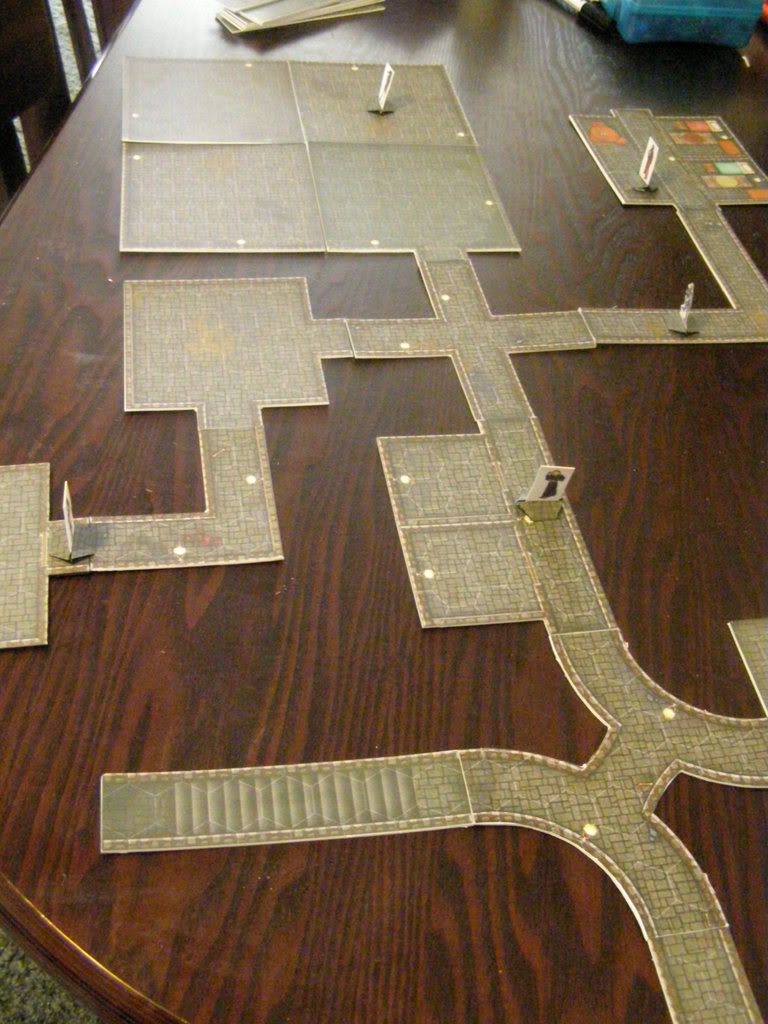
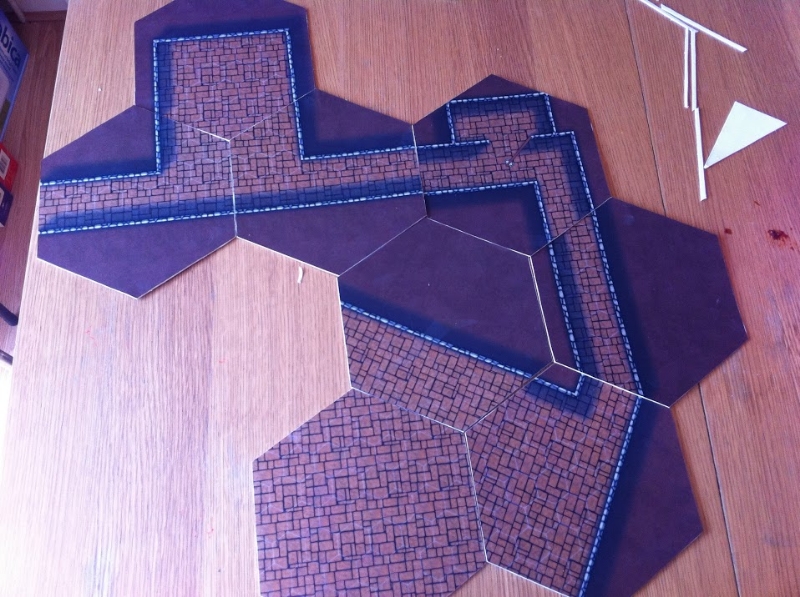
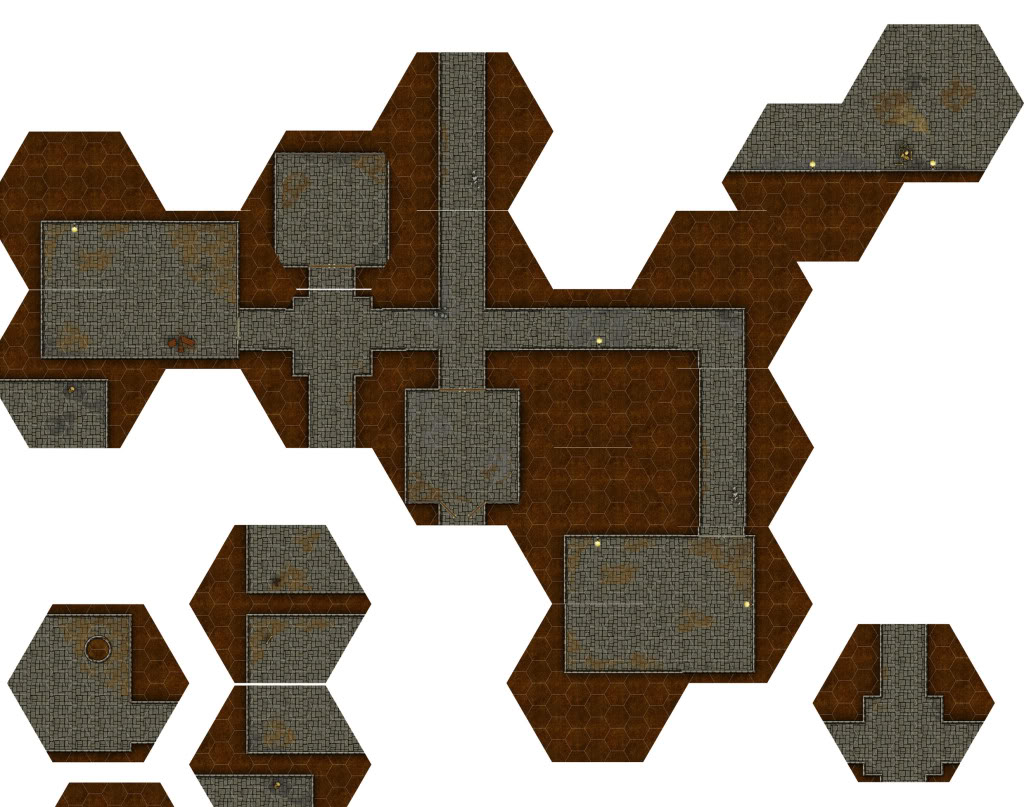
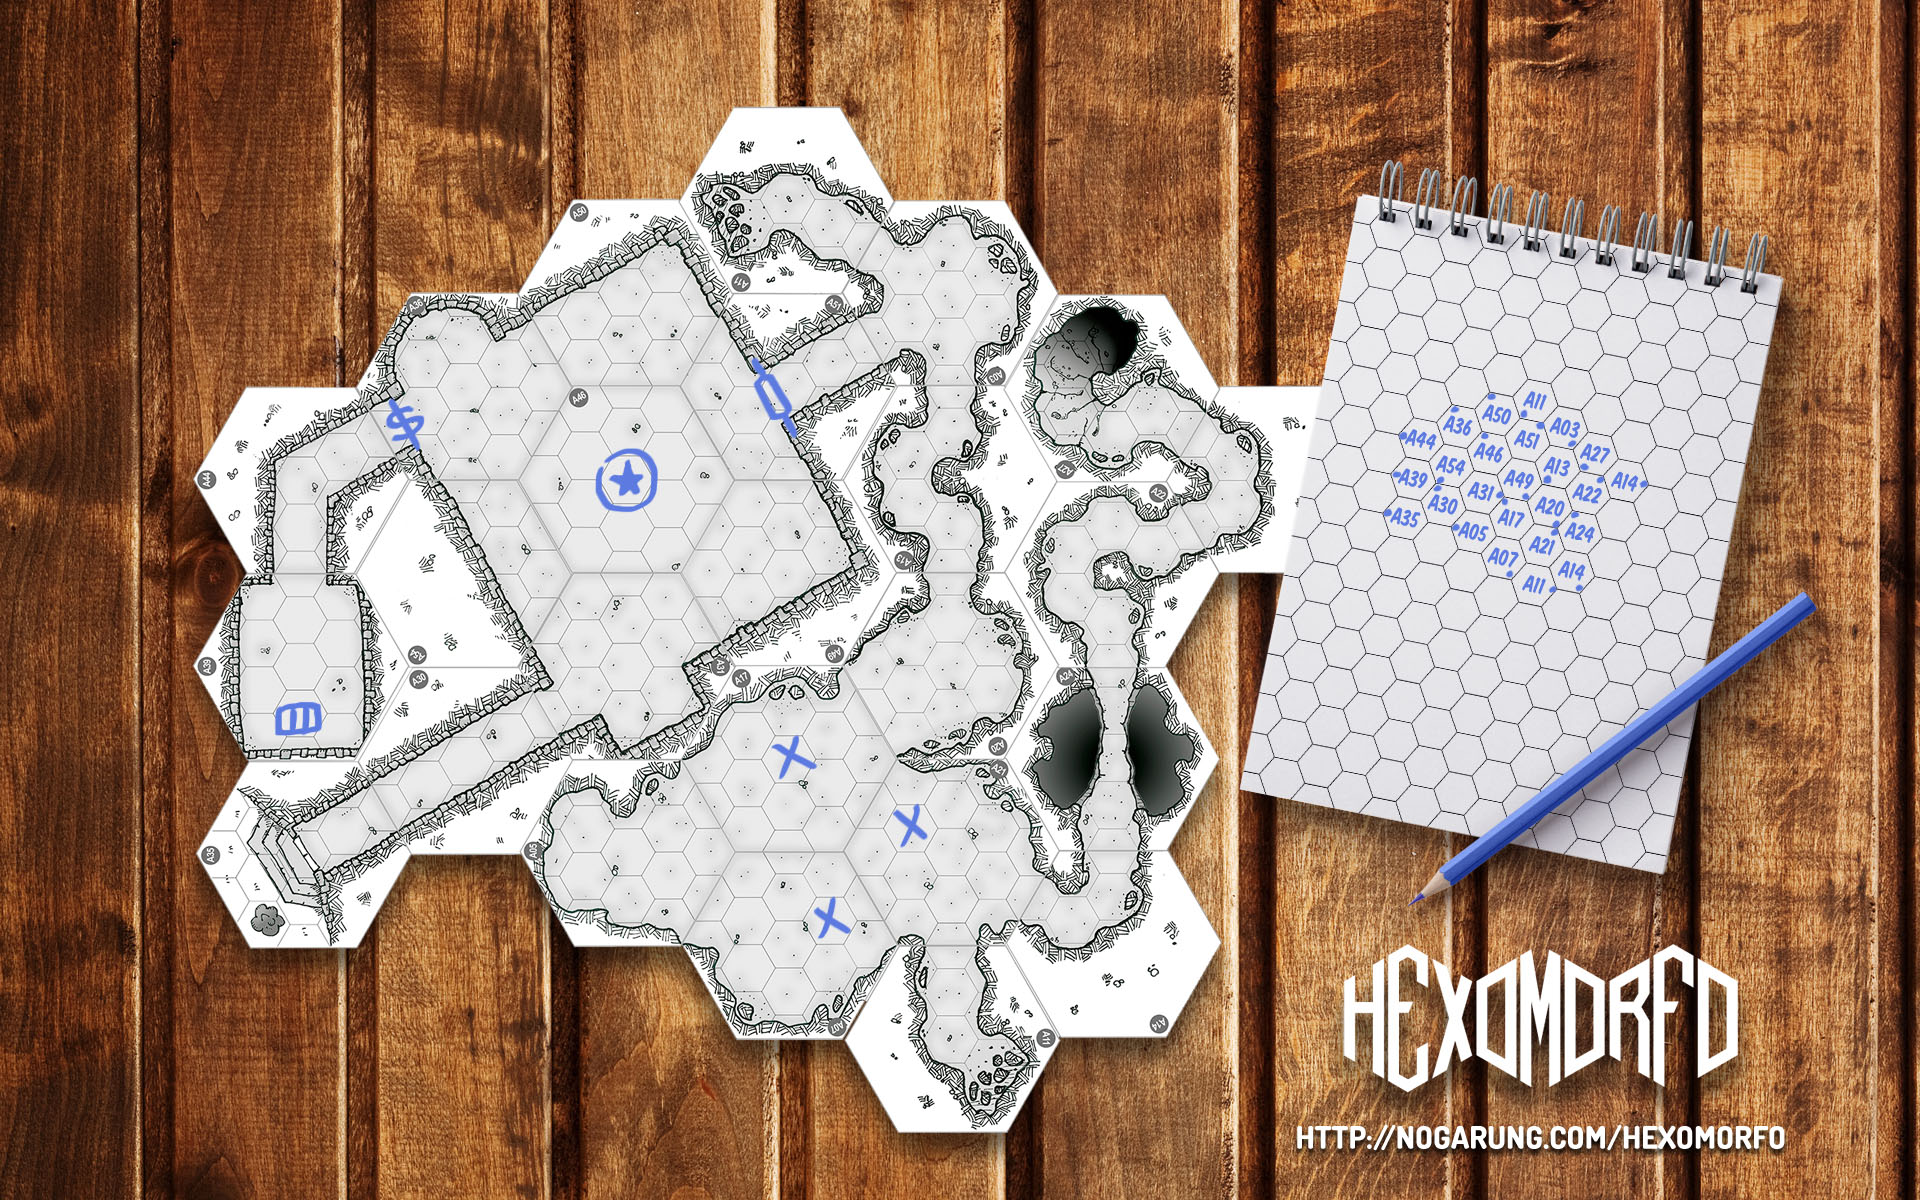
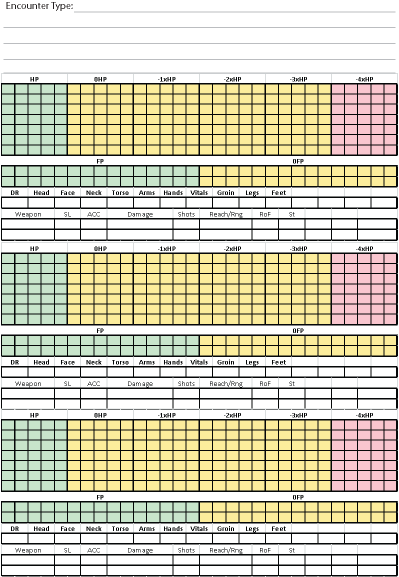
To reduce the extremely large number of tiles I’m creating I’m adding tokens around the tiles.  It may use a bit more ink but it also allows you to get more out of your photo paper as well.  The tokens will allow you to place stairs, traps, treasure, etc. anywhere you want on your tiles.

Door Tokens

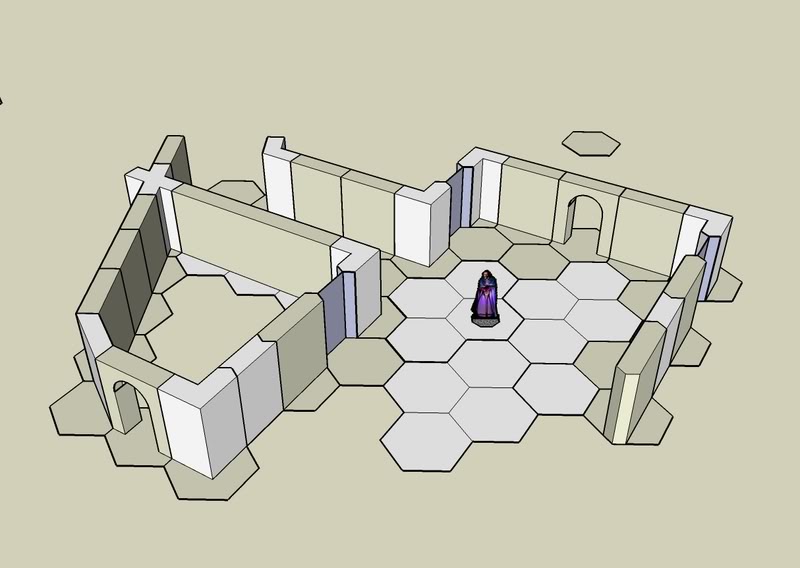
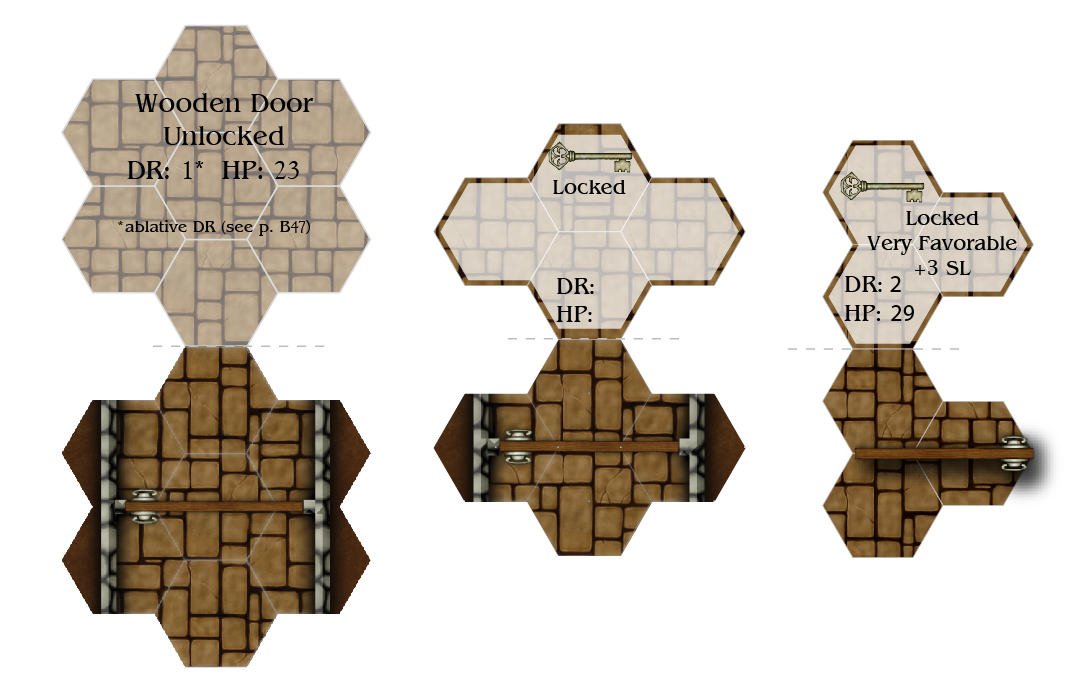
 These three style door tokens will allow you place your doors within any area on the tiles for the wider Vertical Corridors.  Carefully cut them out with a hobby knife using proper safety procedures and you can then either glue one side and fold in half on the grey dotted line or cut them in half and glue them on to thicker card. The backs of the tokens will have information on the type of door.  To make this easier and more customizable for those of you using the tiles all token pdf’s will be form fillable. Which means you can enter your own data. The center token in the picture above is how they will all look with blank data fields where as the other two is a representation of how they will look with the information inserted by the user.

Test it out on this pdf for yourself!  You will have to download the pdf, Google Docs won’t let you use the form features in the preview.

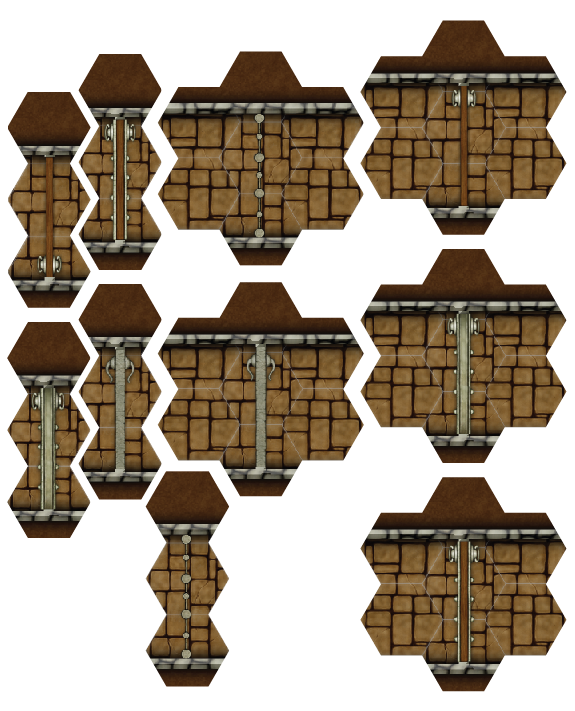
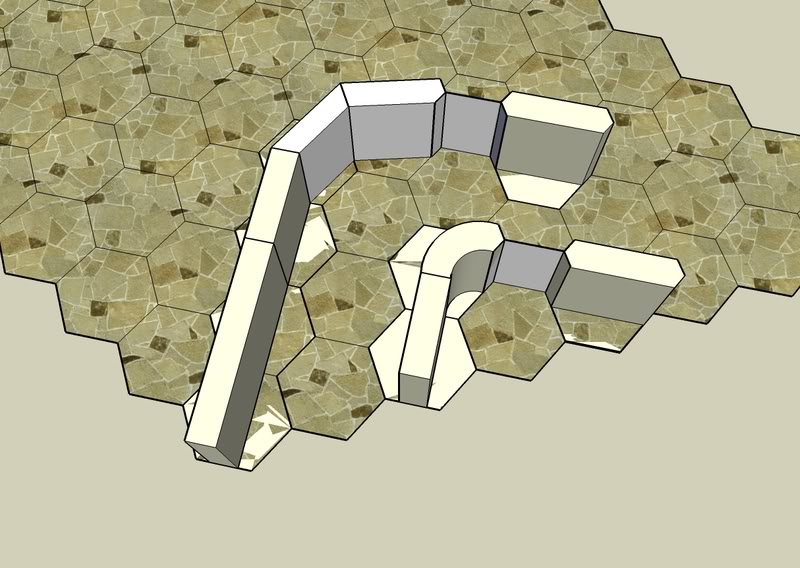
Because the Horizontal Corridors have to be slightly reduced in width I have created two types of door tokens for each door type. These also will have a form option on the reverse side.

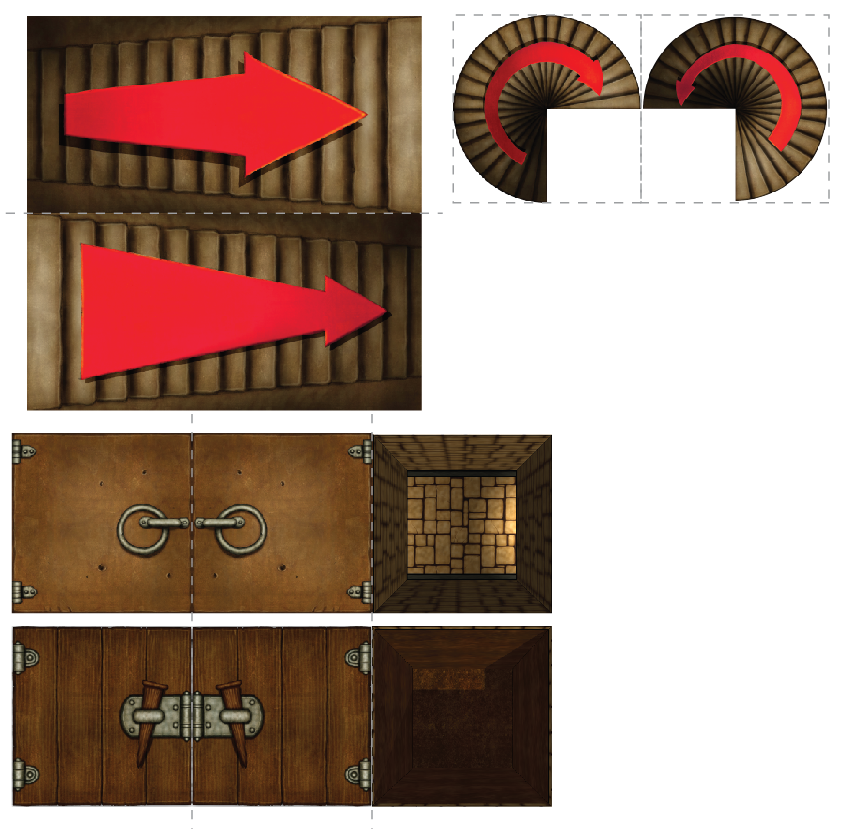
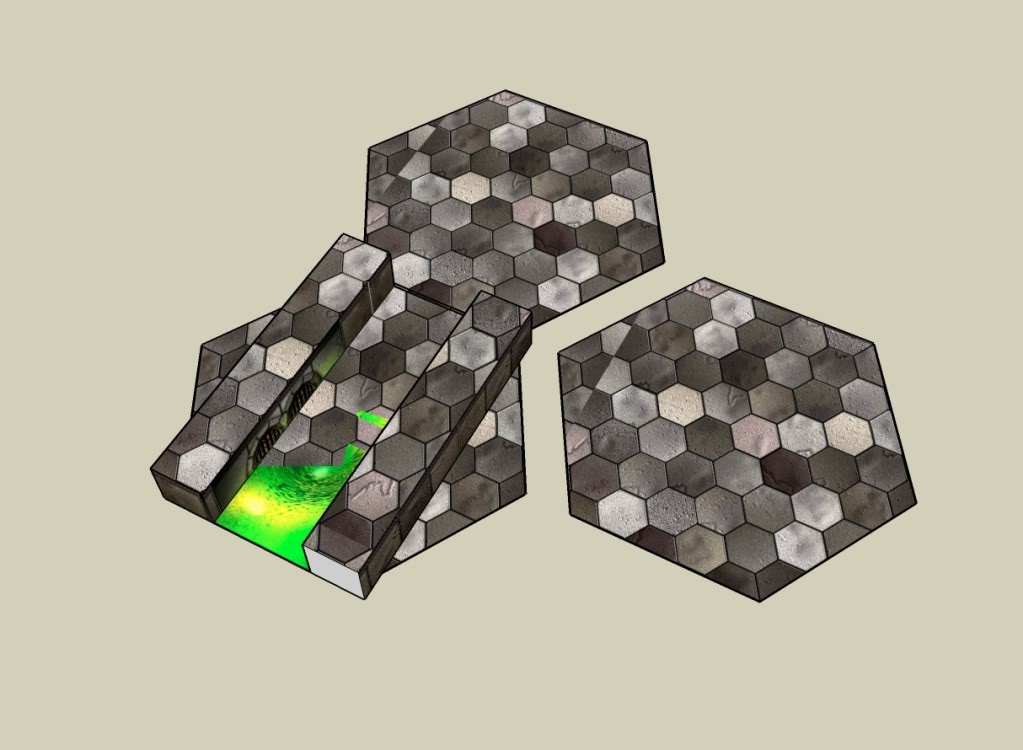
Here are some of the options you can place from getting from one level to another.  I manipulated the pit images in photoshop.  The top one is a pit down to another corridor directly below it and the bottom one is just a deep pit.  I probably should have placed a skeleton on the bottom for scale. If you fold the pit symbols on the grey lines and glue the trap door parts together then glue the bottom (pitt symbol) to a piece of thick card you can have a pit tile with a working door!

Now to make sure that the pdf’s can be used by both A4 and 8.5″x11″ I’ve placed a red rectangle on my sheet representing the size of 8.5″ by 11″. This will make sure none of the pieces will be cut off due to size. Everyone will have to print them with no margins though.

I’d be interested to know what kind of tokens people would like to see.

7 inch hex Battle Tiles

I’d like to share the 7 inch hex Battle Tiles that I made back in 2009. You can read about it HERE on the Profantasy forums.

You can get them HERE

For more information on the battle tiles click on the tags to other posts concerning Geomorphs.

If you end up using them please share pictures and if you tend to use them often and you need a new tile then please let me know and I’ll whip one up for you.

My Thoughts on 4″ Hex Tiles

Last time I discussed, in my own disorganised way, my thoughts on 7″ hex tiles.  Now I’m going to delve into the 4″ hex tile.  As I’ve stated a few times before the thought first came to me when I saw the Tabletop Hex Terrain Toolkit on Kickstarter. This is going to be a great tool for making some wonderful terrain for both RPG’s and Wargames.  However the scale is just slightly off for my tastes (as discussed here).  I may eventually redesign the tool for use with proper one inch horizontal hexes, until then I am making four inch tiles to use for my GURPS Dungeon Fantasy games.

The 4″ Tiles can only support single and double width corridors (1 hex = 3′) compared to the three widths in the 7″ tiles.  Also the number of connections is reduced dramatically to the four examples in the following image, compared to the 9 images for 7″ tiles.

Corridor options

Although there are fewer options I don’t think the four inch tiles are inferior to the seven inch.  The four inch tiles will certainly allow for more dense dungeons, and with a bit of thought and planning will be able to offer some very complex designs. Also you can make any Hex Dungeon look just like any Square dungeon.  All it takes is manipulating the width of the horizontal corridors. If the corridors are the same width they will not match up when a horizontal corridor attaches to a vertical corridor.  The horizontal corridor will be too wide.

Both horizontal and vertical corridors are the same width, the horizontal is too wide

The horizontal corridor is now slightly smaller than the vertical. H: 3.43, V: 3.9

I can live with this slight alteration as it now gives me more options when designing.  I can now have corridors that turn at 90° just like you would with a square tiled dungeon.

90° left hand turn

Single width corridors and room tiles, just a fraction of the possibilities

An example of what can be made 1 hex = 3′ (1 meter)

What I like from the example above is how at any given time the orientation of the dungeon can turn 60° giving the dungeon a more natural feel.  If you’re digging a dungeon why would you limit yourself to a grid? Also once you add the double width corridors your increasing your options and complexity.  I’ll be adding more as I have time.

I’ve got plans to make full 3D dungeons using the 4 inch tiles and plaster molds such as those you can get from Hirst Arts, Linka World, and 4bot Industries. The issue is I will have to make a lot of custom pieces and custom molds so I’m going to be shelving this project for the mean time.

I think switching from the 7″ to the 4″ tiles was the right choice for me. When I get time I will go ahead and place the 30+ 7″ colour tiles I’ve already made if anyone is interested in trying them out.  I’ll do the same for the 4″ but not until I get a large amount ready.

Pro

  • You can make dense dungeons without so many extra tiles
  • Easier to store
  • Can produce more random results
  • Easier to use “Fog of War” effect

Con

  • Only single and double wide corridors, no triple
  • No irregular/offset corridors
  • Floor textures may not align properly
  • Custom 3D parts

Profantasy Software

Mapping with Master Hexes

Hexomorfo System

Hirst Arts

4bot Industries

New 4″ Hex Geomorphs progress

If you read back through the blog you can see my slow (very slow) transition of how I make my geomorphs.  I started with just making the rooms and corridors and cutting them out at the wall.  Looks good, you can do a lot with it, however you need to make separate vertical and horizontal parts for each option.  Not very efficient.

October 2008

2008 using Dungeon Siege textures, these are “Flower Hex” tiles

Then after several discussions with people I know, one of which was Andorax, from the World Works Games forums (now defunct). The idea of making the tiles Hexagonal in shape that way you can rotate them in any direction without the need to make Vertical and Horizontal versions for each tile.

March 2009

March 2009

I made the tiles 7 inches from flat side to flat side to reduce the paper waste.  One of these hexes would fit on either A4 or US 8.5×11 sheet of paper.  If your using high quality photo paper then you really don’t want to be throwing a bunch of it away.  The other nice thing about the 7 inch tile was you could have single (3′), double, and triple width corridors giving you a varied dungeon.  Now to connect the walls together when you’re running them at a 60° turn means that the horizontal corridor has to be slightly smaller for the walls to match up at the edge.  This way you can place your 4 way cross roads and all four corridors will match up to the next tile no matter how you rotate them.  Plus you then don’t have to be confined to just 60° turns as I’ve seen many people do.

I also played around with how to make 3D Hex Dungeons

January 2008

January 2008

2009-2010

2009-2010

These were overly complex but a good start.  Unfortunately I no longer have the files for these.  Then last November during my routine searches for Hex Maps and Hex Dungeons I found the Kickstarter for Tabletop Hex Terrain. You can read my thoughts about it in the blog post linked above.  I now have the Hex jigs but I think I’m going to scale them up to get a true 1″ hex and have them laser cut.  I can still use the original Hex Jigs for Battletech and Mechwarrior: Dark Age.

Then in December the Hexomorfo System came out using the same conclusions I was using (but only using vertical corridors not horizontal as well) but the smaller scaled 4″ tiles, a bit like the Hex Jig that I discussed in November. My only issue with the 4″ tiles is you can not have triple wide corridors without needing four hexes for the length of two that you would need for single or double wide.  I had considered going to 6″ tiles but it would be bulky for the 3D version although easier to build using Hirst Arts bricks.  However I’m going to have to custom make 1″ hex tiles for the Hirst Arts as Bruce doesn’t seem interested in making any.

So now I’m currently making tiles for the 4″ system and I’m hoping to get about 100-150 done before experimenting with the 3D tiles.  I’ll keep posting updates when I reach them.

HEXOMORFO SYSTEM

HEXOMORFO SYSTEM is created by Eneko Menica and Eneko Palencia and the design is similar to what I have been working on for the new Tabletop Hex Terrain.  I’m really pleased as this shows me I was on the right track! They have made it available for 15mm and 25/28mm miniatures.  I like to see that Hex Dungeons are catching on!  They have even mentioned that they may be making more designs!

Tabletop Hex Terrain

I just backed a kickstarter for MDF Jigs to make hex terrain with!  Each hex is 100mm Vertical Hex (point to point)

https://www.kickstarter.com/projects/1378063512/tabletop-hex-terrain-toolkit


dungeon-vert-hex

A mock of what a dungeon might look like using this system. Remember each of those hexes are 100mm vertical.

e4b41c368a0d6be0164c32772053b0a2_original

I wasn’t sure if I was going to back it at first.  For GURPS I use 1″ (25.4mm) horizontal hexes and for this system it is 100mm vertically which allows for 25mm vertical hexes.  However I’ve decided that I’m not going to let it bother me as it looks so nice!  Here are the differences between the two.

hexjig-comparison

GURPS standard on the right side, Hex Terrain Tool Kit on the left side. 14.7485% decrease in size

It will mean that some miniature bases will overlap the hex.  However it looks so nice!

1a81f16d496b9eca058260af80ab9b6b_original 65fc5c7cf5b6748696599017bb38aec4_original

17c7d80daa194a078d175da29d4ec74c_original 17aee6e5218b3a4e79d4efd72b68fa2b_original 1e0fd2ae5d47d1a4618a3051472b72b4_original

Look how amazing that looks!  With the risers it would be really easy to place a dungeon underneath the ground and terrain on top!  They are expected to arrive in March which will give me two months before Dungeon Fantasy Powered by GURPS arrives in May!

Also I will be able to use these for my wargaming as well.


GURPS Campaign Booklet!

So I’m kind of handy and creative at sporadic moments. I’m making a 32 page Dungeon Fantasy Campaign Book, A5, to help me whip up my games. I’m a BIG fan of layered pdf’s and fillable forms in pdf so you will be able to do all of that with it. I will also offer it for free to everyone as I have a thing about making money off hobby stuff (stops being a hobby).

Here is what will be on the pages so far

Page 1: Cover, you can insert your own images, Title, Campaign Segment Number.
Page 2: Campaign Overview
Page 3: Campaign Overview cont. Campaign Checklist to help stay on track
Page 4: Text Box
Page 5: Layered Graph section
Page 6: Top half Layered Graph, bottom half Double Column Text box
Page 7: Encounter Sheet. A place to list the encounters and maybe some tick boxes to use for HP/FP tracking.
Repeat Pgs. 4-7 until page 15 (total of 3 sets)
Pages 16 & 17 Middle full page map/image spread
Pages 18-21 Same as 4-7
Pages 22-25 PC overview
Page 26-27 NPC/Monster overview
Page 28 Random Encounter tables
Page 29 Random loot table
Pages 30 & 31 Game notes
Page 32 Back cover, maybe some game aides.

encounter-sheet

The colour can be switched off to just black and white.

The NPC/Monster and PC overview is just going to be Attributes, a few lines for skill/power so only the most used or important.  Armor and a few weapons.  Very basic but enough to allow the GM to keep tabs on things without having to scroll through a full sheet.

The Graph Paper pages gives you six layers to choose from

map-options

left to right Lined Paper, Geomorph Tile, Geomorph Map, Square Graph, Isometric Graph, Blank for inserting image.

The half page option is much the same as above but only offers the top half for the graph and bottom half for writing.  I’ll keep posting as I make progress.

New Card Design

I’ve redesigned the cards to Bridge Size (2.25×3.5 inches (56×87 mm)) and I have ordered 200 blank Bridge cards to use in my printer.  I’ve asked the GURPS community on Google+ to make any suggestions and to add any Maneuvers not covered in the current GURPS Combat Cards.  I’m still working on the Monster cards and I’m unsure if to actually use them or stick with 4×6 note cards.

GURPSCombatCards2 GURPSCombatCards