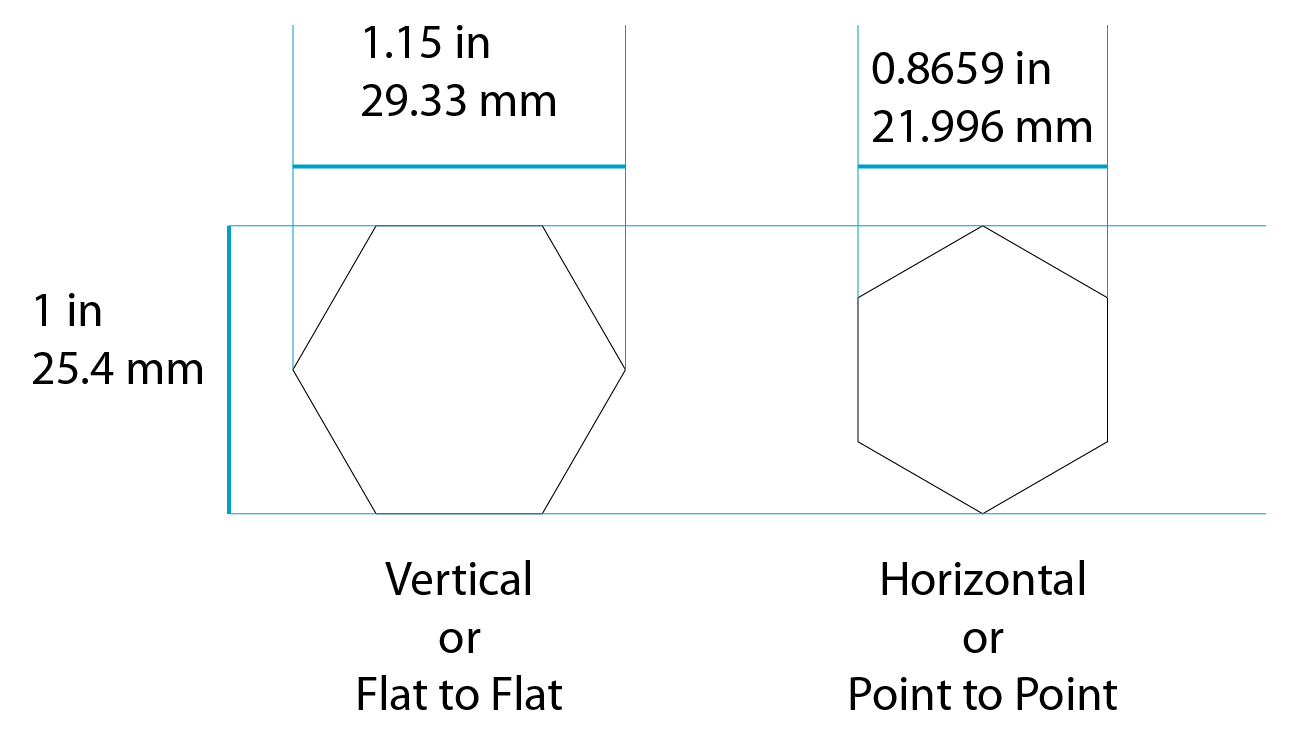
In my last post I gave a brief overview of how my different hex dungeon maps evolved. This time I just want to discuss briefly on some hex maps but mostly the 7 inch hex tile. There are two ways to place a hex onto a map. Vertical and Horizontal sometimes referred to Flat to Flat and Point to Point. Now if you are using your map for miniatures the standard movement is 1 inch for the base. If you want to the distance from top of your tile to the bottom of the tile to be 1 inch this means you have two different possible sizes for your hex. However most people would just stick with the 1 inch distance flat to flat as that will perfectly allow even miniatures with round bases to fit within the entirety of the hex. Not to mention that a 1 inch Vertical hex tile is the industry standard for miniature bases.

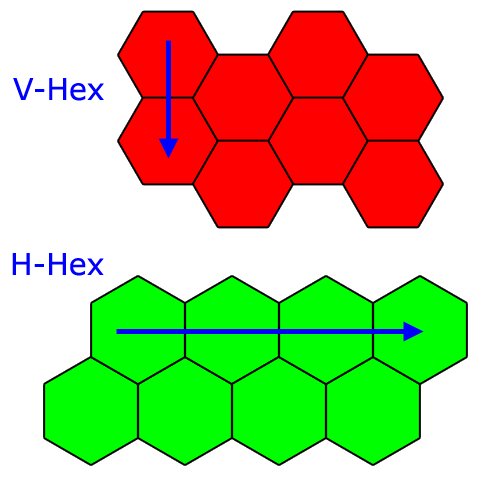
I’ve heard some people refer to them the opposite way but I view it as the direction of travel in a straight line via the flat edge. Very few games that I can recall use the Horizontal grid. I’ve mostly seen older wargames that use counters, Star Maps (although can use both), and probably most recognised in the gaming community Icosahedral World Maps. I’m sure I’m missing a few.
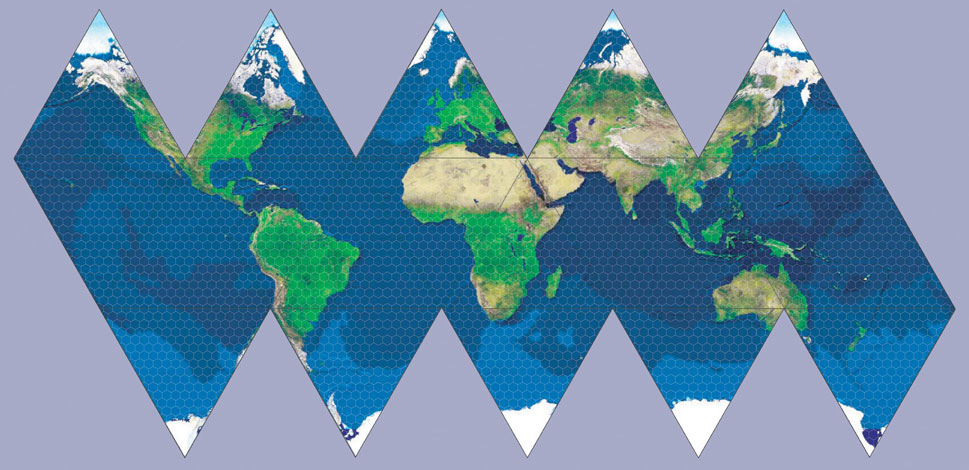
icosahedral world map using Horizontal Hex Grid
However if your playing with miniatures on a battle map you really want to have a facing edge. Also I play GURPS which uses Vertical Hexes if players want to use battle maps. So that narrowed my choices down to, well, one.
Now in my previous posts I’ve mentioned how I used hex grids on square mats and the problems that can lead to as you need duplicate maps for each directions as each square would have half hexes and quarter hexes. It really wasn’t ideal.
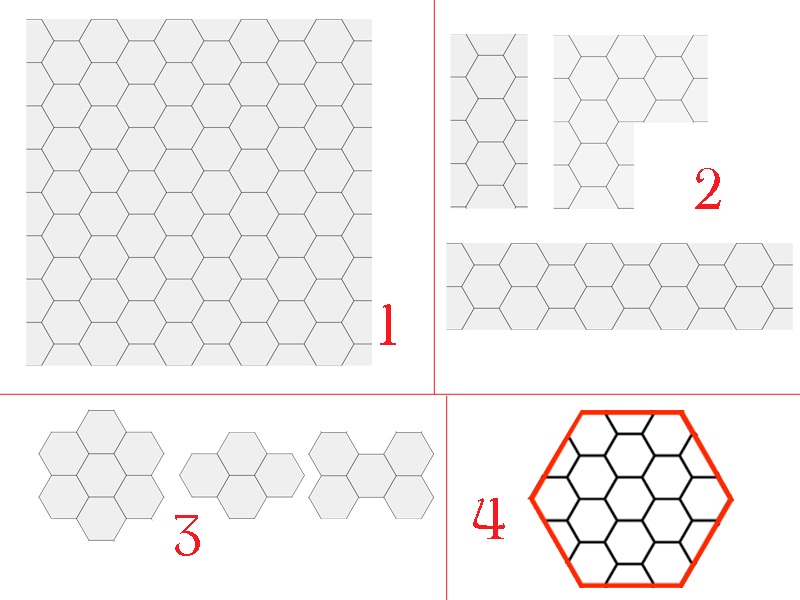
1) Square tile, hex grid
2) Rooms cut to fit, hex grid
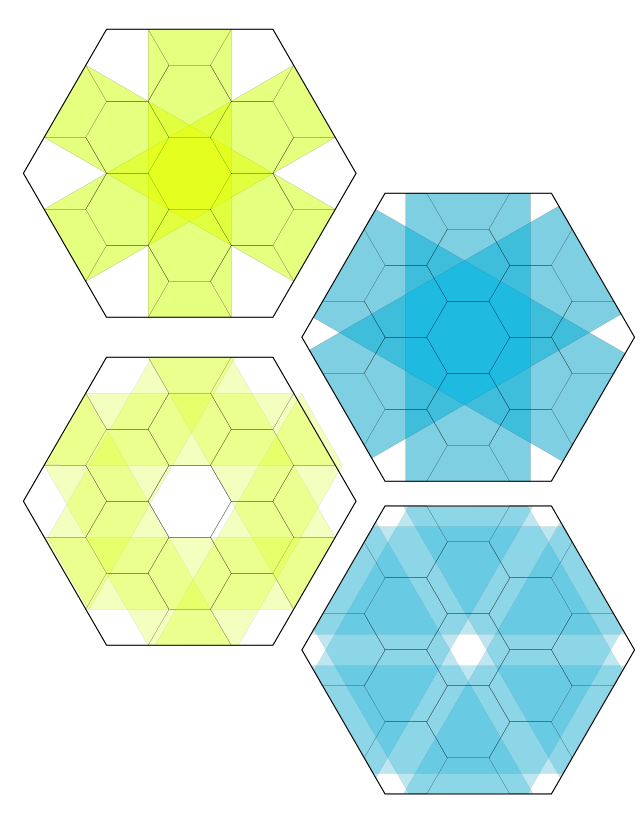
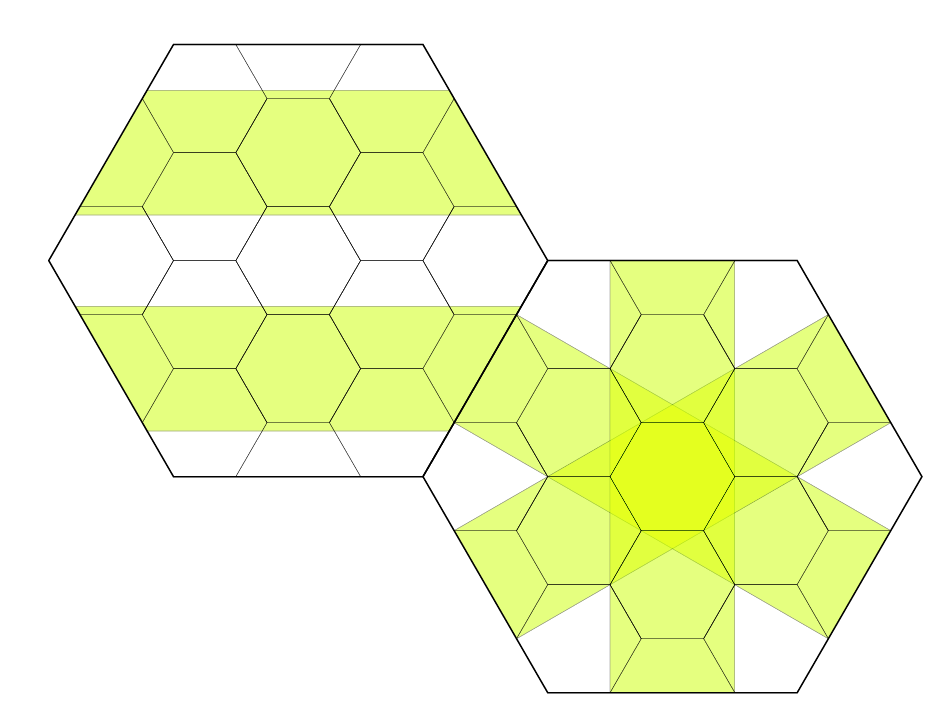
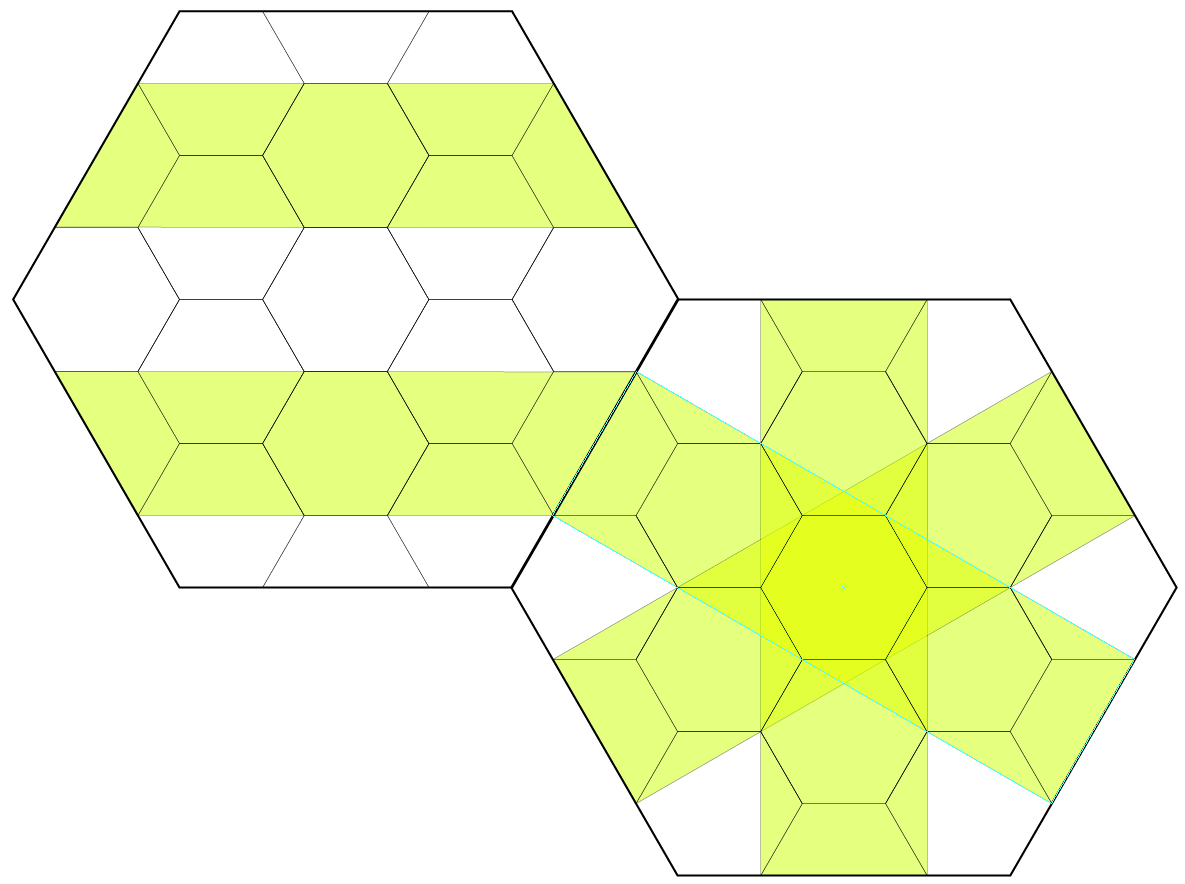
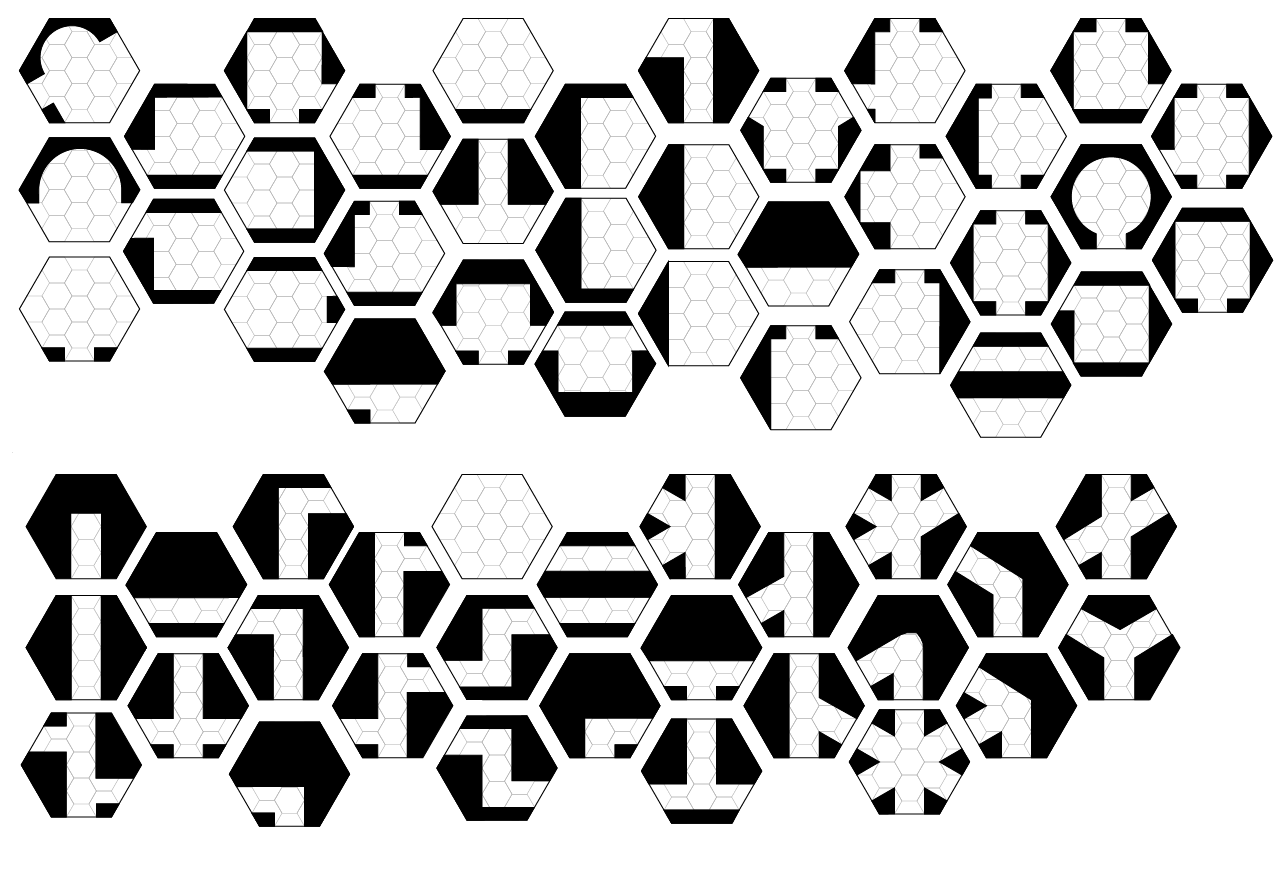
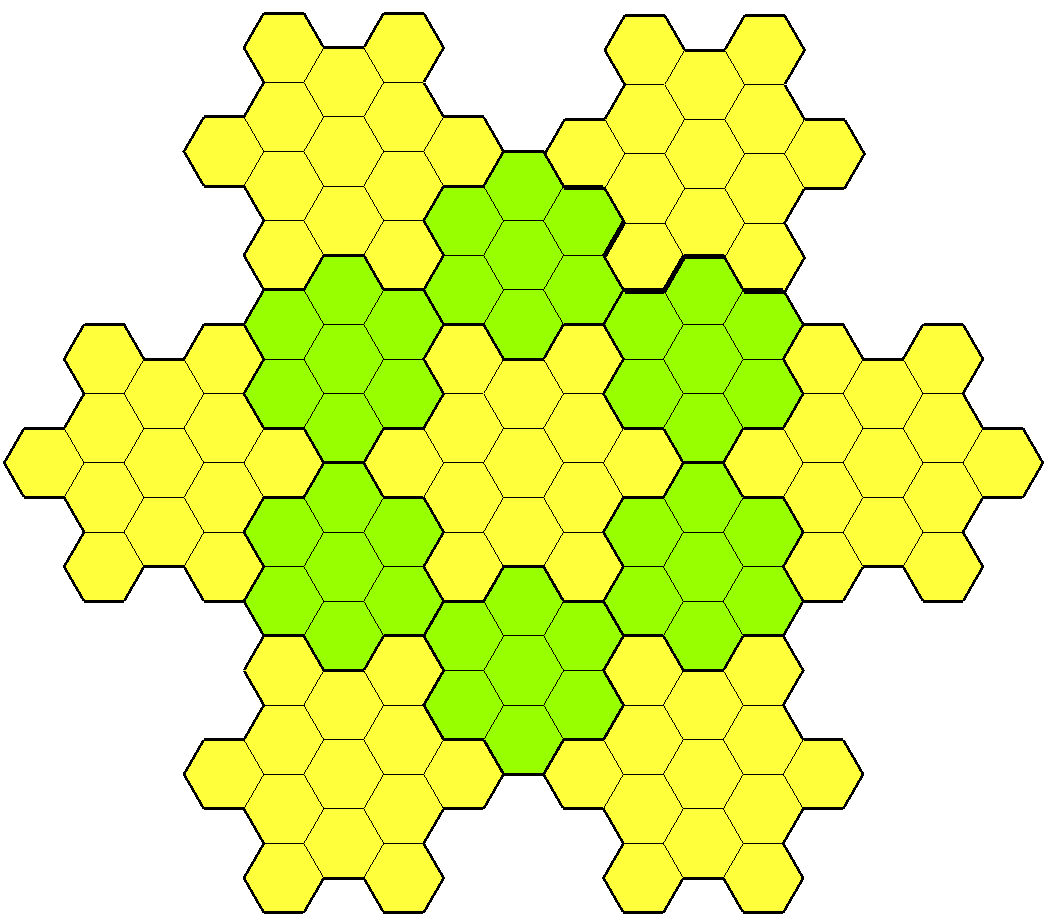
3) Flower Tiles
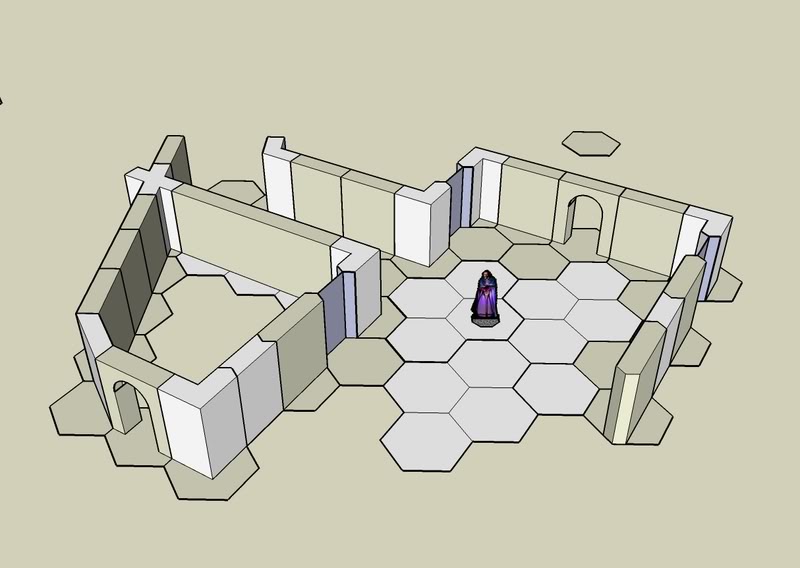
4) Hex Tiles
I did experiment with Flower Tiles. I liked Flower Tiles as they are interlocking but you would require a larger number of varied tiles to make a proper system and it was just too much. I wanted something simpler.
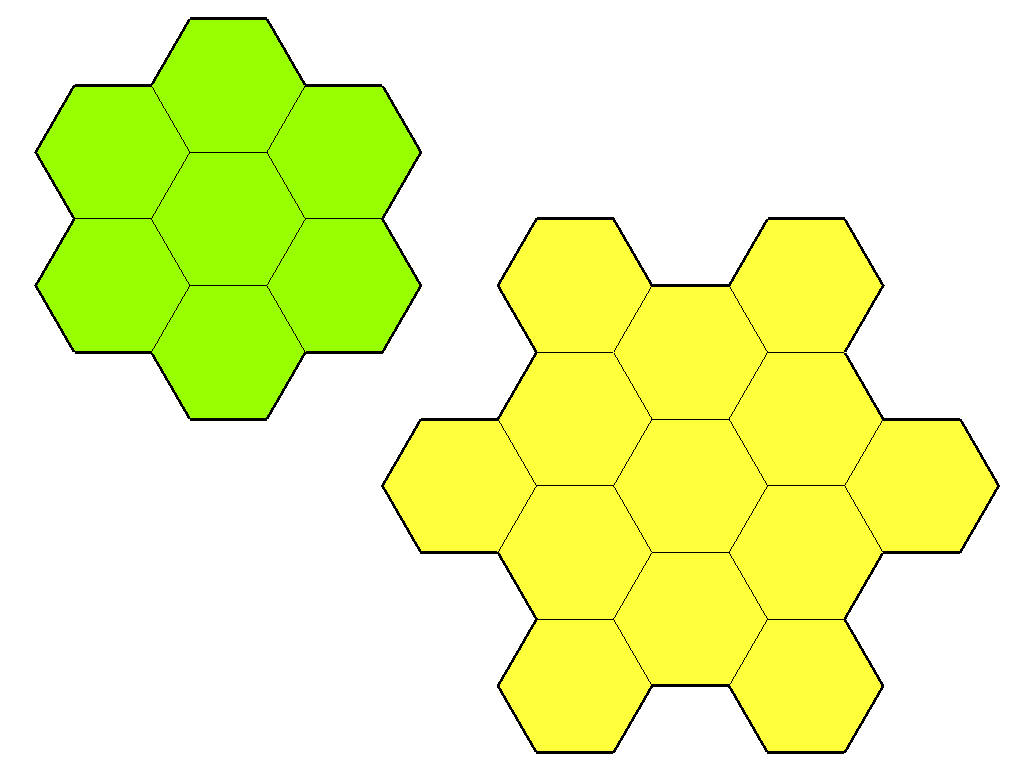
Flower Tiles

Flower Tiles interlocking
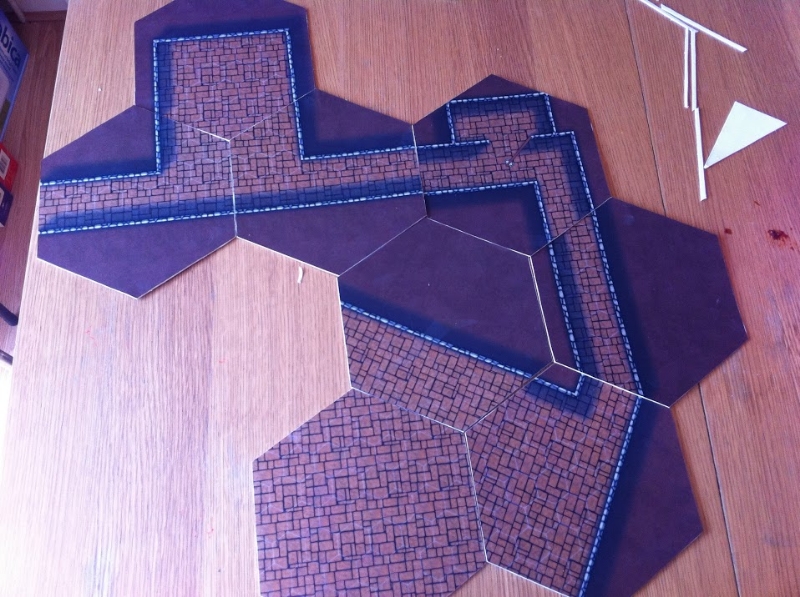
Then I came across the idea, after discussions with Andorax (a World Works Games forum user), to use Hex Tiles. This allowed me to rotate the hexes in any direction and have all the tiles line up. The only thing we disagreed on was whether to use Horizontal or Vertical. I prefer the Vertical so I went with that.
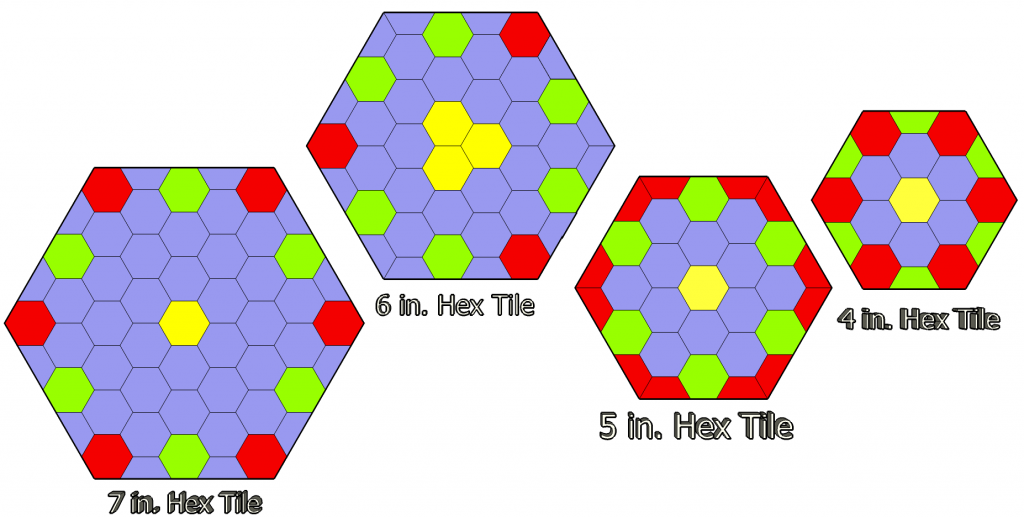
There is a great blog post by Phil Wright “Mapping with Master Hexes” where he goes into in depth detail about how to choose the proper tile size. I’d like to say I did the same thing but honestly I just got lucky. I wanted to fit a tile on a sheet of paper with as little waste so for A4 or US 8.5×11 that ended up being a 7″ Vertical Tile. I’ve made dozens of these tiles and even printed out a few on good quality photo paper. Most Wargames are done in 6 inch sections however that just won’t work with a 6 inch hex tile. As with a square tile the 6 inch hex tile has too many irregularities for it to be functional. 4″, 7″ are best. you could use 10″ and 13″ but that is starting to get a bit large for me. 5″ hexes would also be feasible but it personally did not suit me.
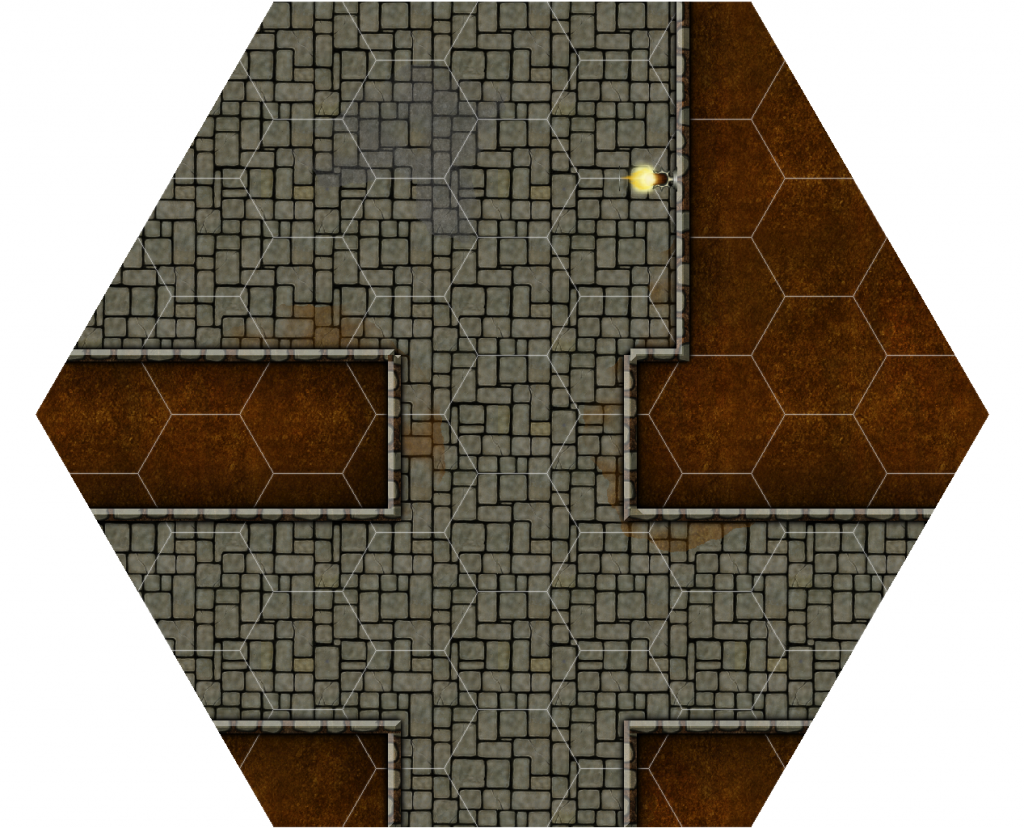
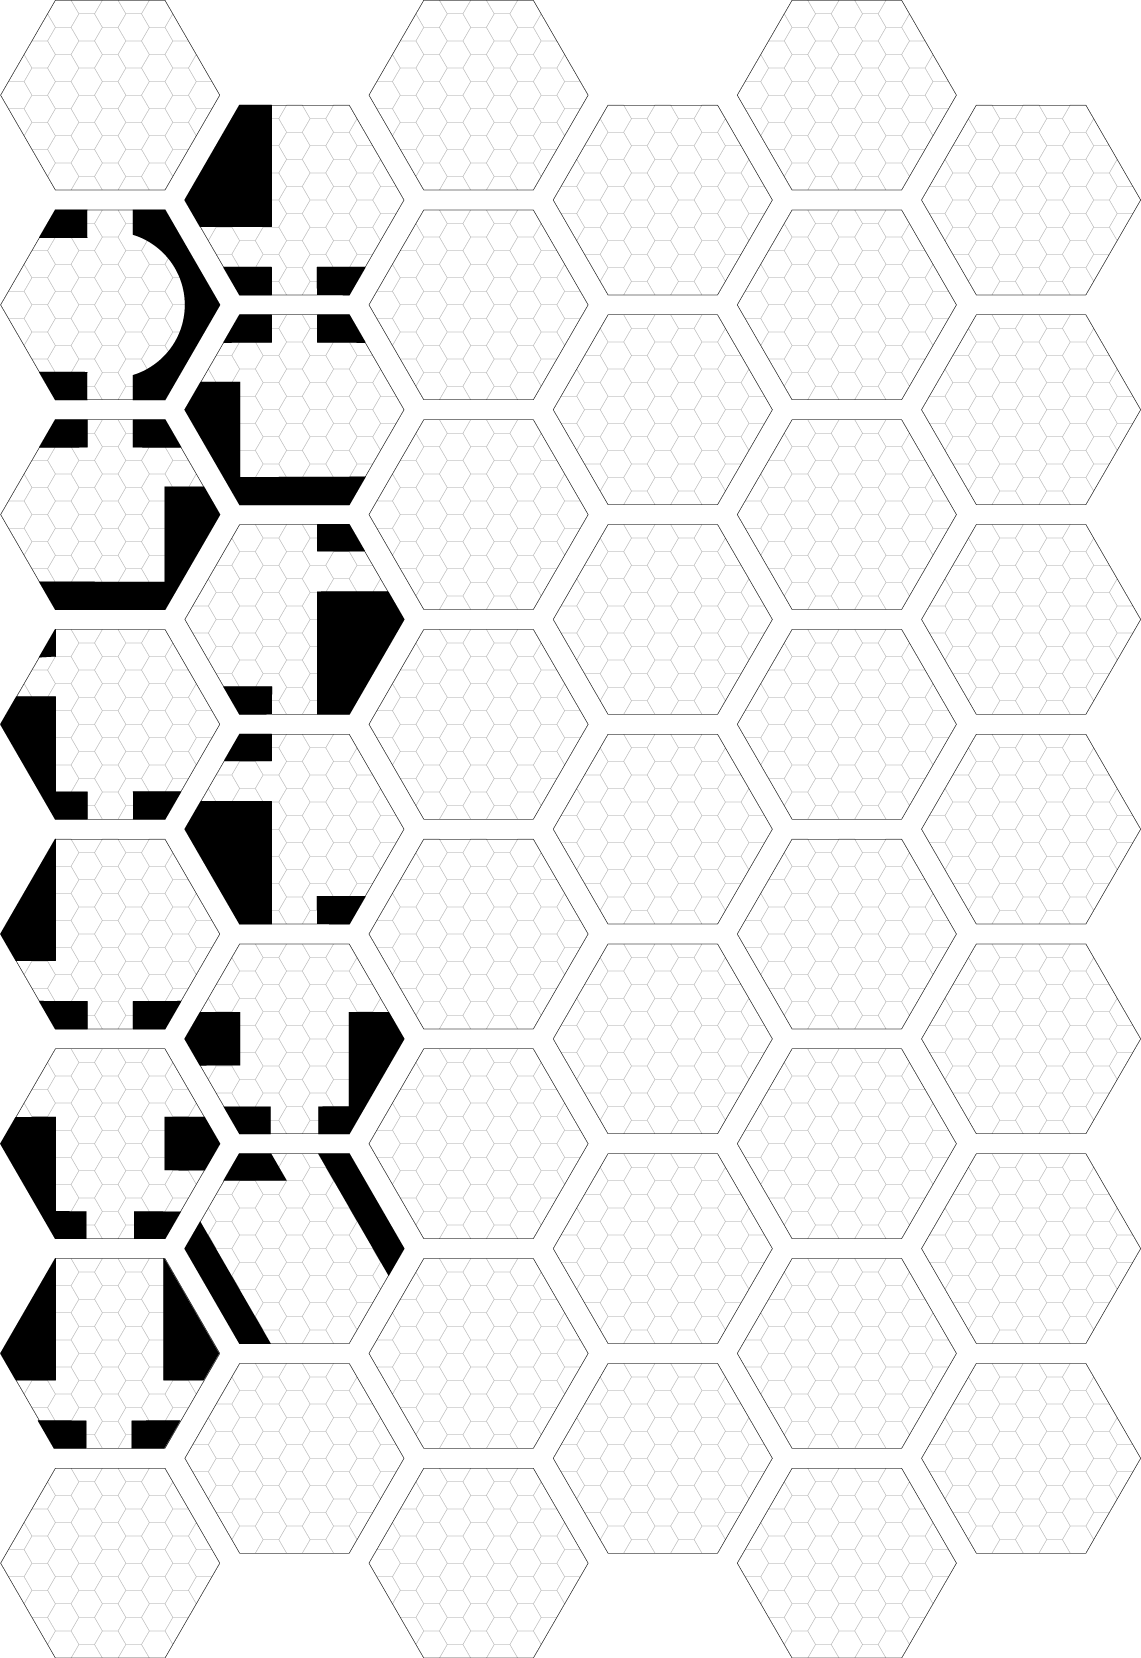
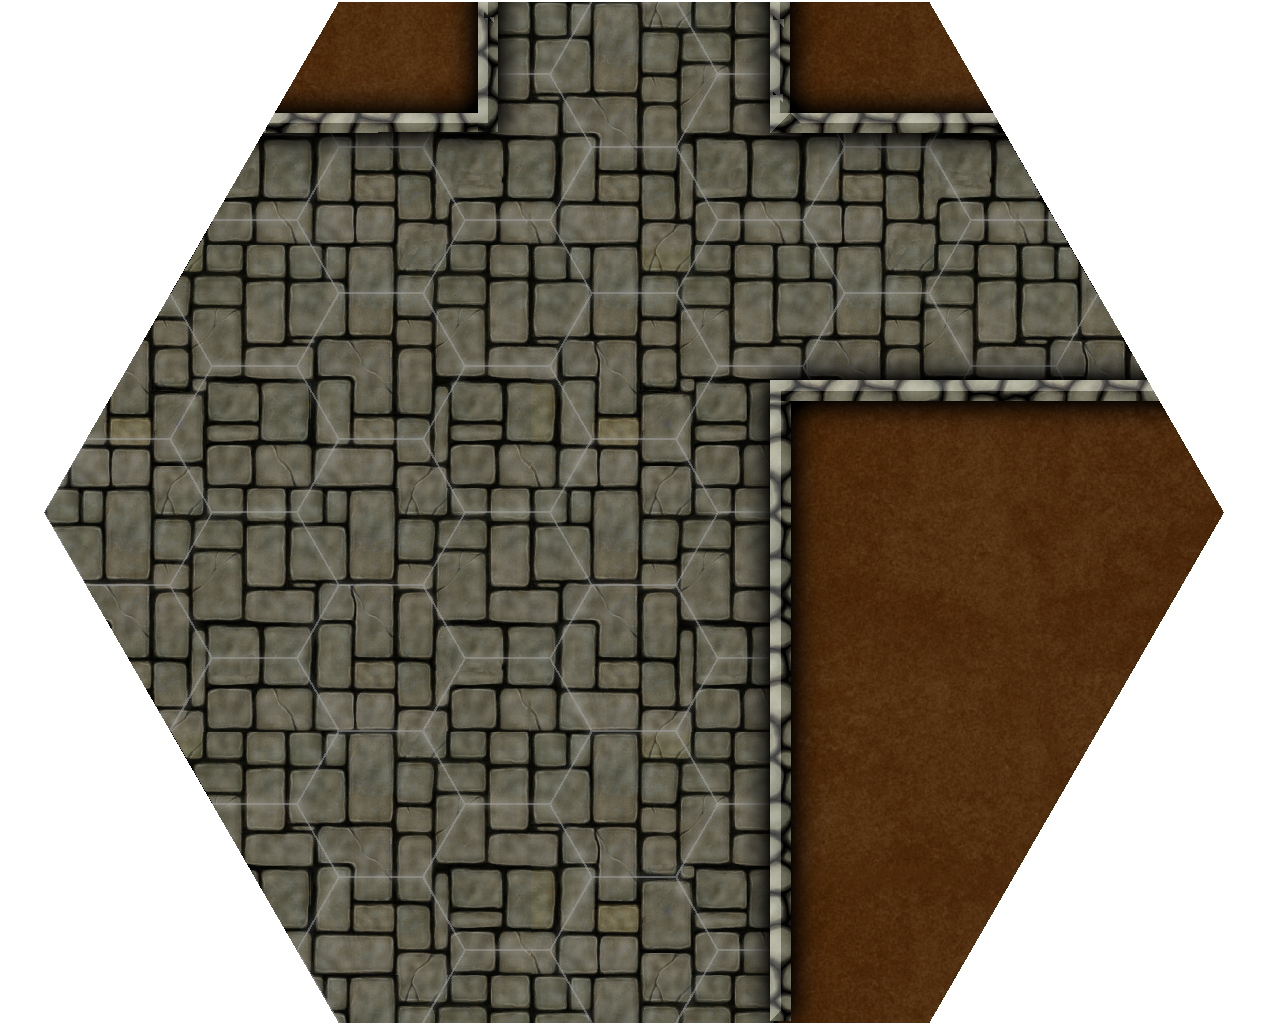
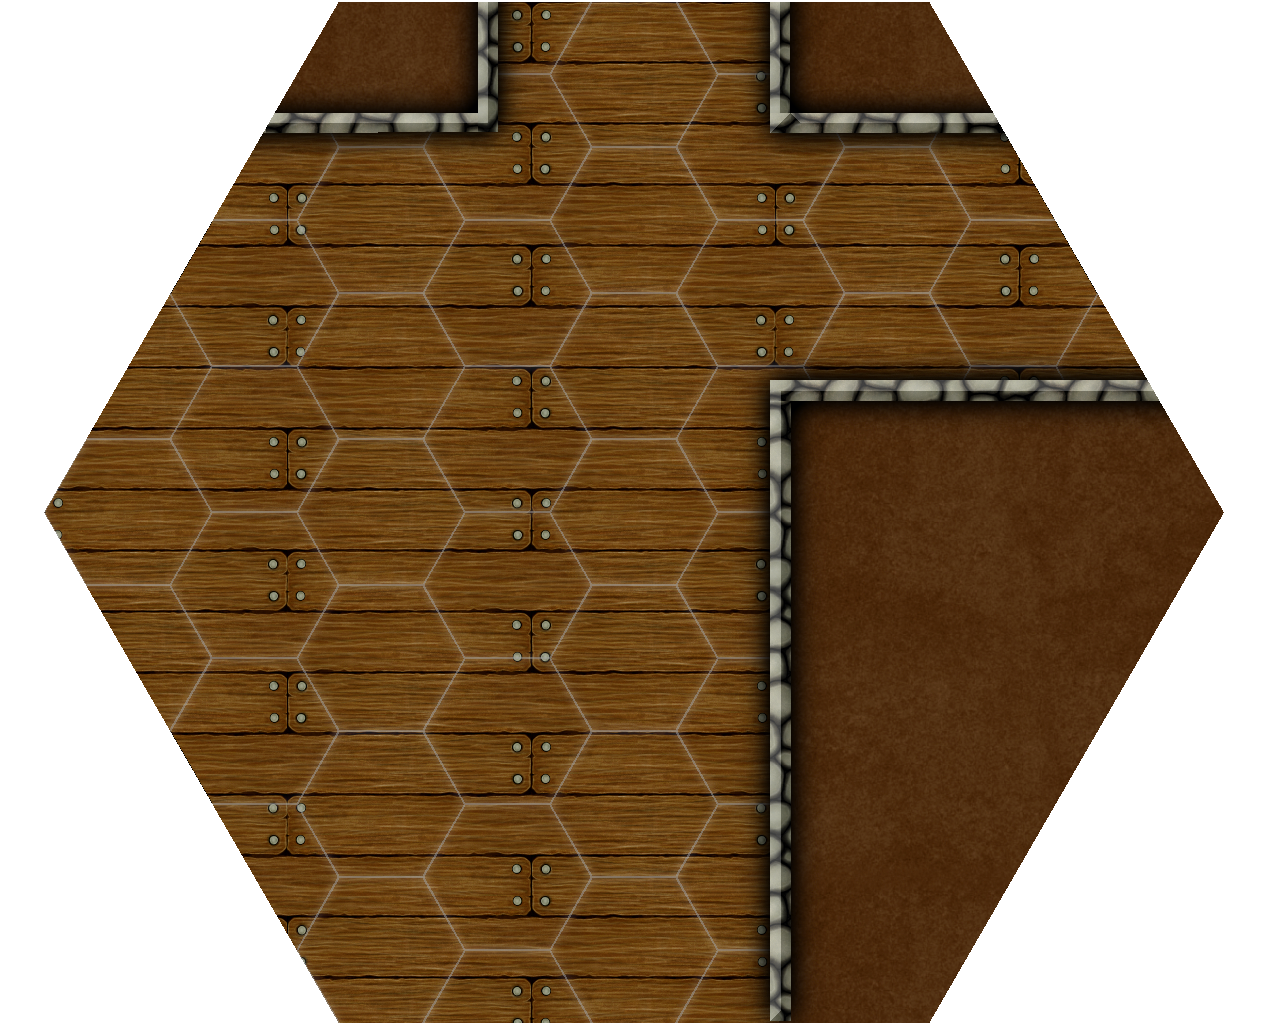
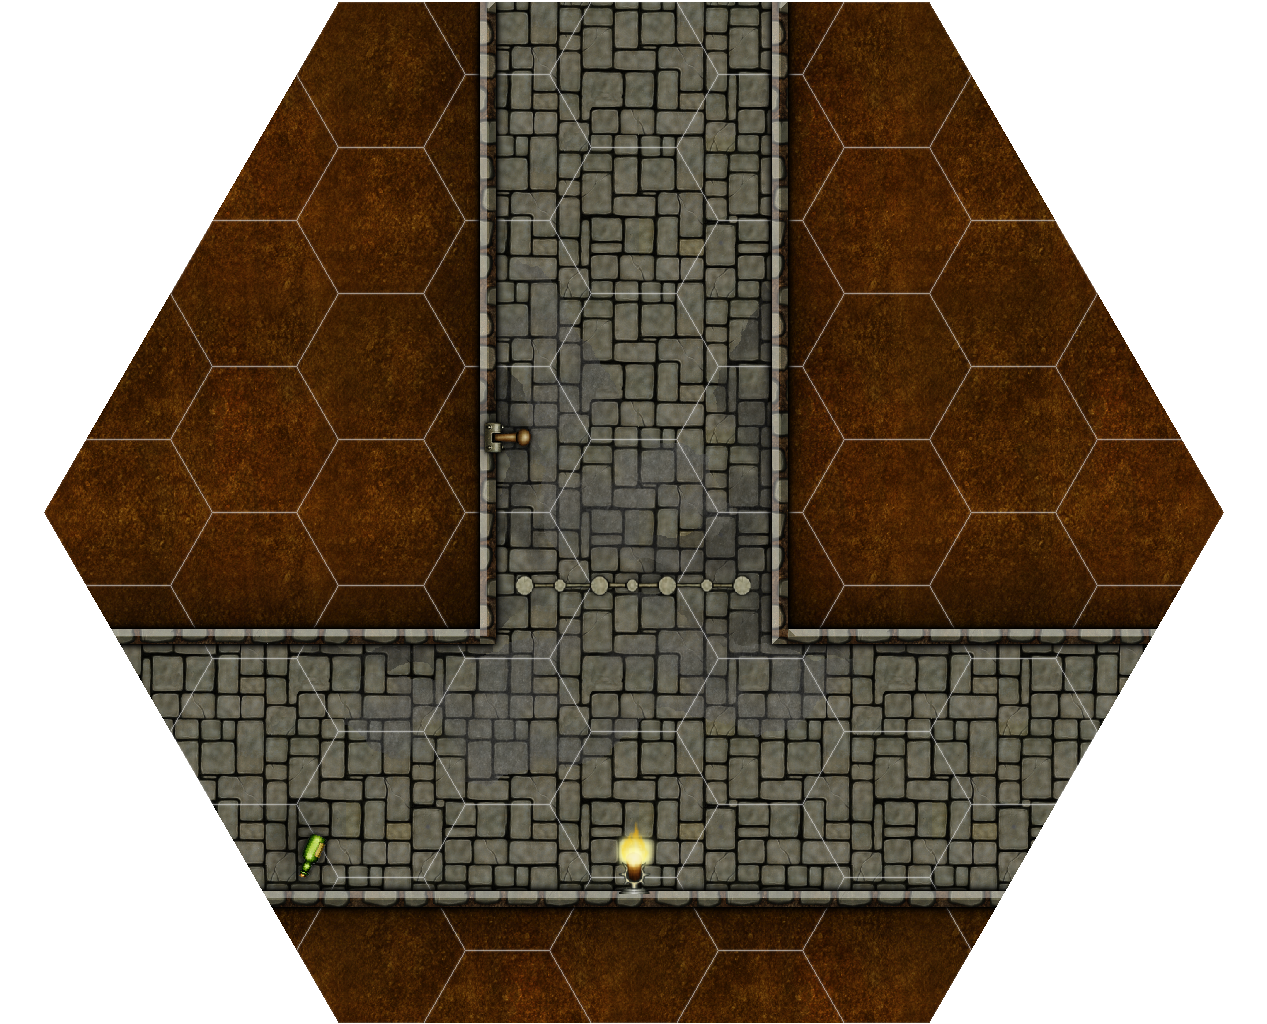
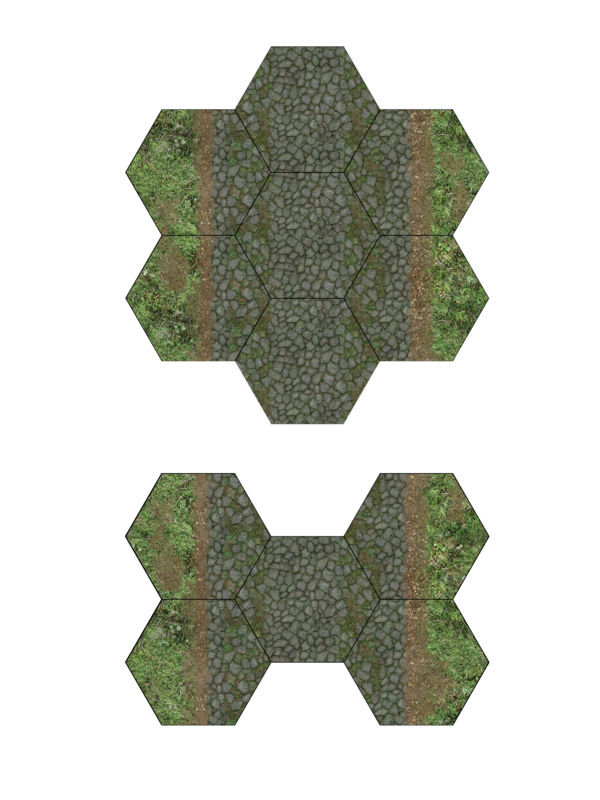
7″ Vertical Hex tile made in Campaign Cartographer 3
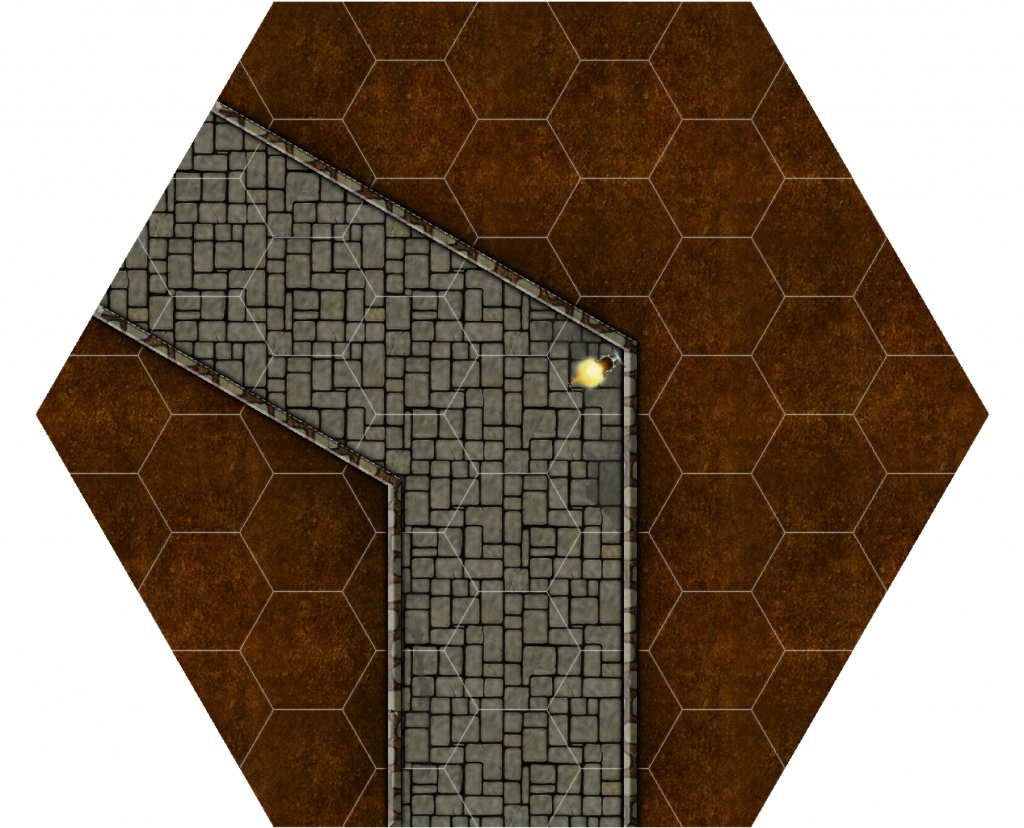
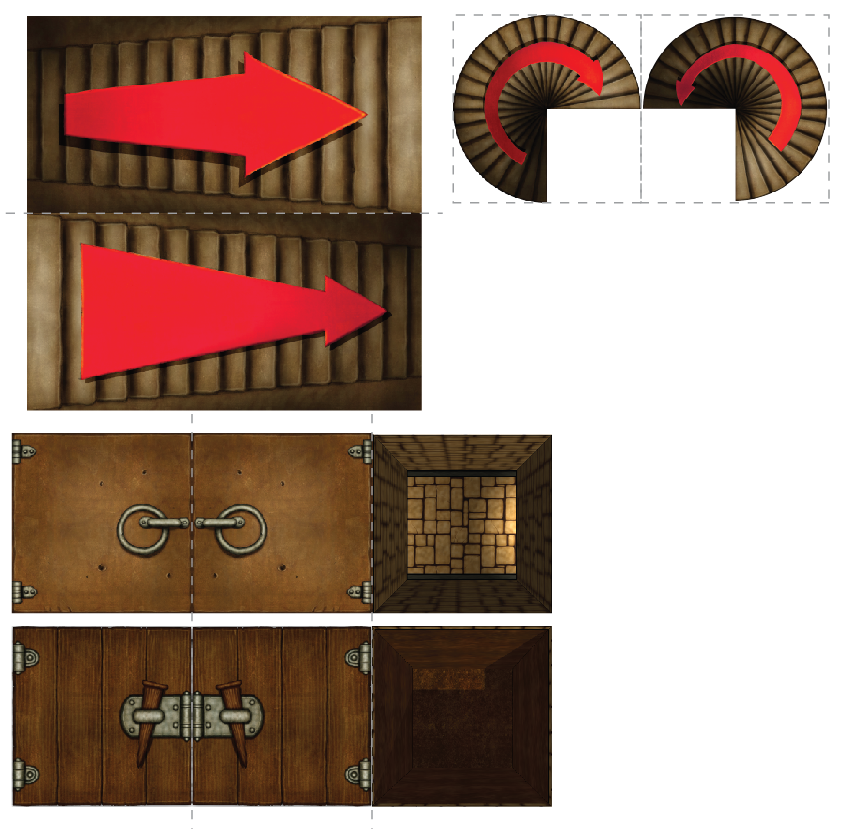
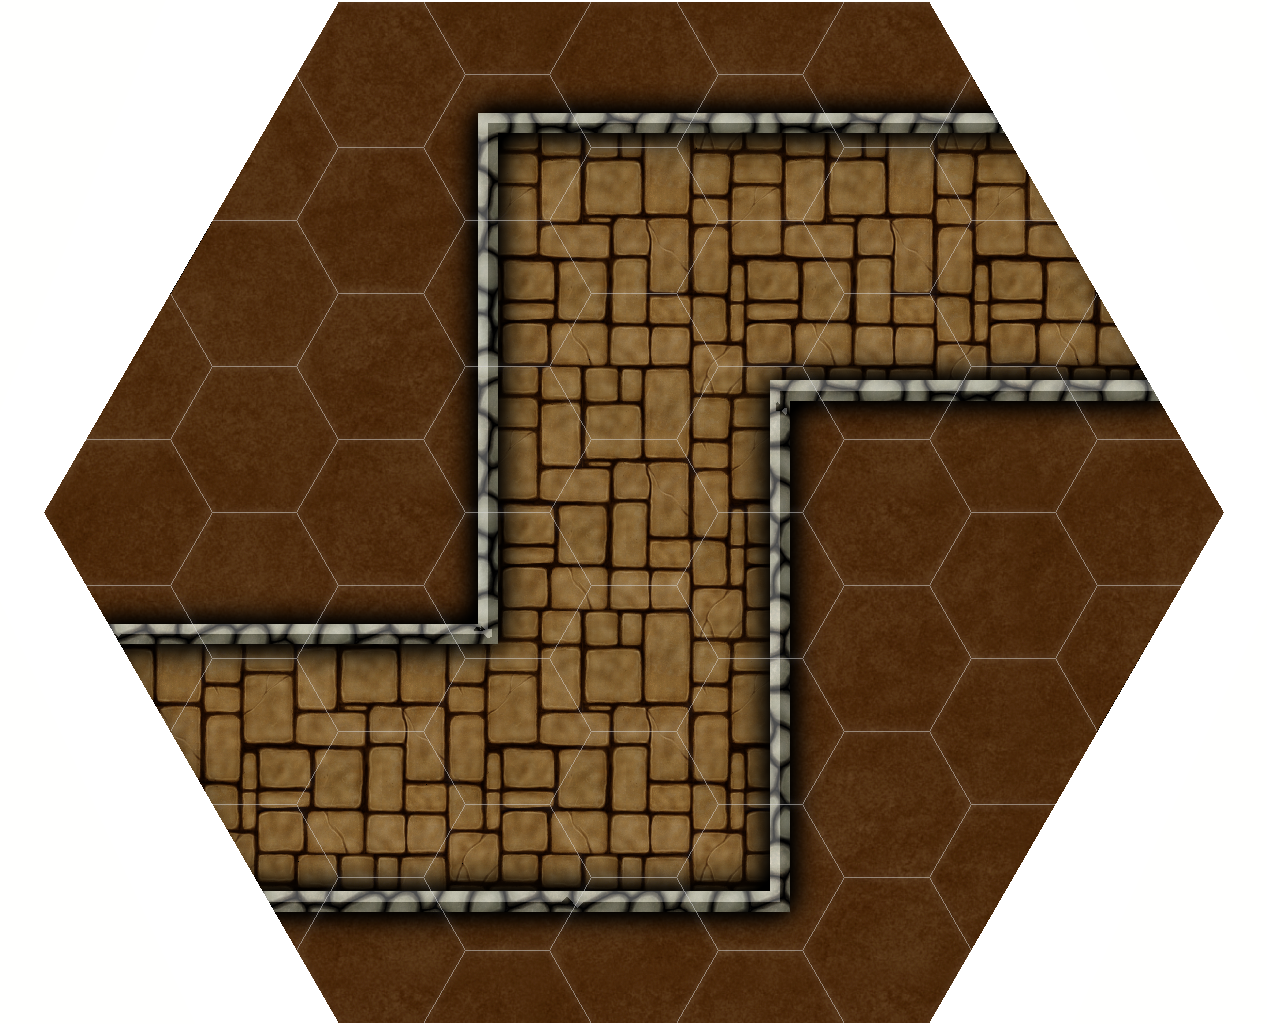
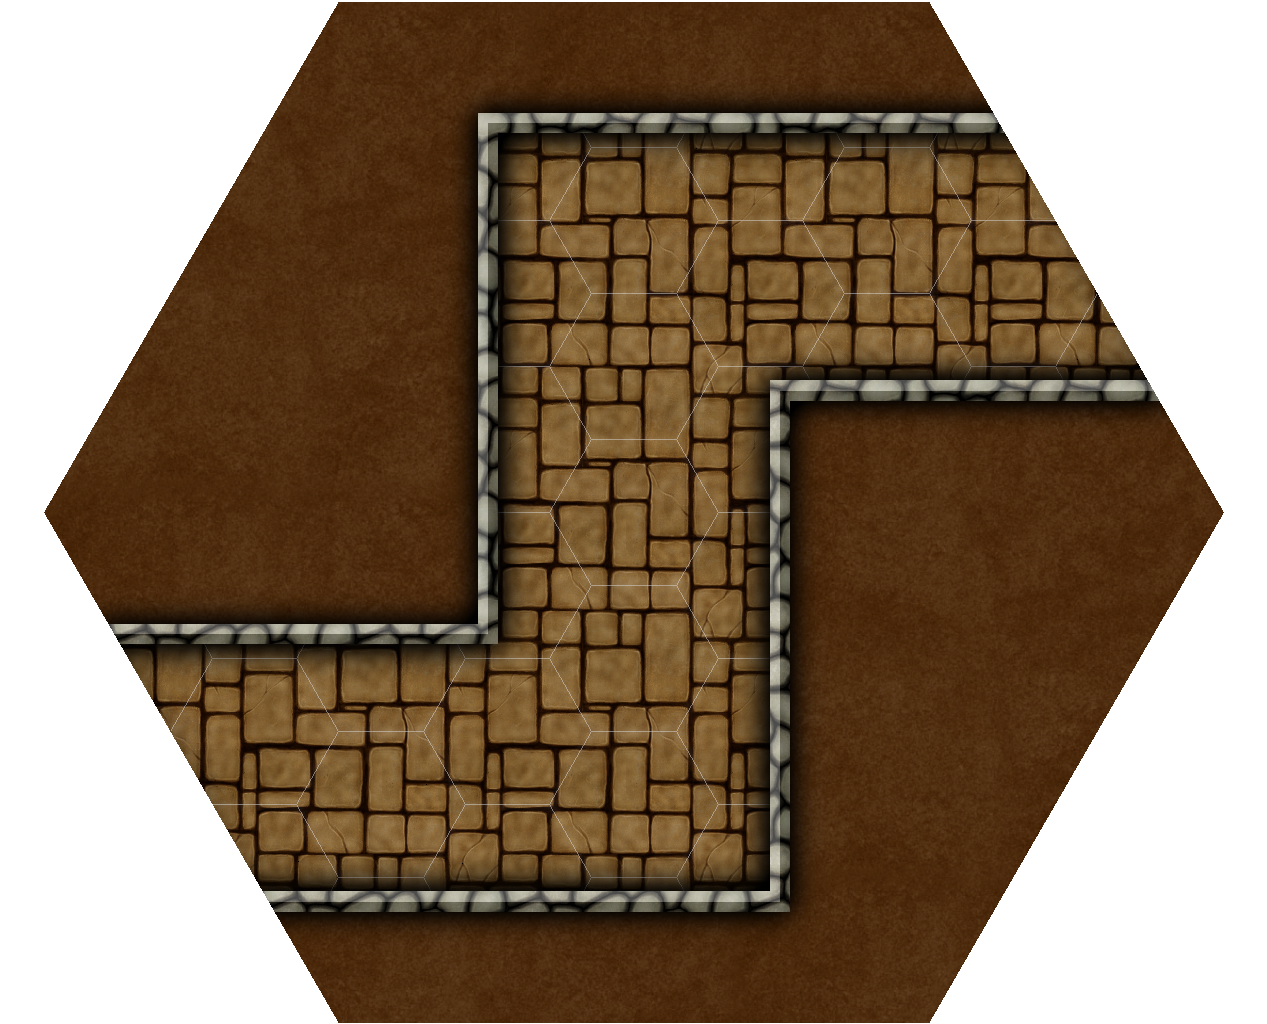
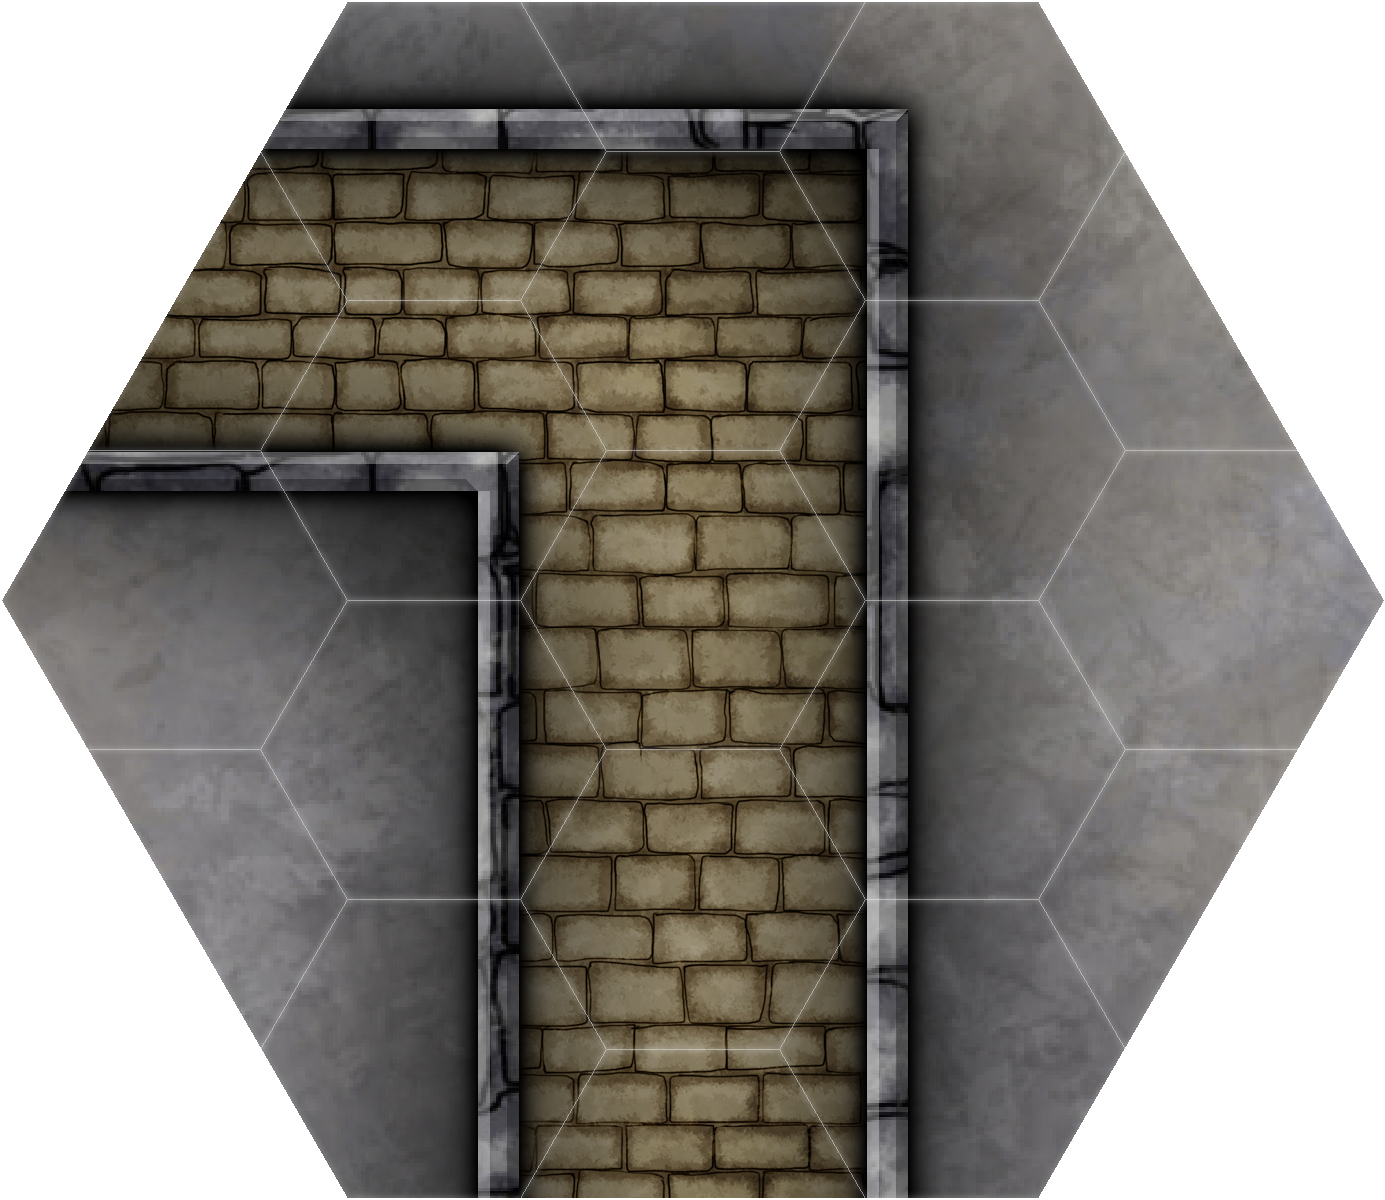
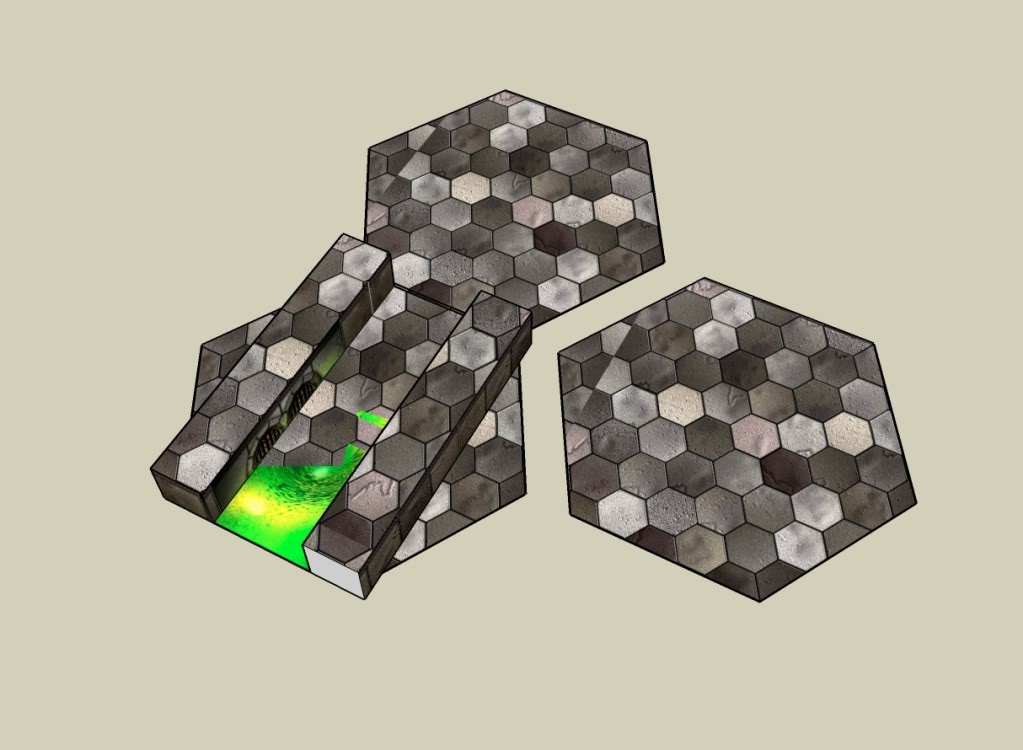
120° Corridor
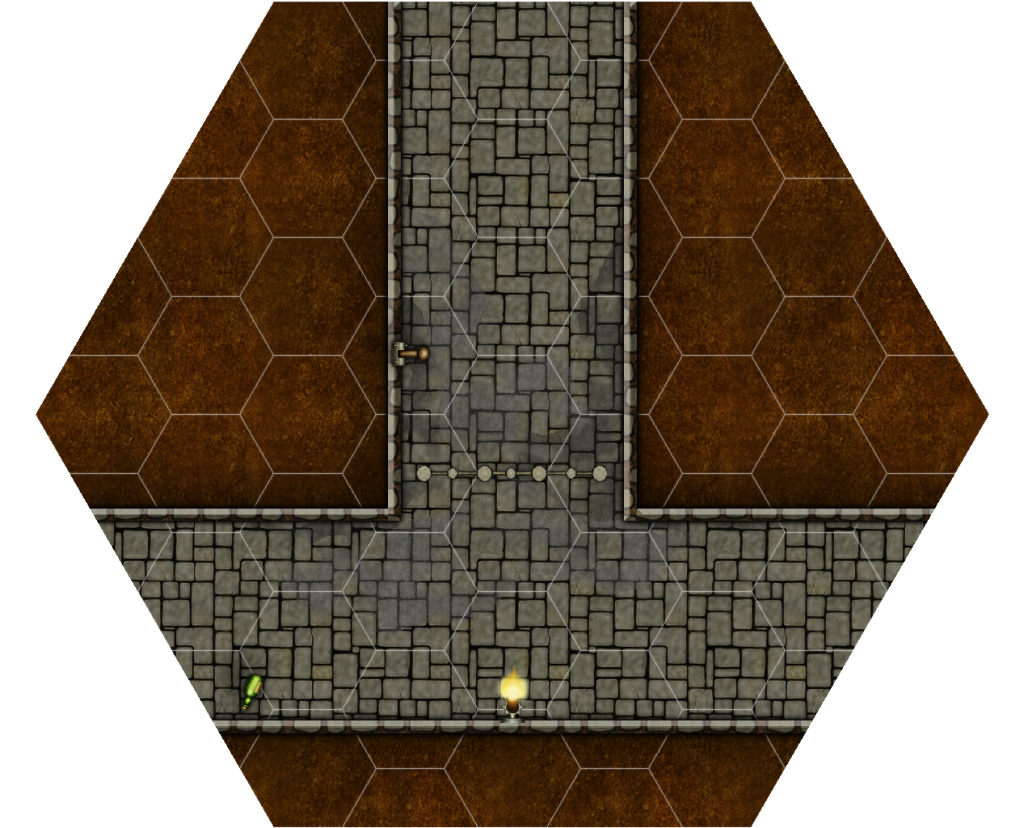
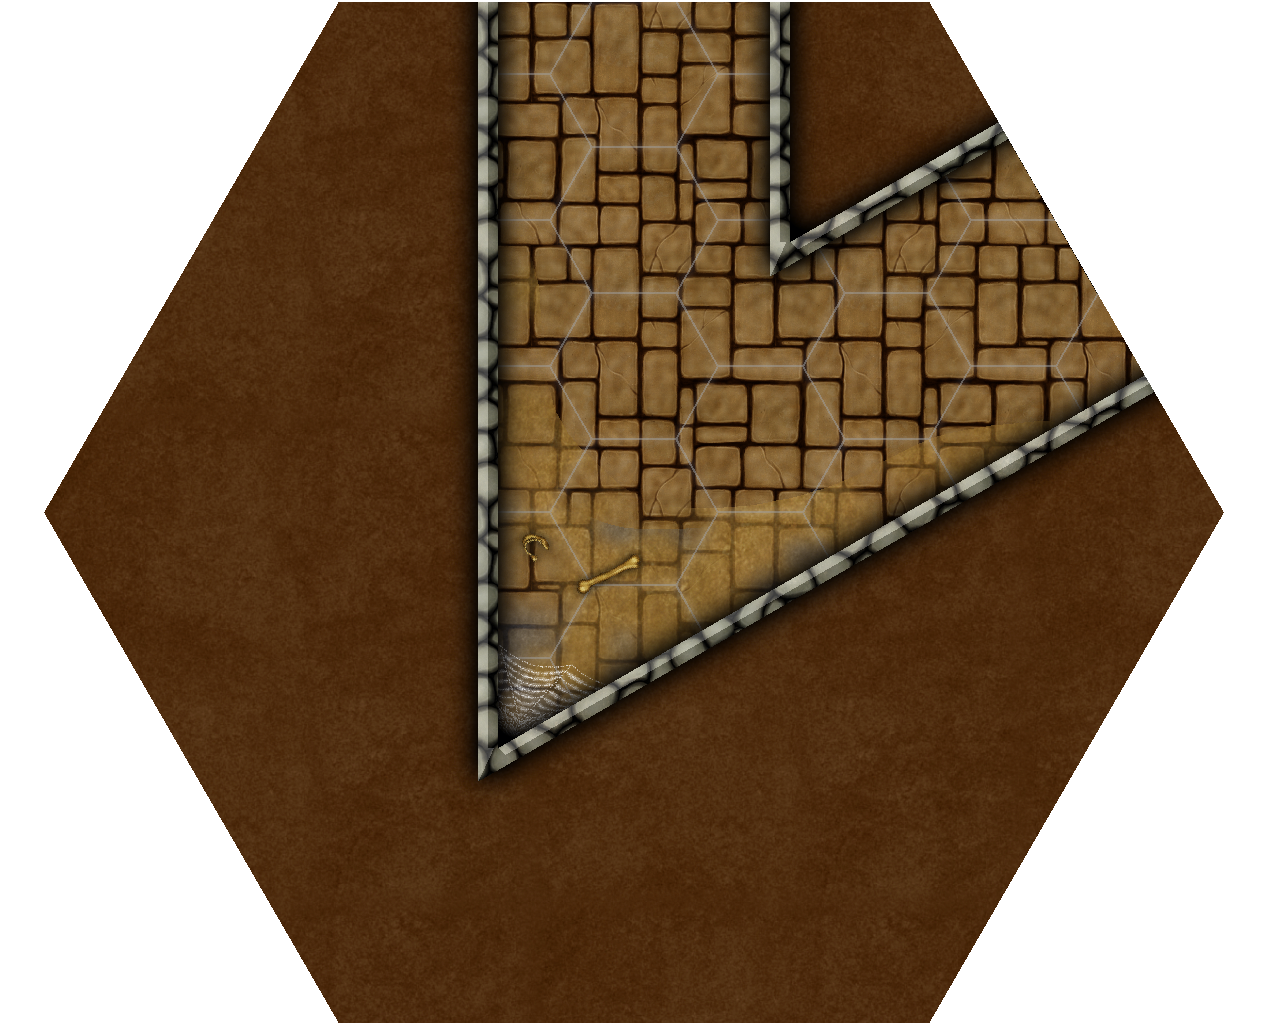
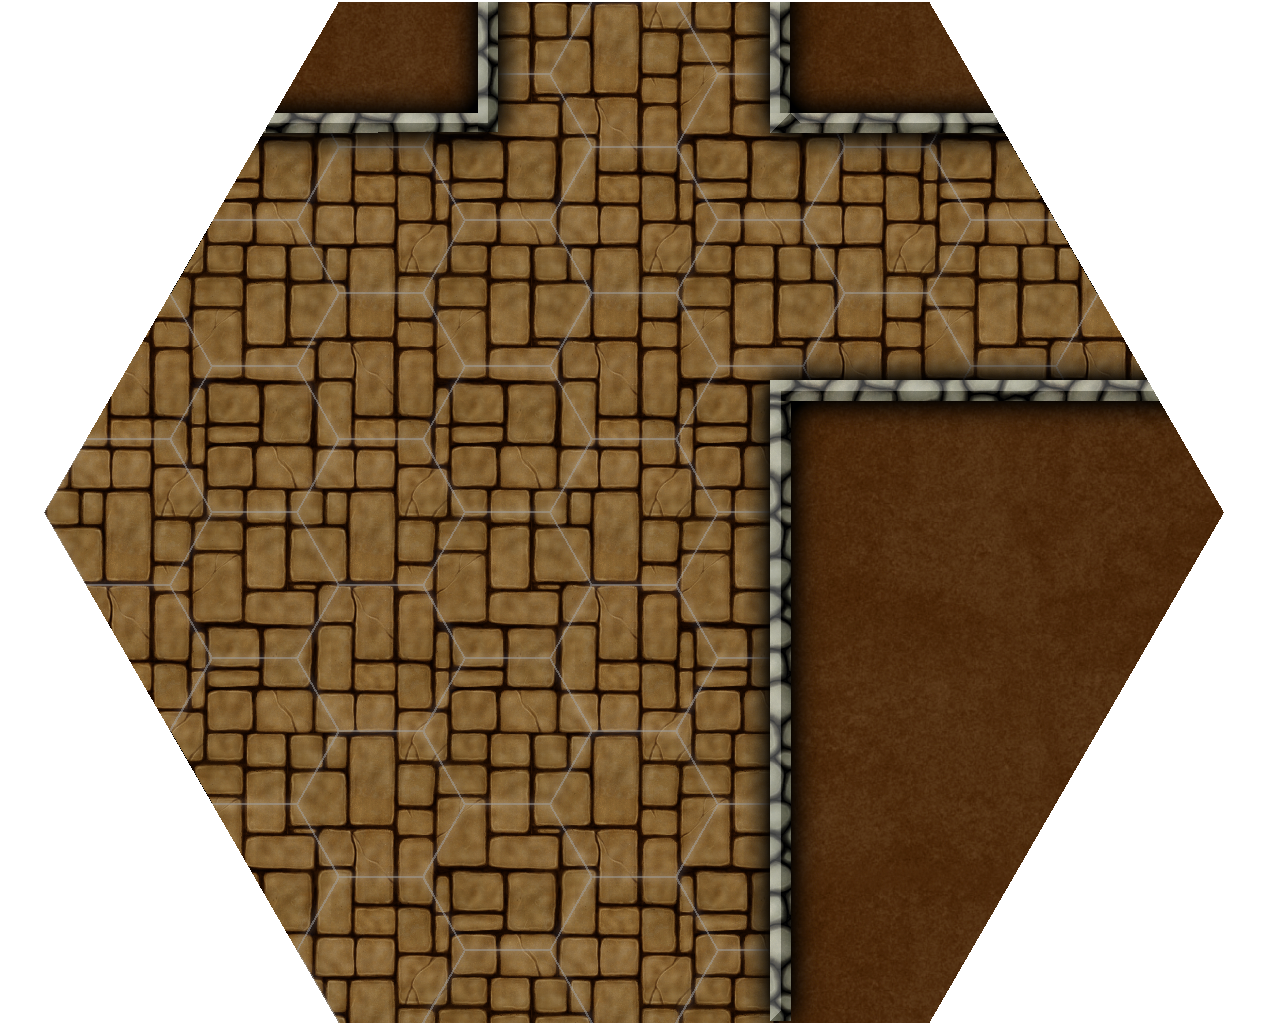
The Horizontal corridor is not as wide as the Vertical corridor
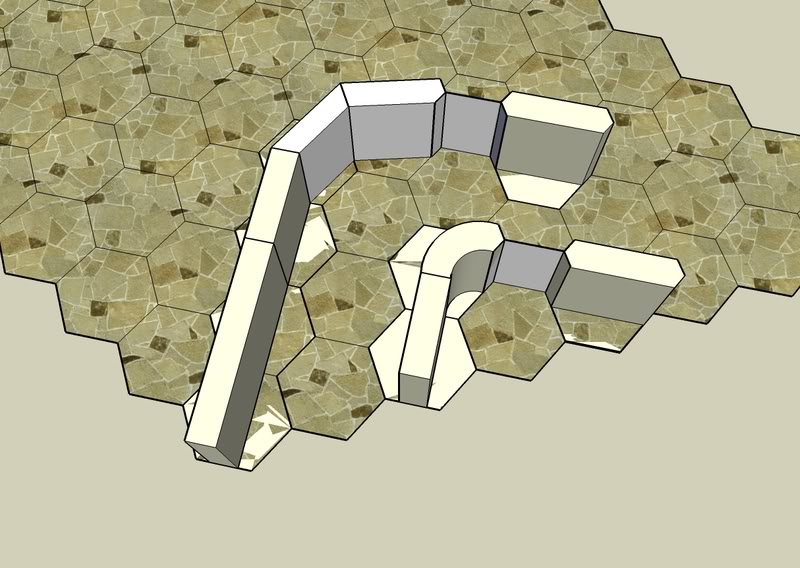
Now I refused to be confined to all my corridors turning at 60° and 120°. However because of the 120° angle of the outer edges it means that the corridors meet at a slant. If the walls are all the same, then the walls cutting across the angle wouldn’t match up with the walls that hit it flat on. So this means all horizontal, or cross cutting would be a better term, corridors have to be slightly smaller. I’m crap at maths, I’m a visual guy so I kept scaling until it looked right. It is roughly 13-15% difference in size depending on the width of the corridors.
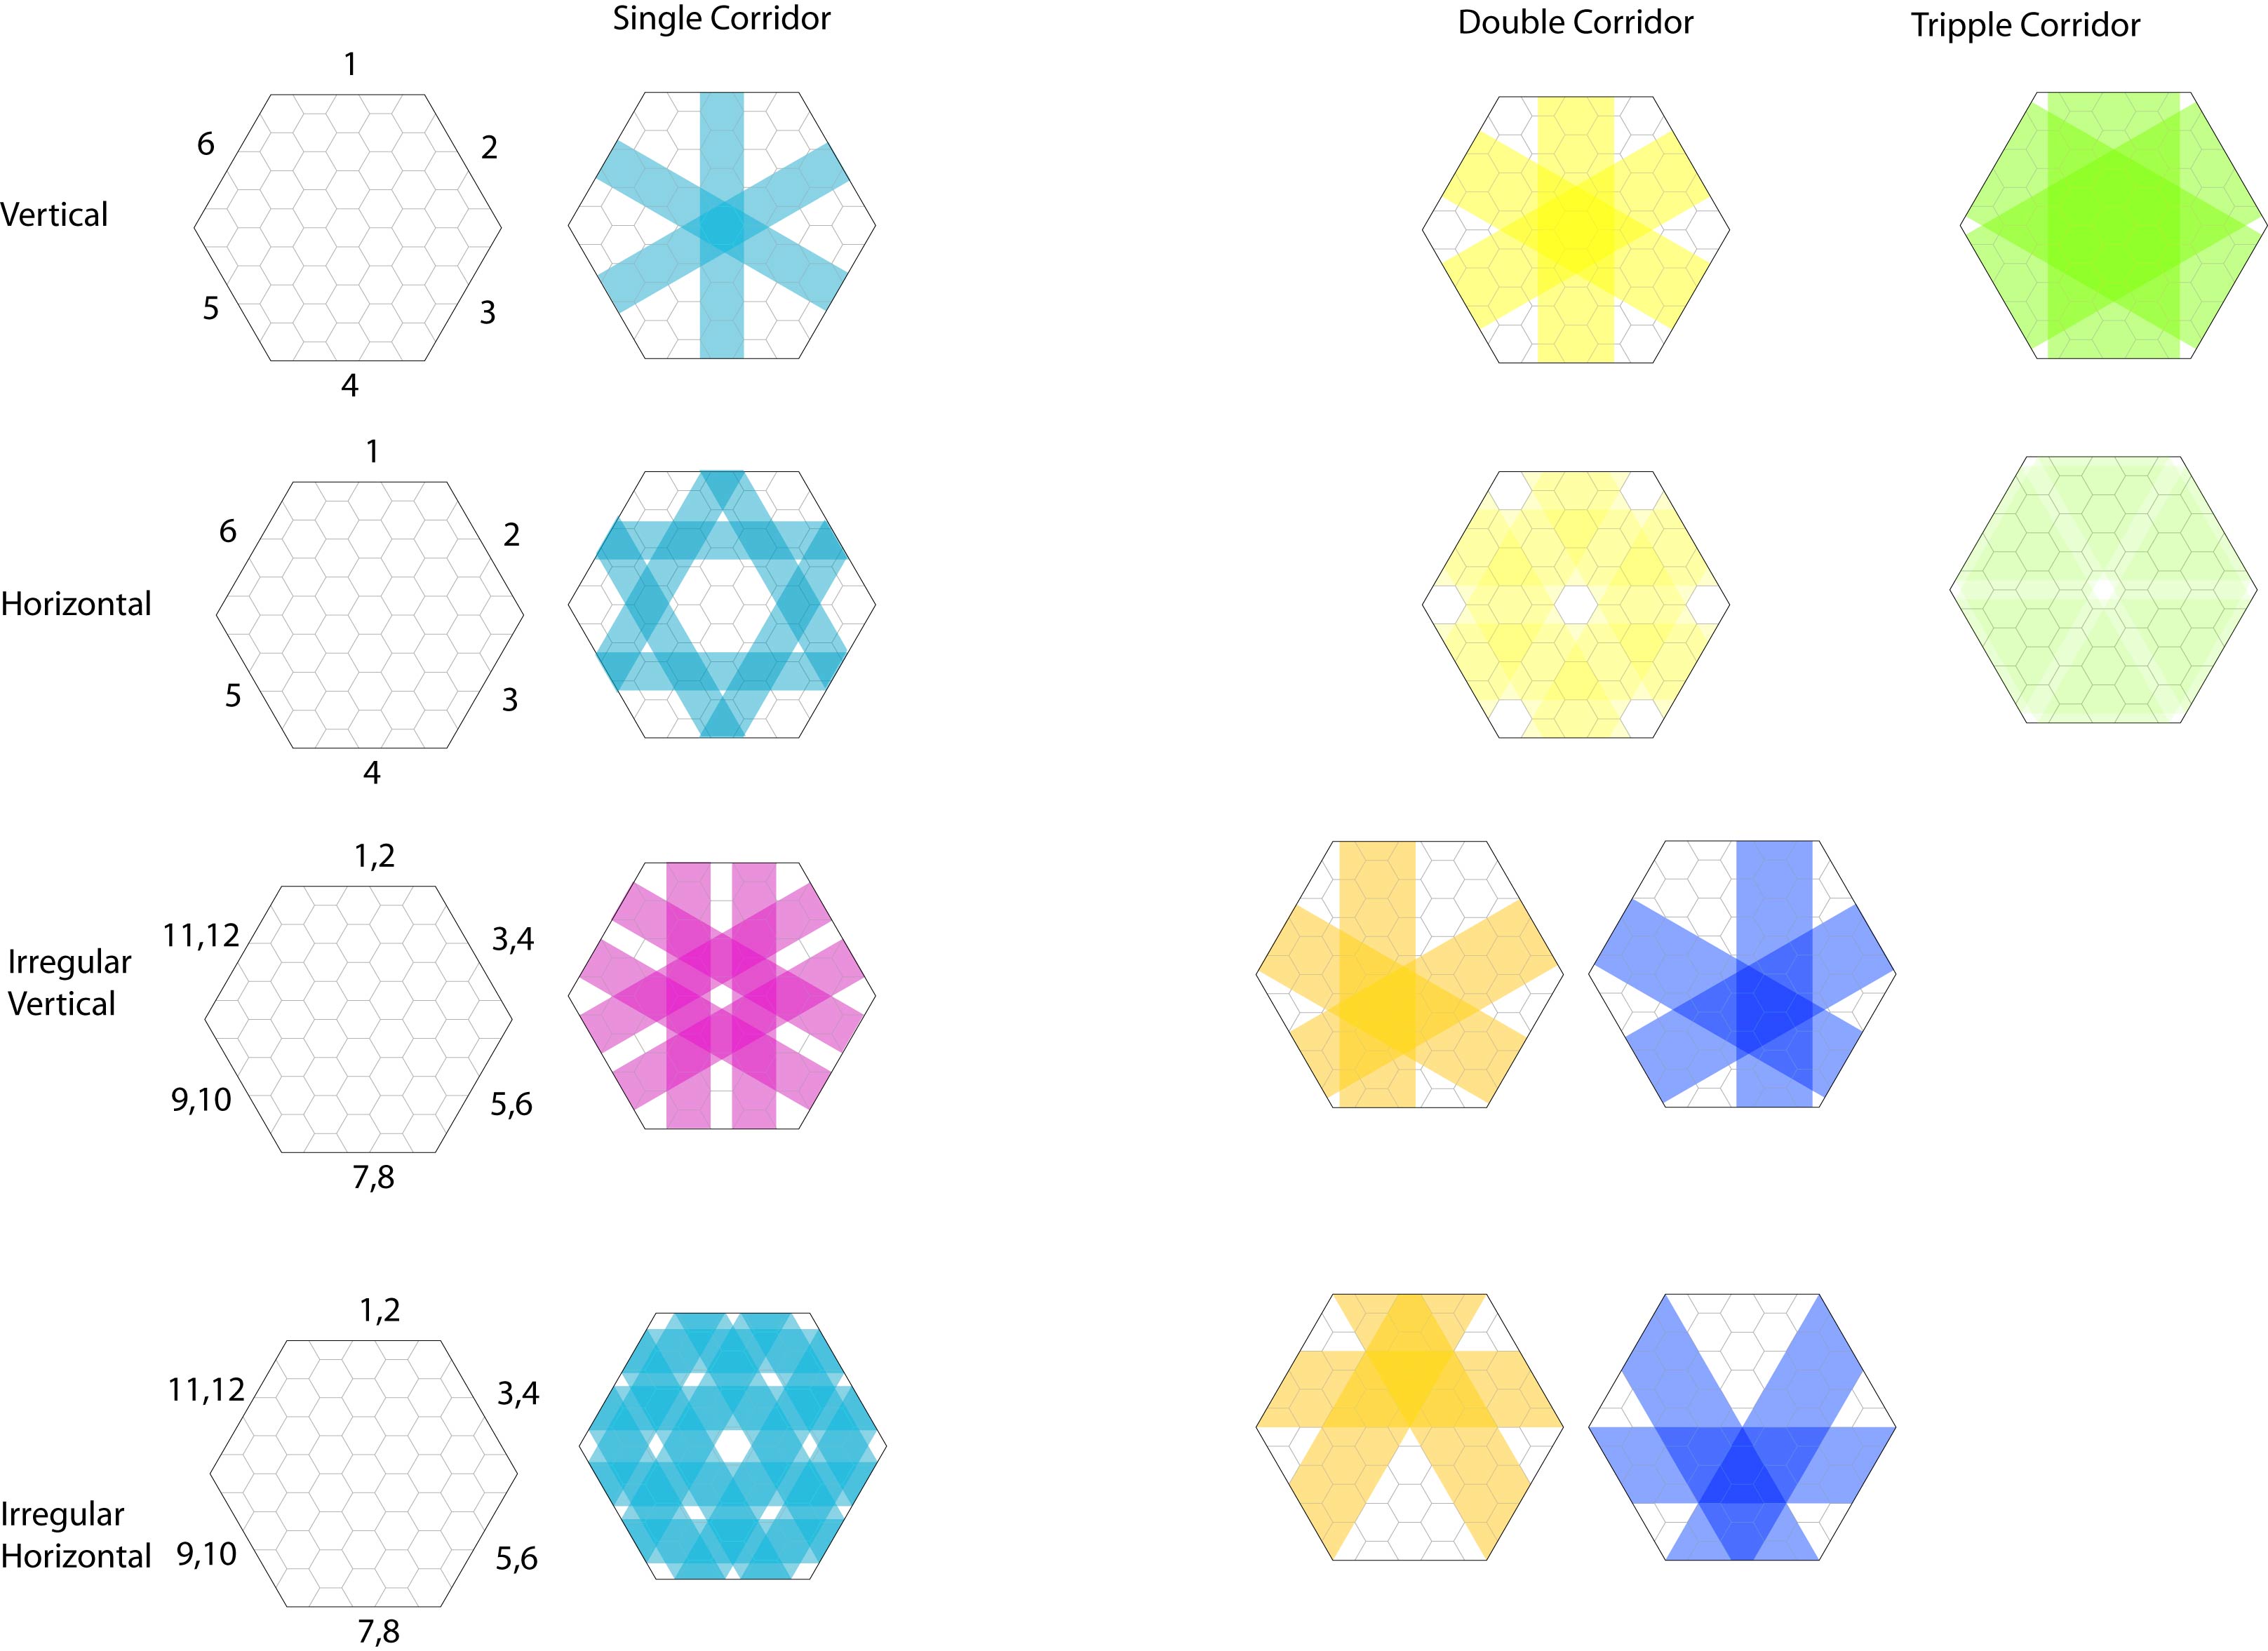
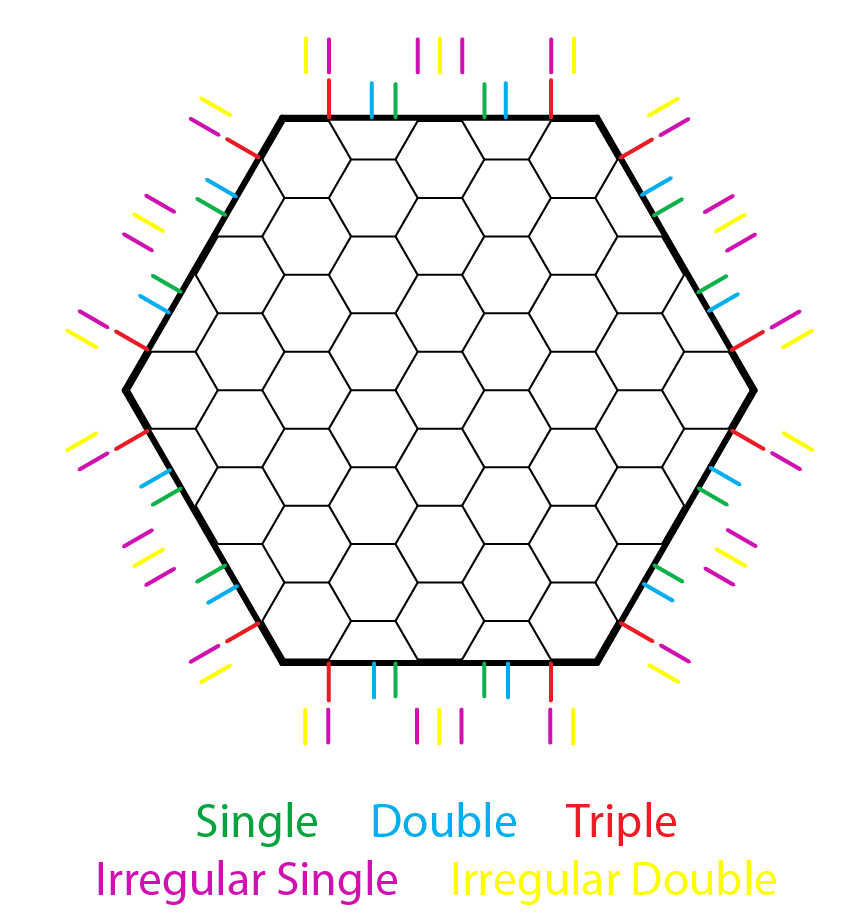
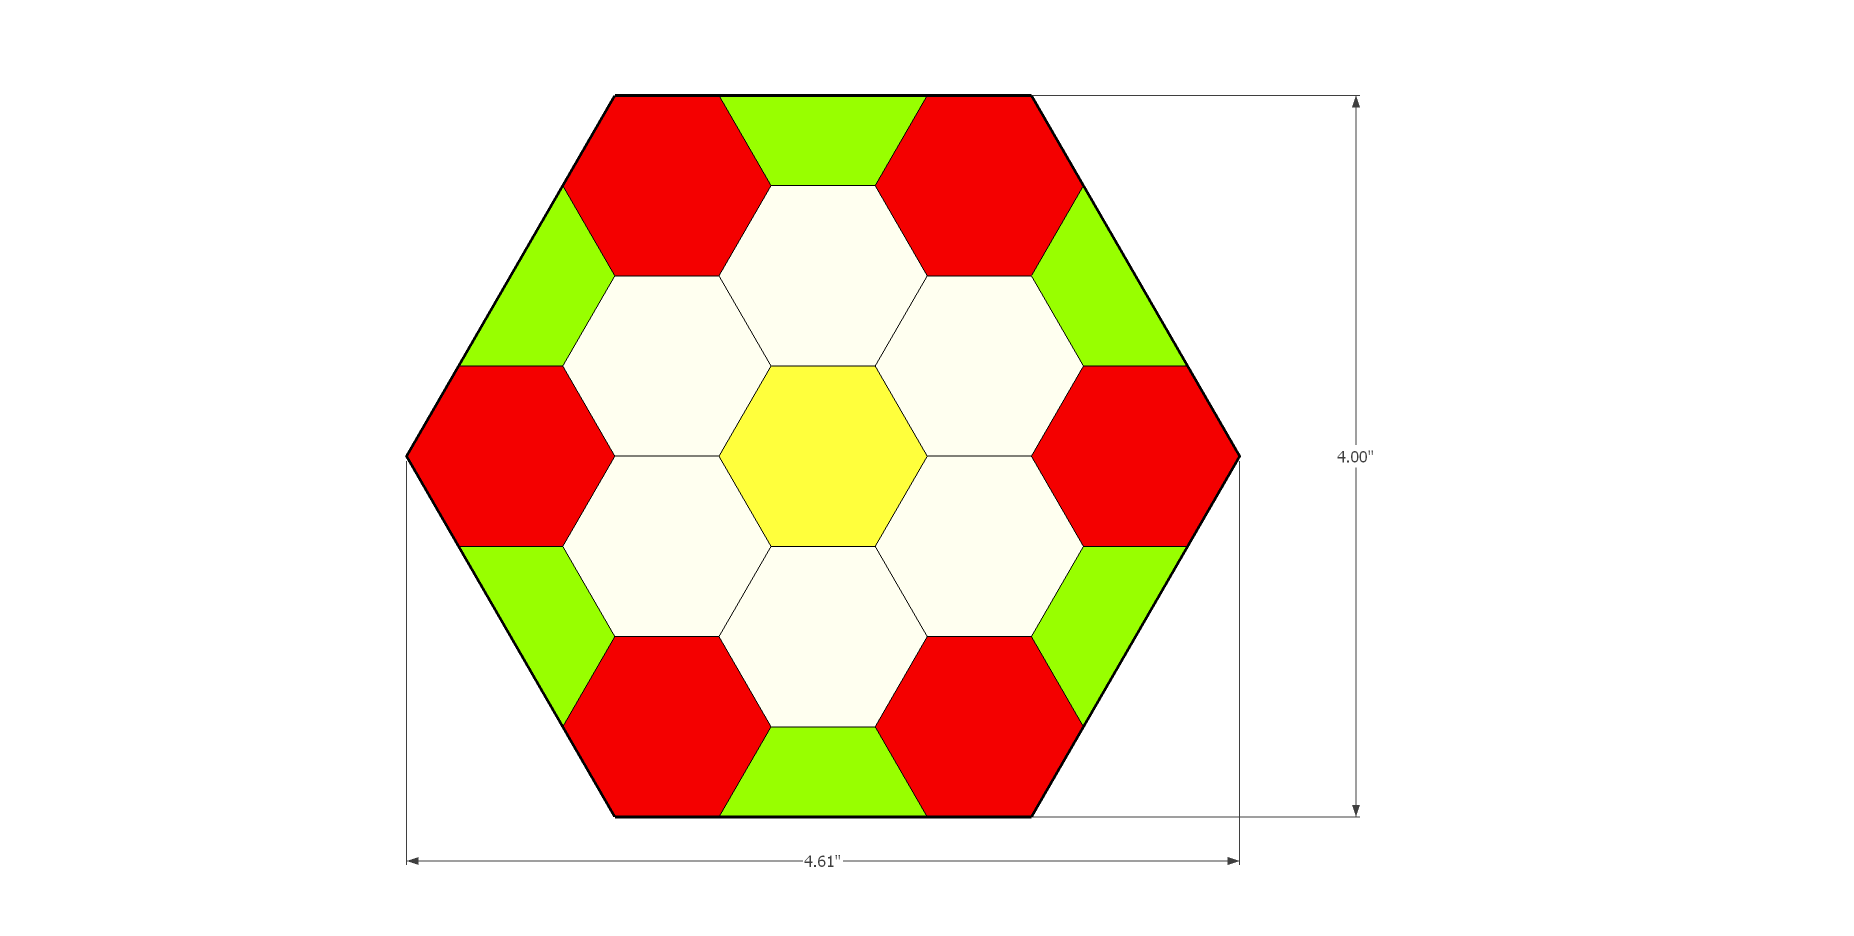
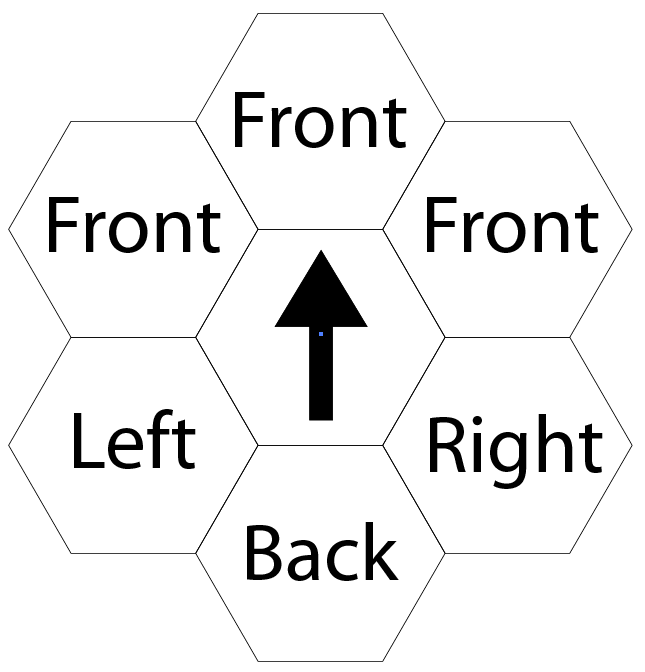
First off I should clarify that in GURPS each hex is 3 feet. Which is about the area that a normal human would occupy. So with the seven inch tiles it allowed me to have 3′, 6′, and 9′ corridors and with the 7 inch tile I could off an array of options of how the corridors connect.
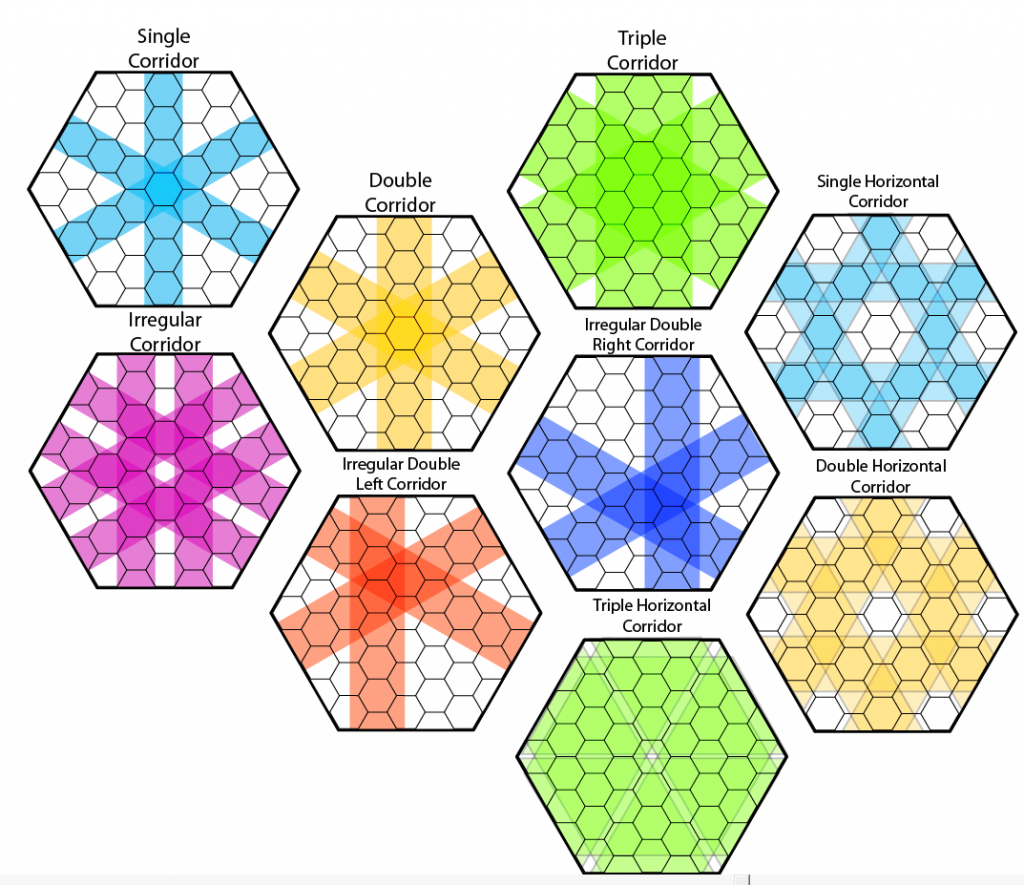
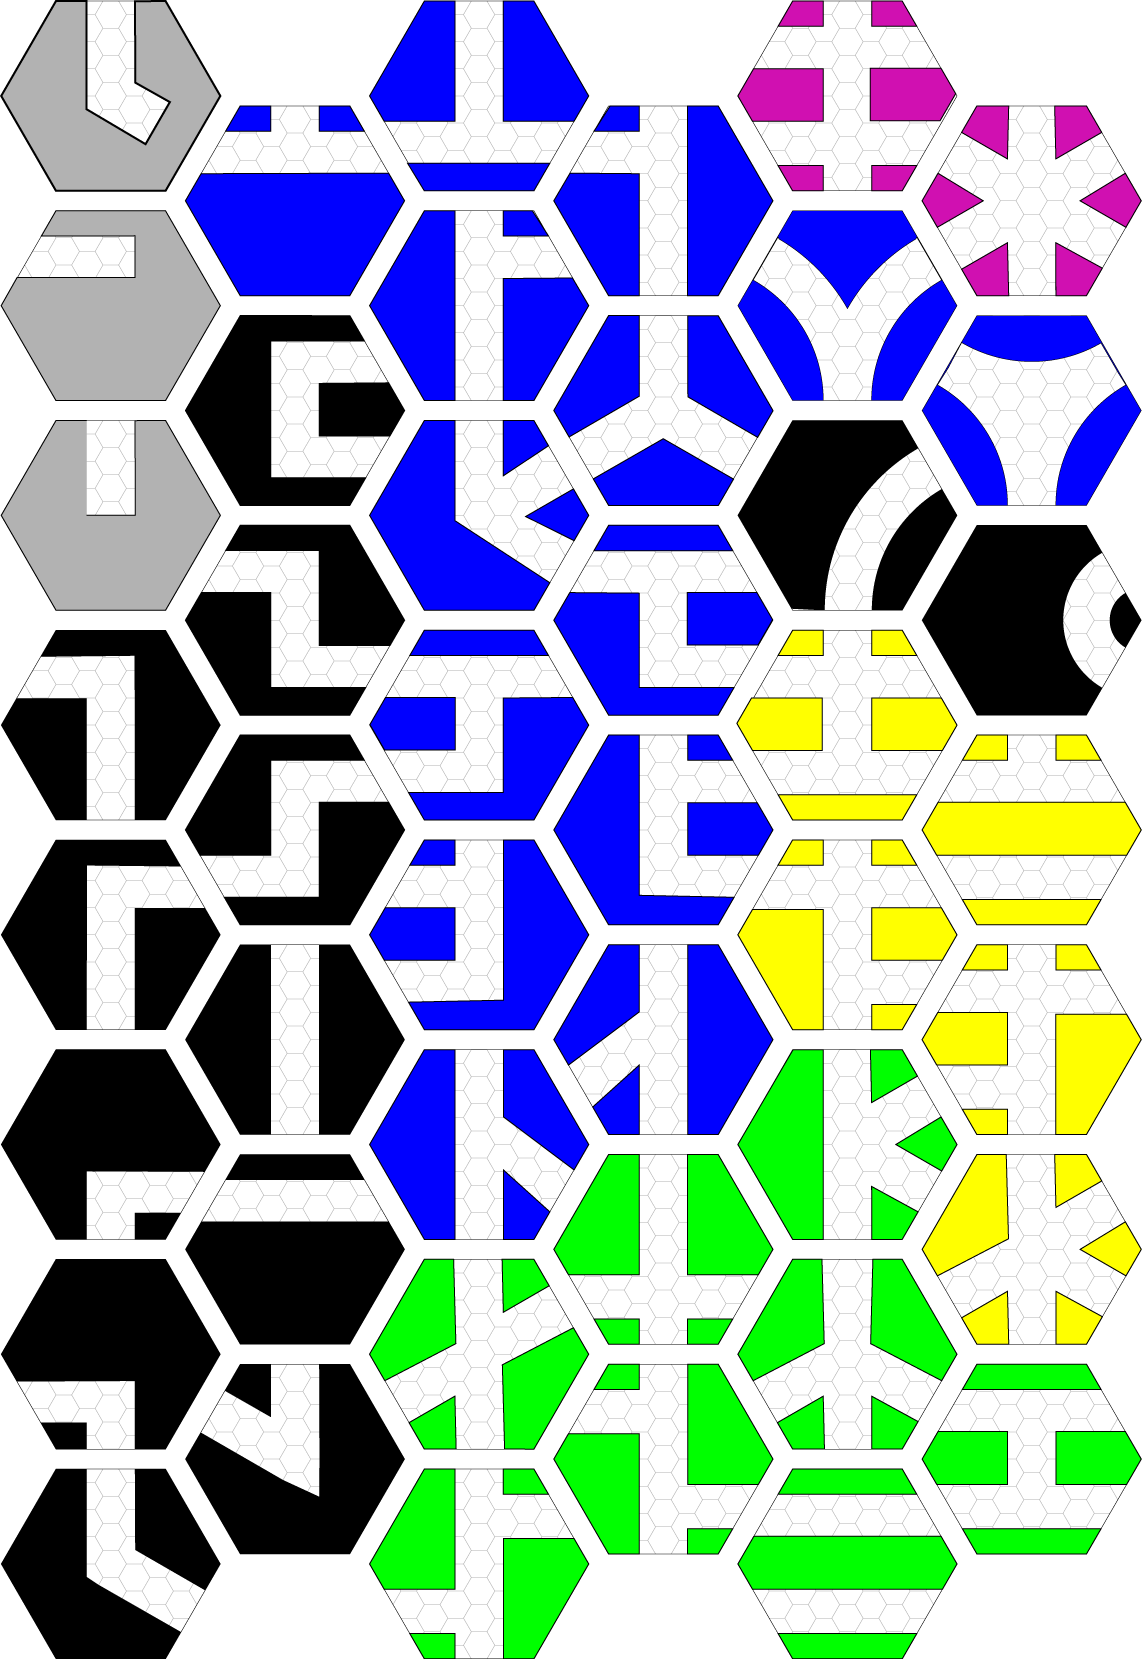
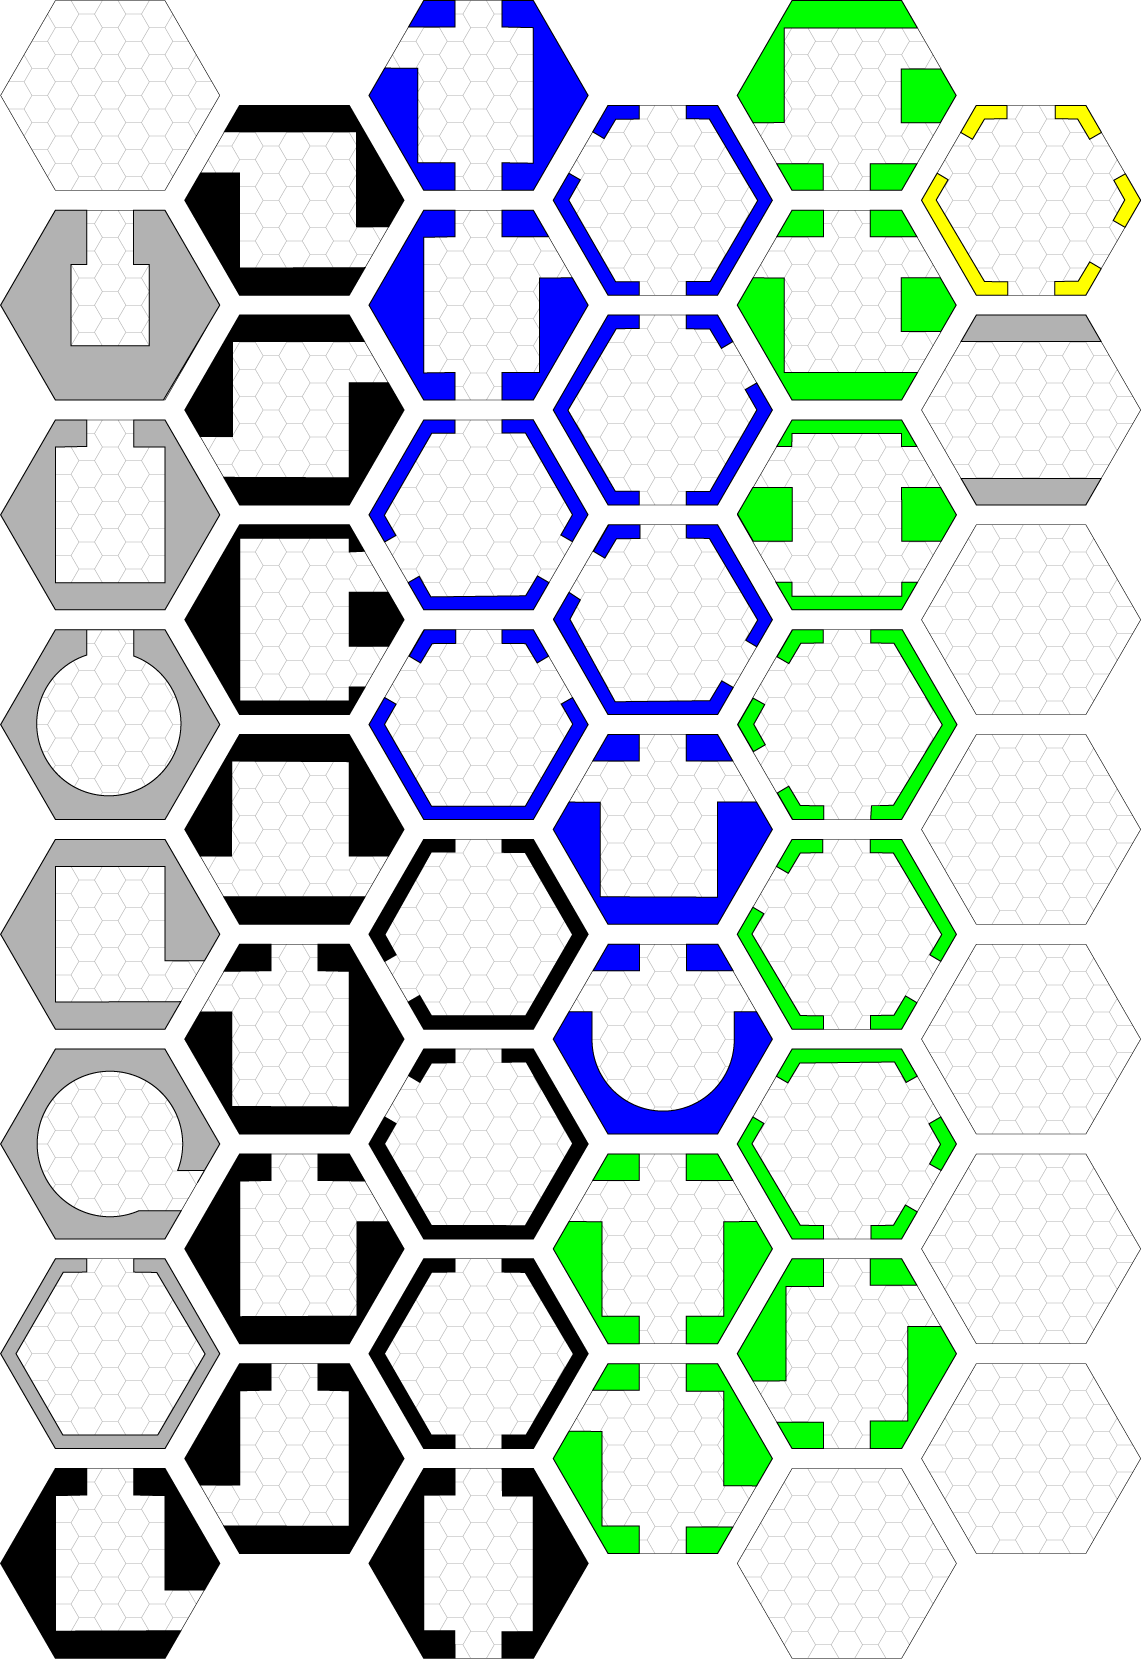
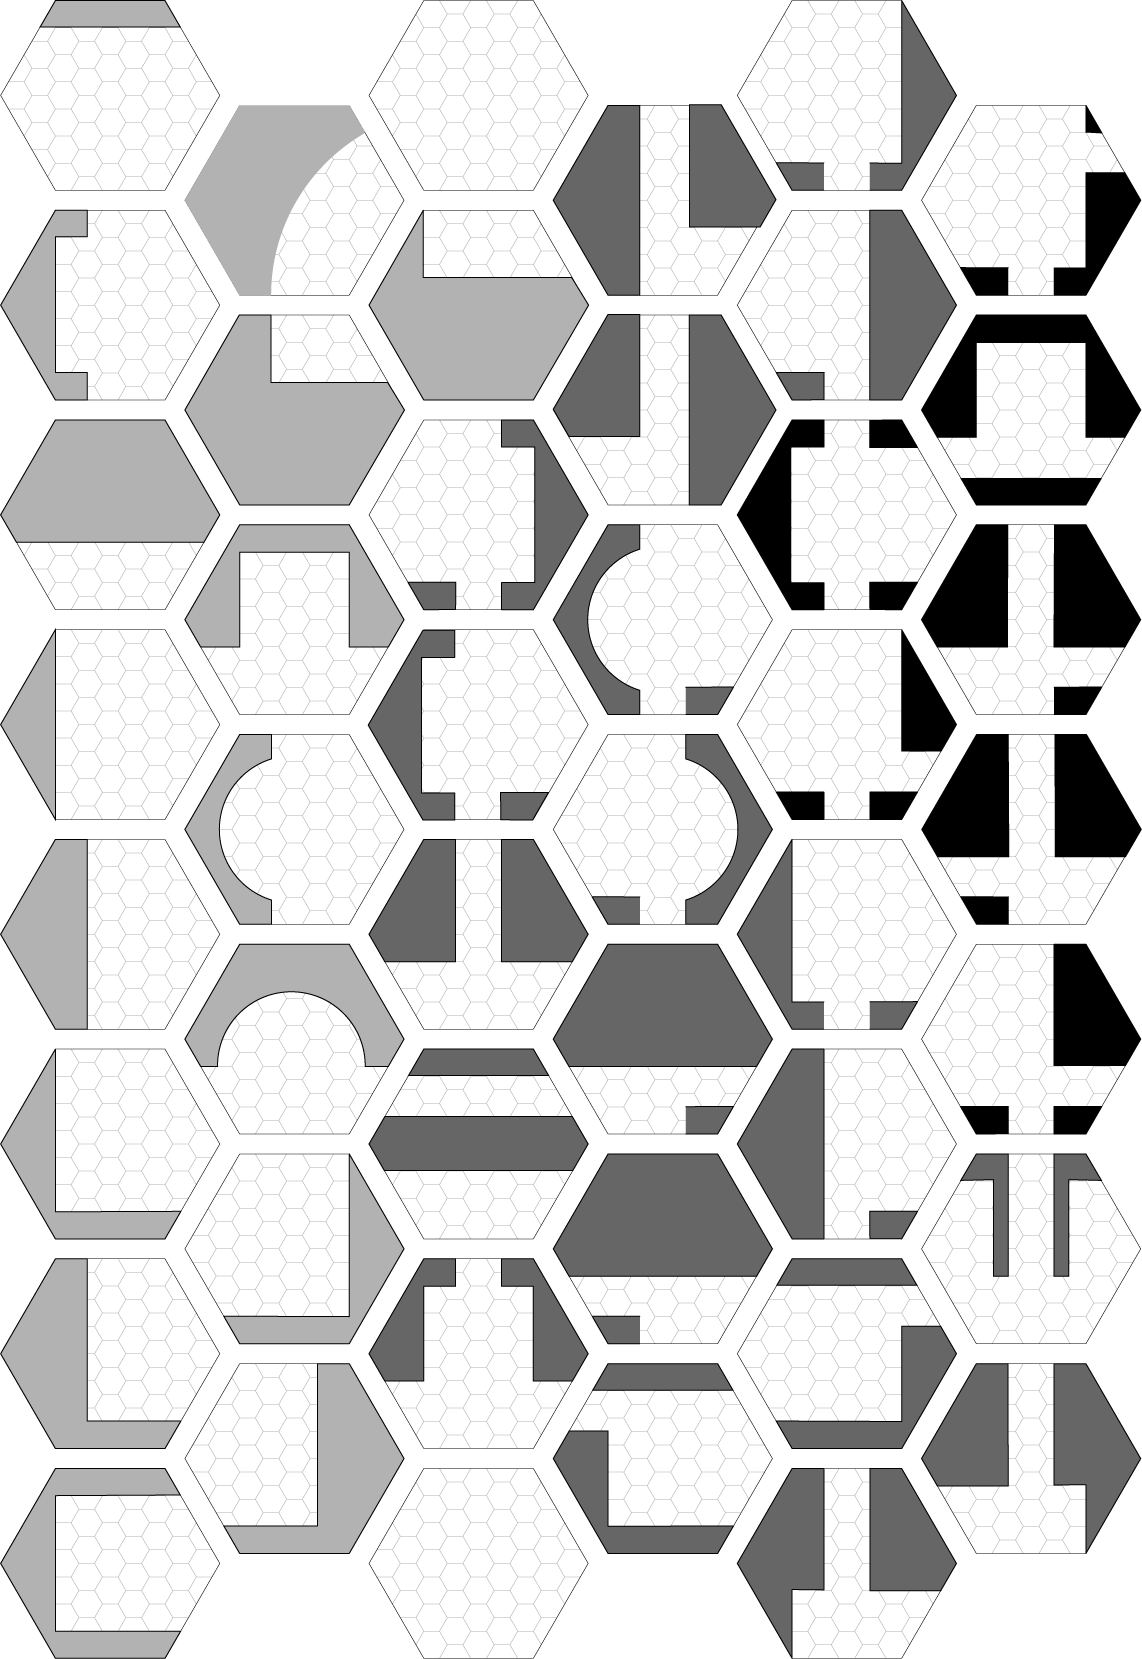
Corridor connecting guide for 7 inch tiles
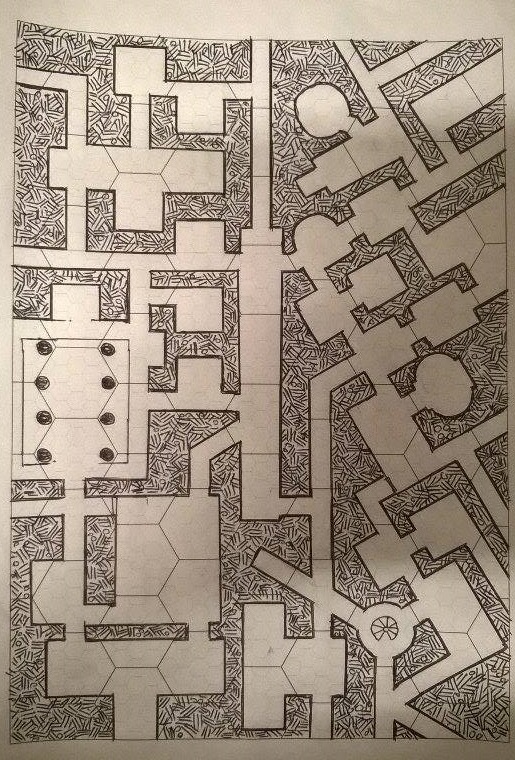
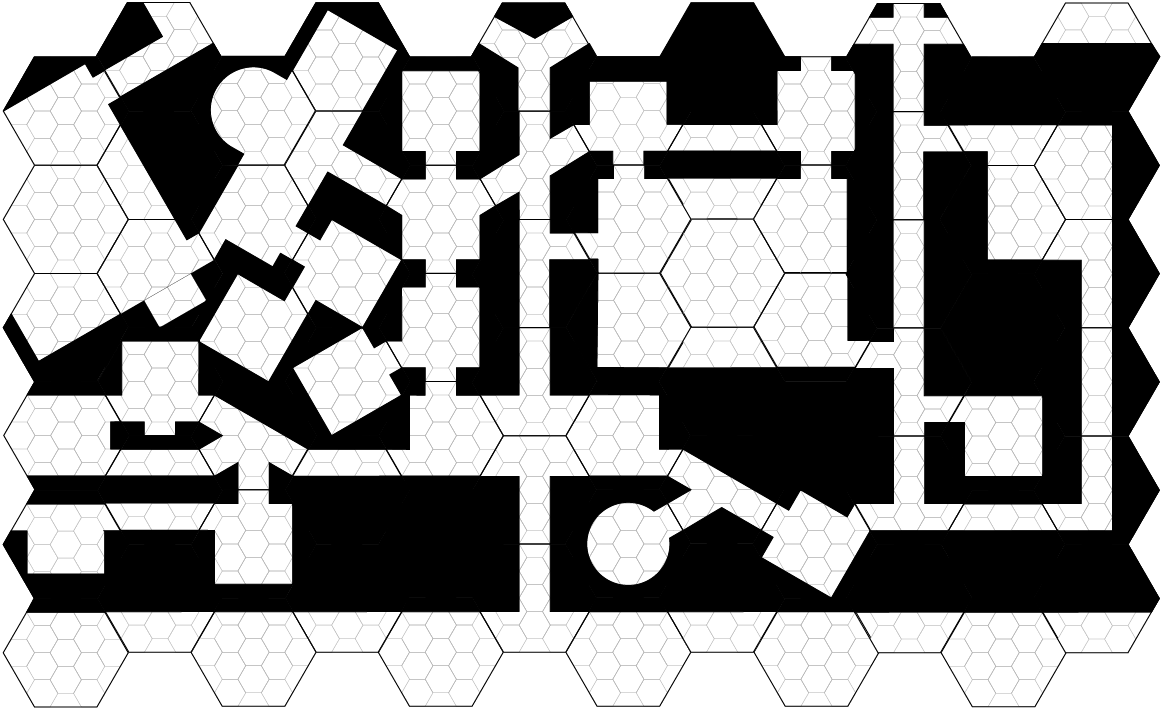
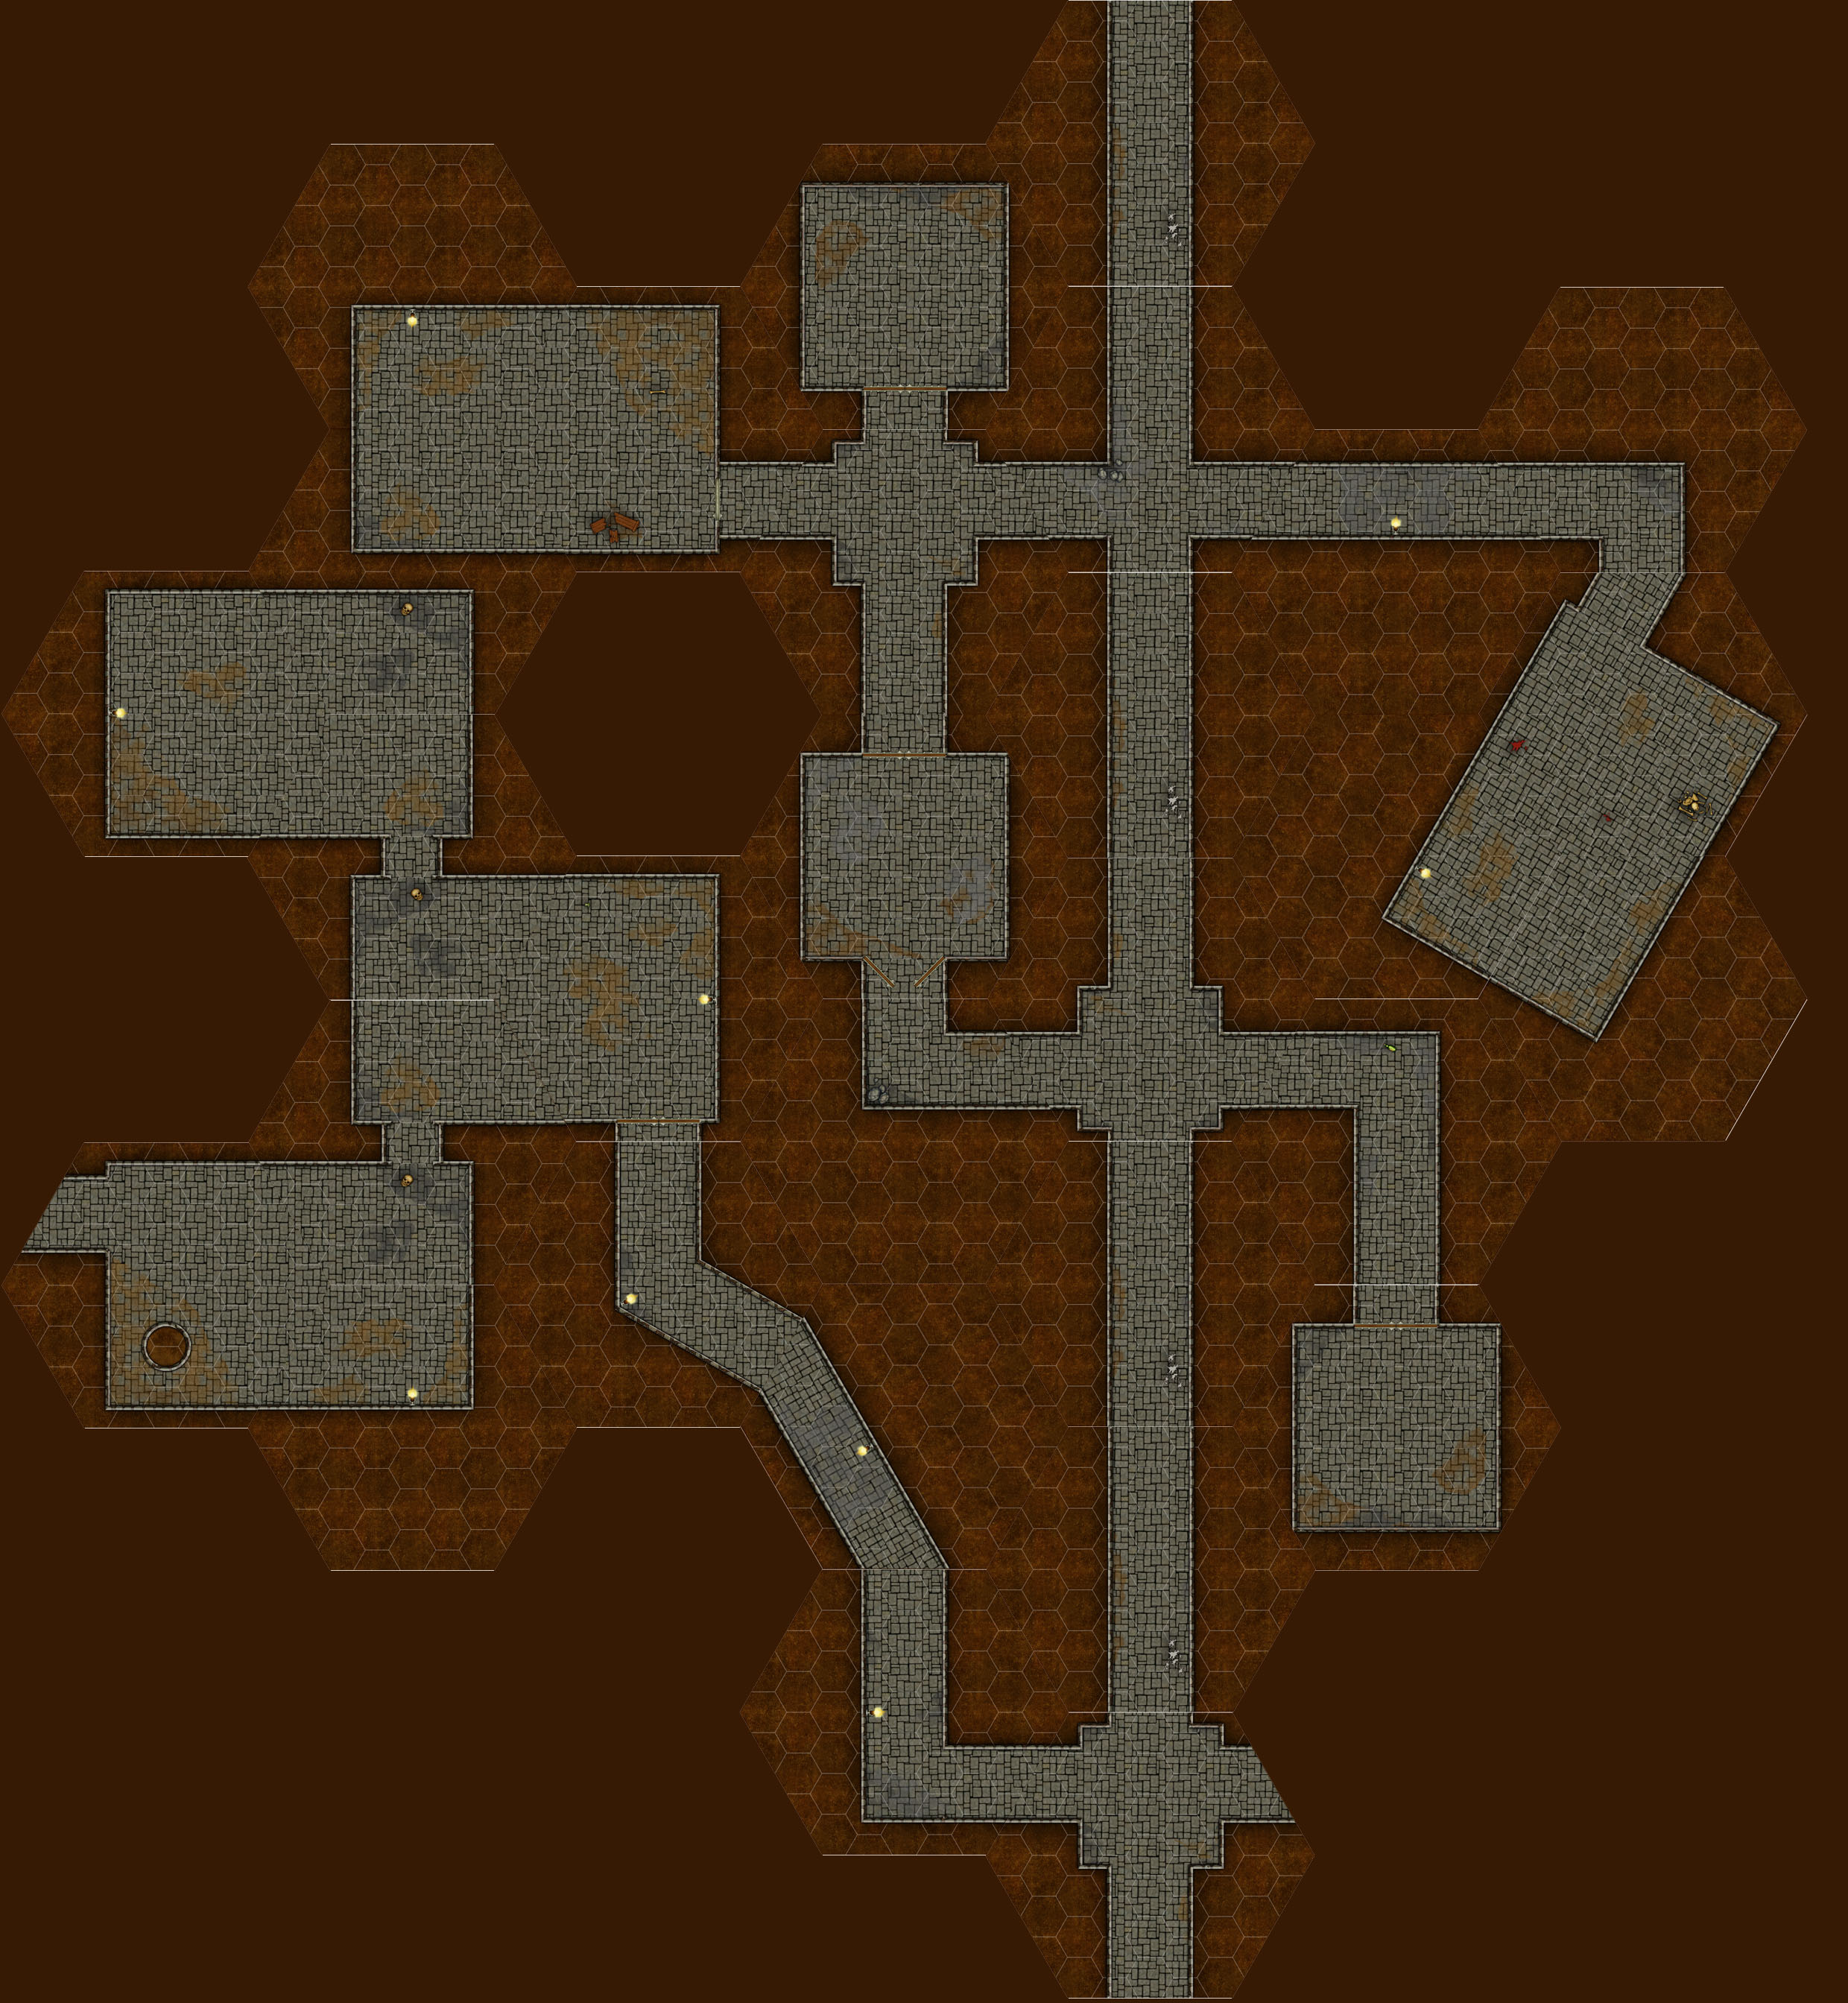
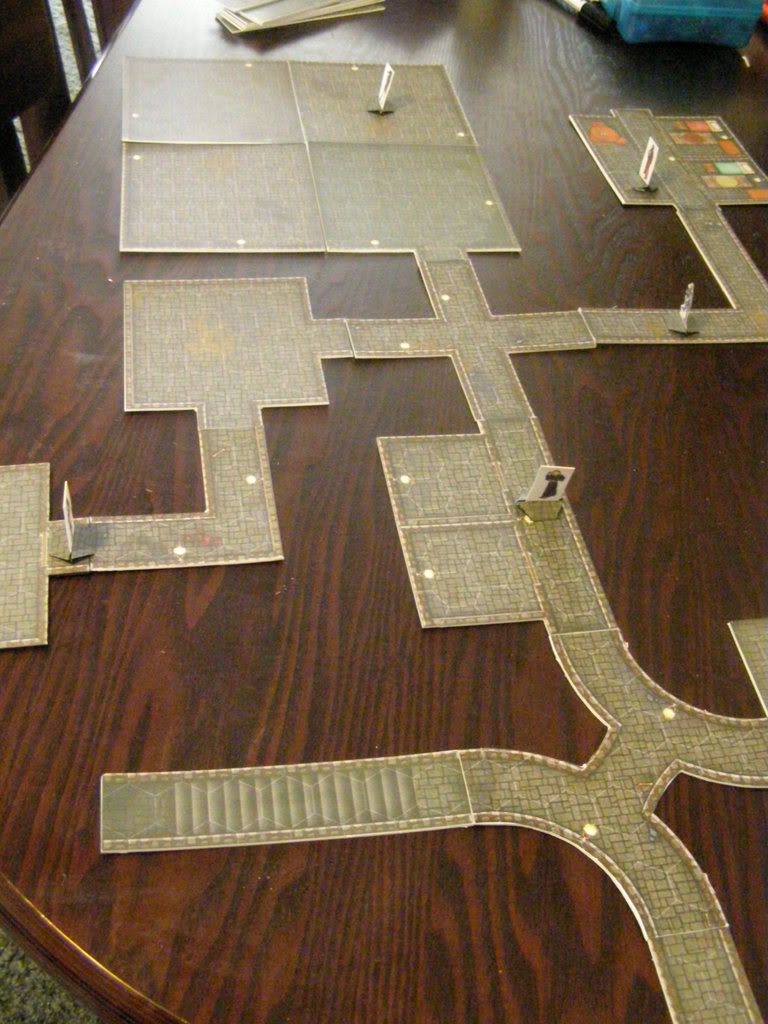
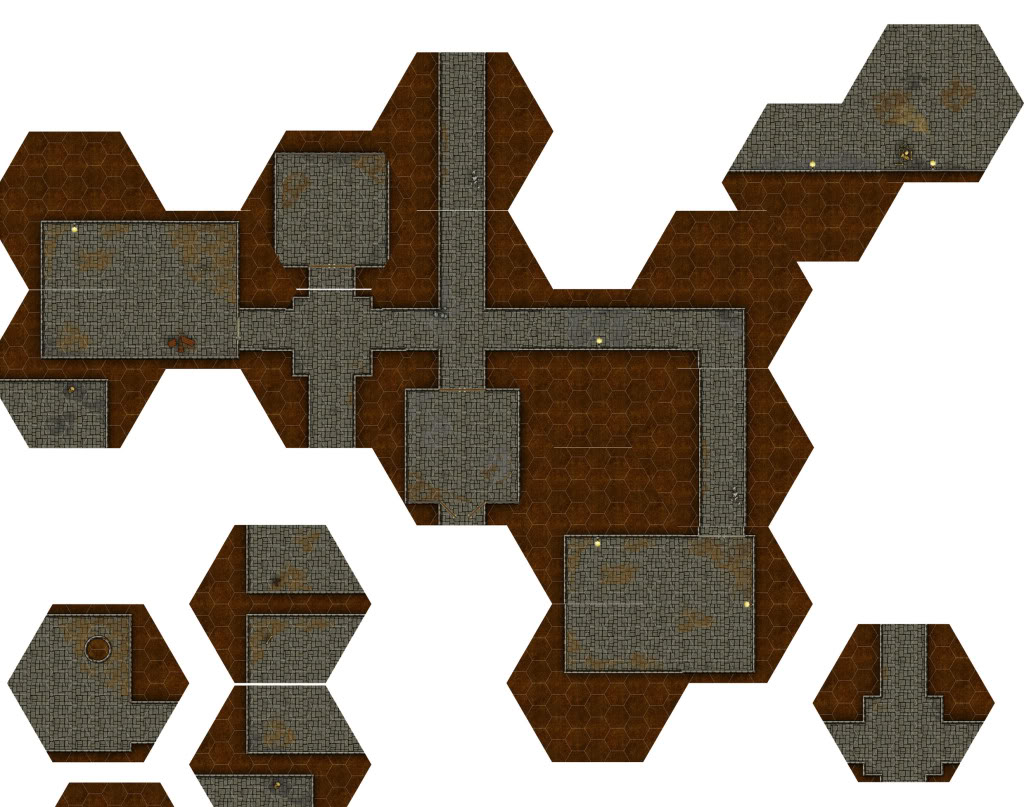
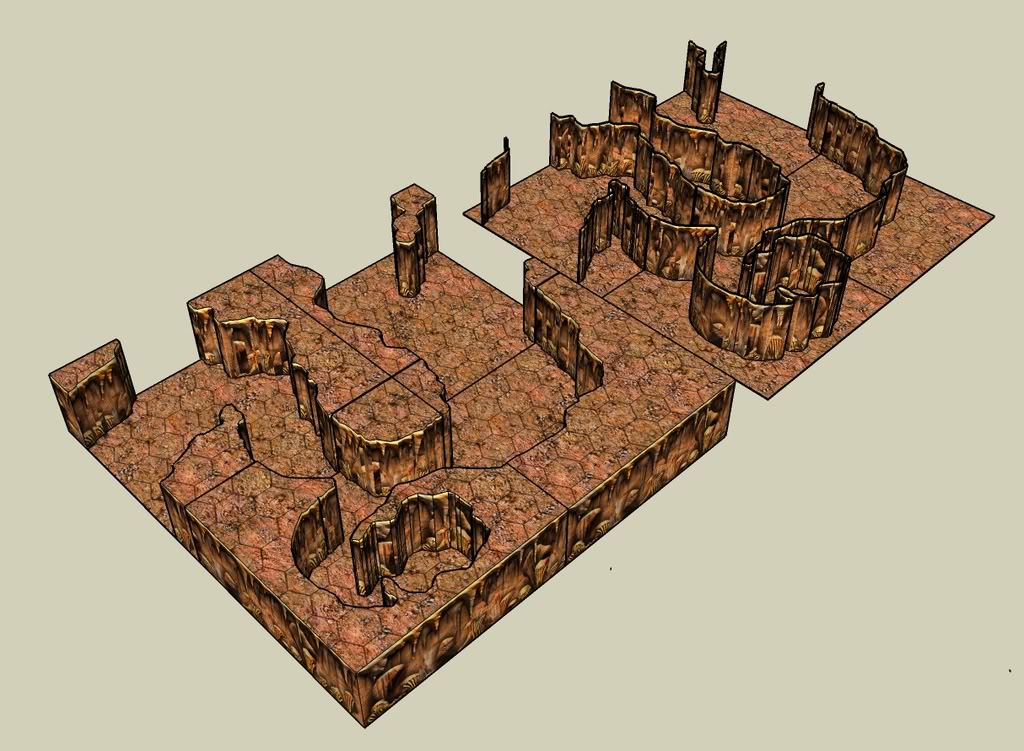
I also experimented on how to use a standard dungeon map and force it onto the 7 inch tiles. This takes away modularity but makes for some fun map tiles that only work for a specific map.
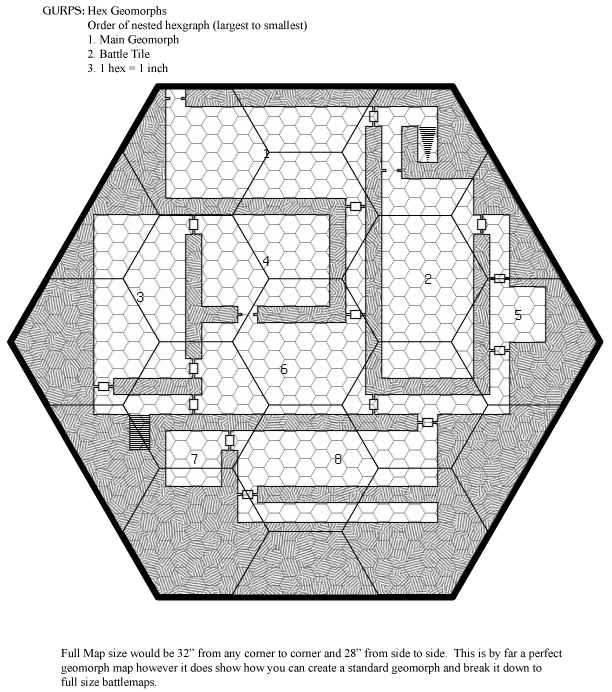
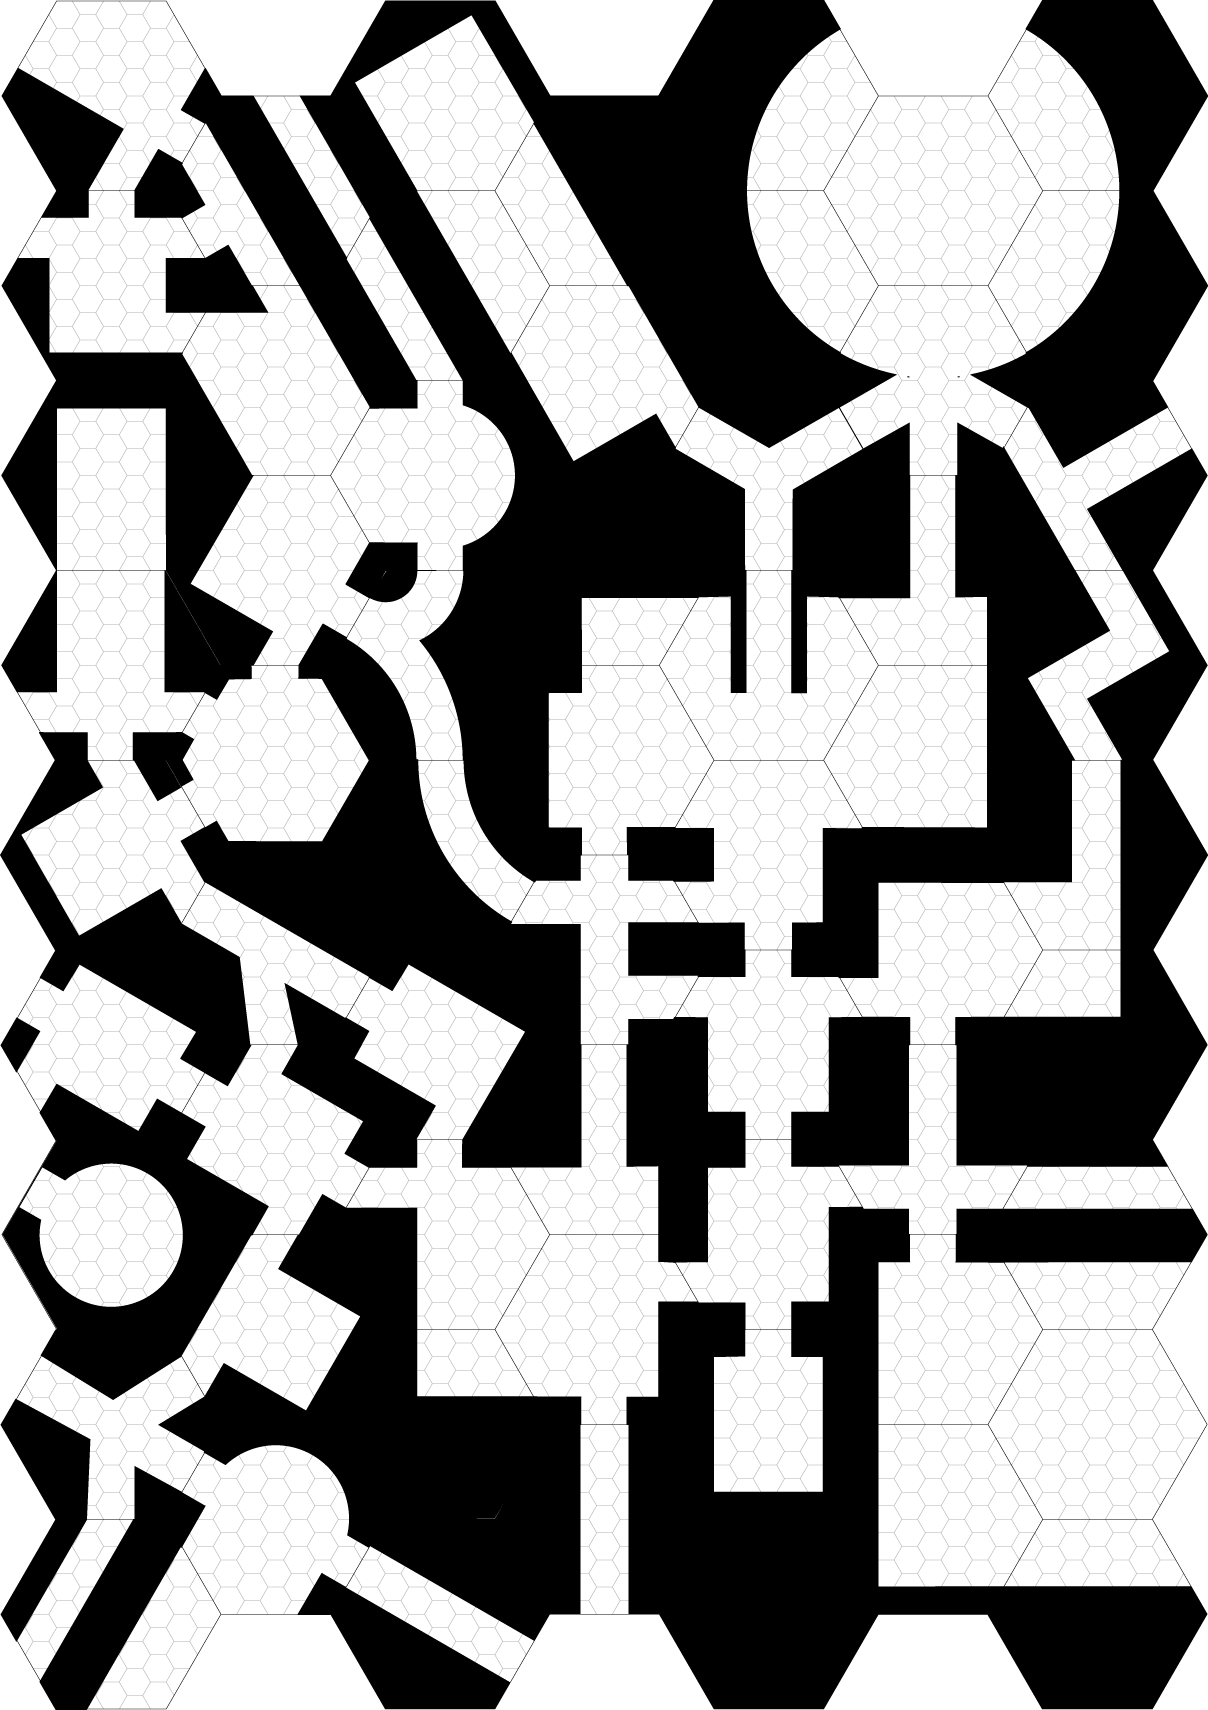
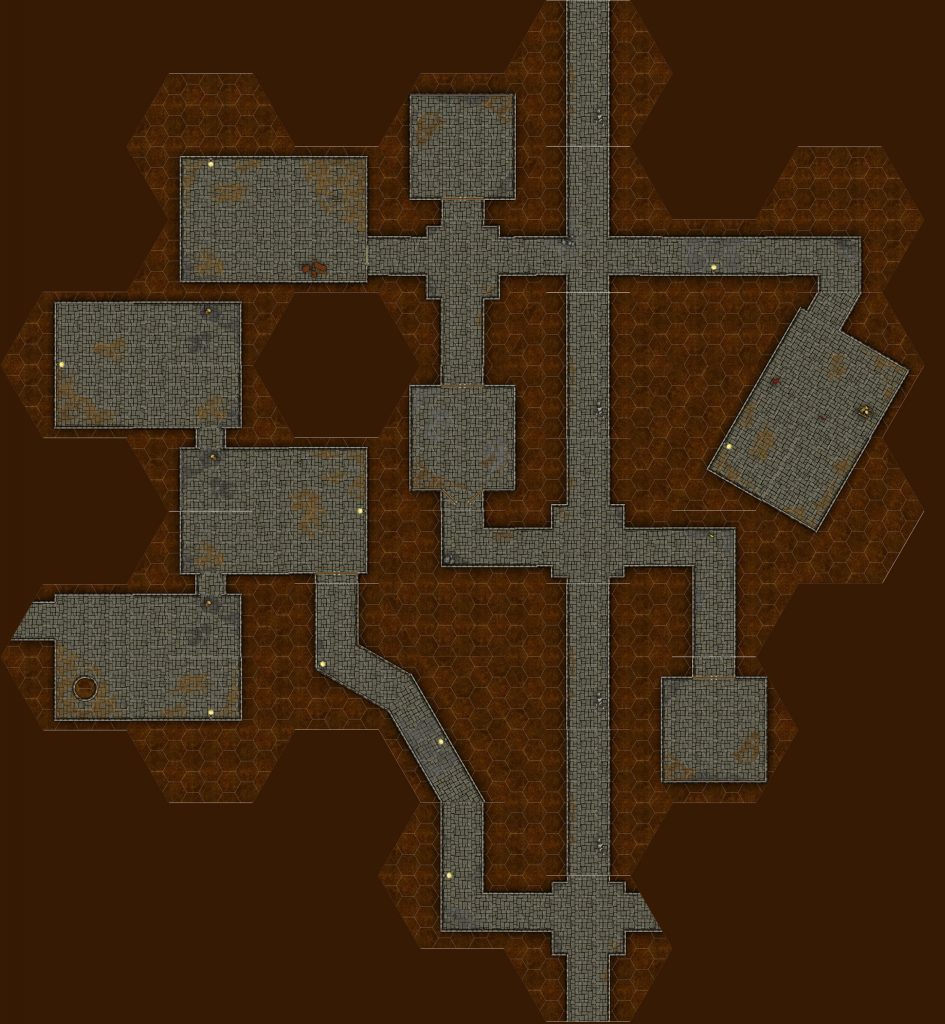
This map was randomly generated using http://donjon.bin.sh/d20/dungeon/ then placed into multiple 7 inch battle tiles
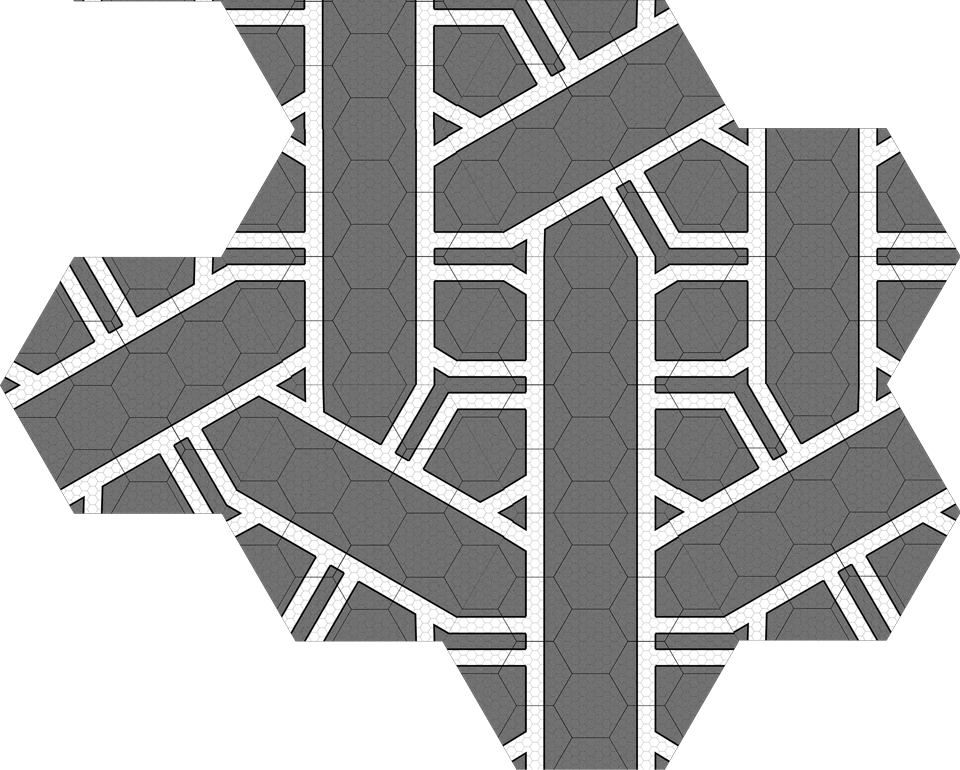
How a few tiles repeated over and over can create a maze.
Pro’s and Con’s of the 7″ Tiles
Pro
- multiple corridor widths
- multiple connecting points
- able to make both large and small rooms
- quick to assemble
Con
- Dense dungeons with small rooms require many special tiles that will contain a whole room plus many half or quarter rooms. This would require plenty of planning and tiles with specific use.
- tiles may reveal rooms which have not been discovered
- if full 3D can get heavy
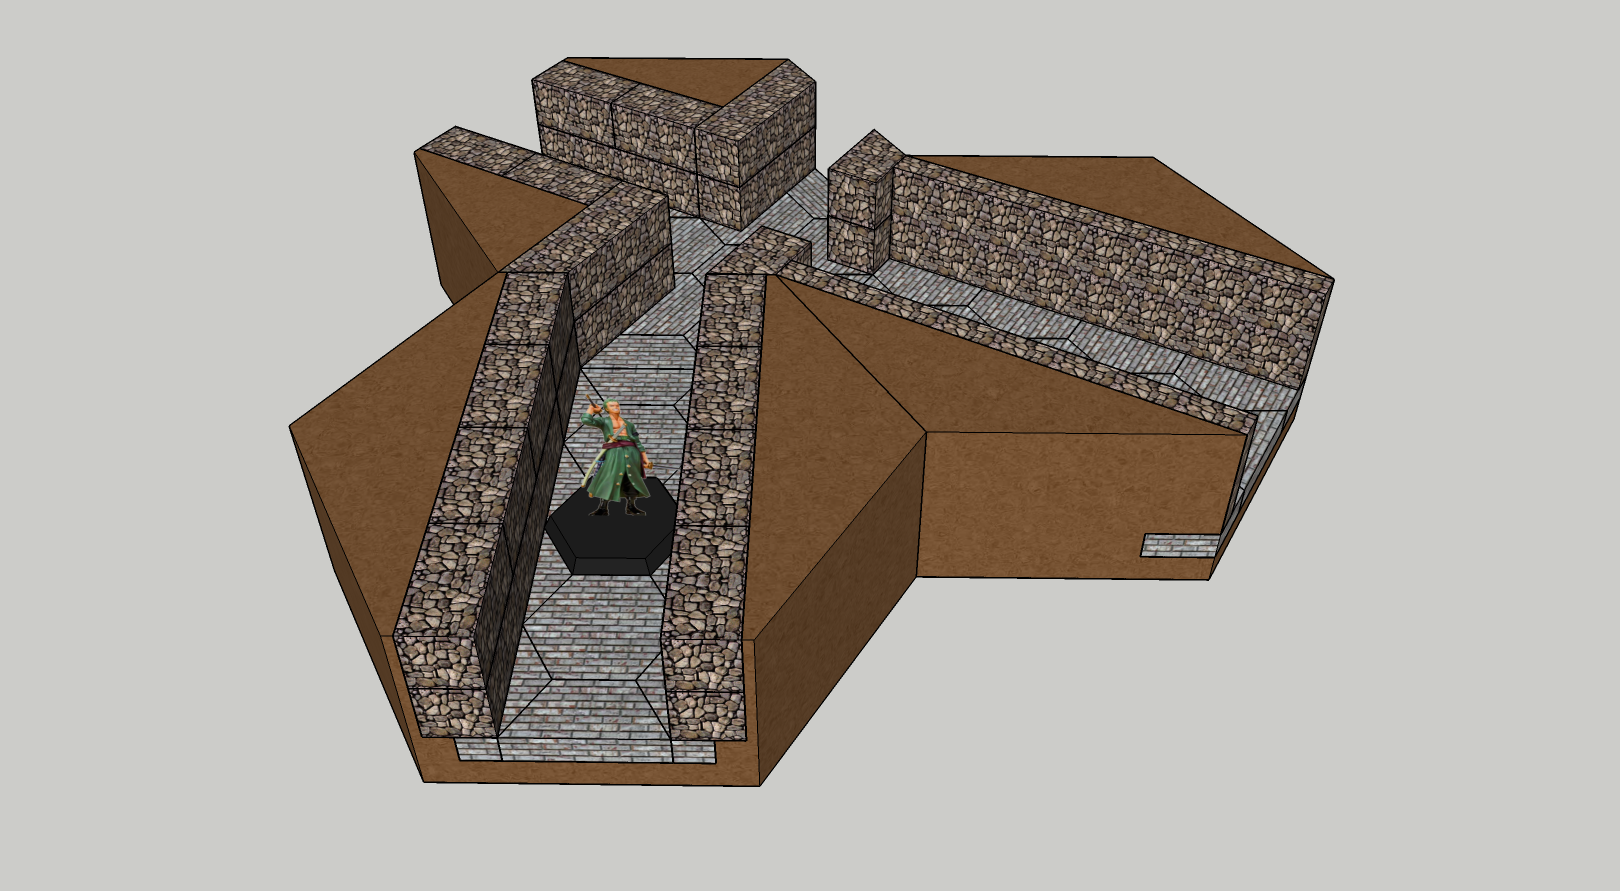
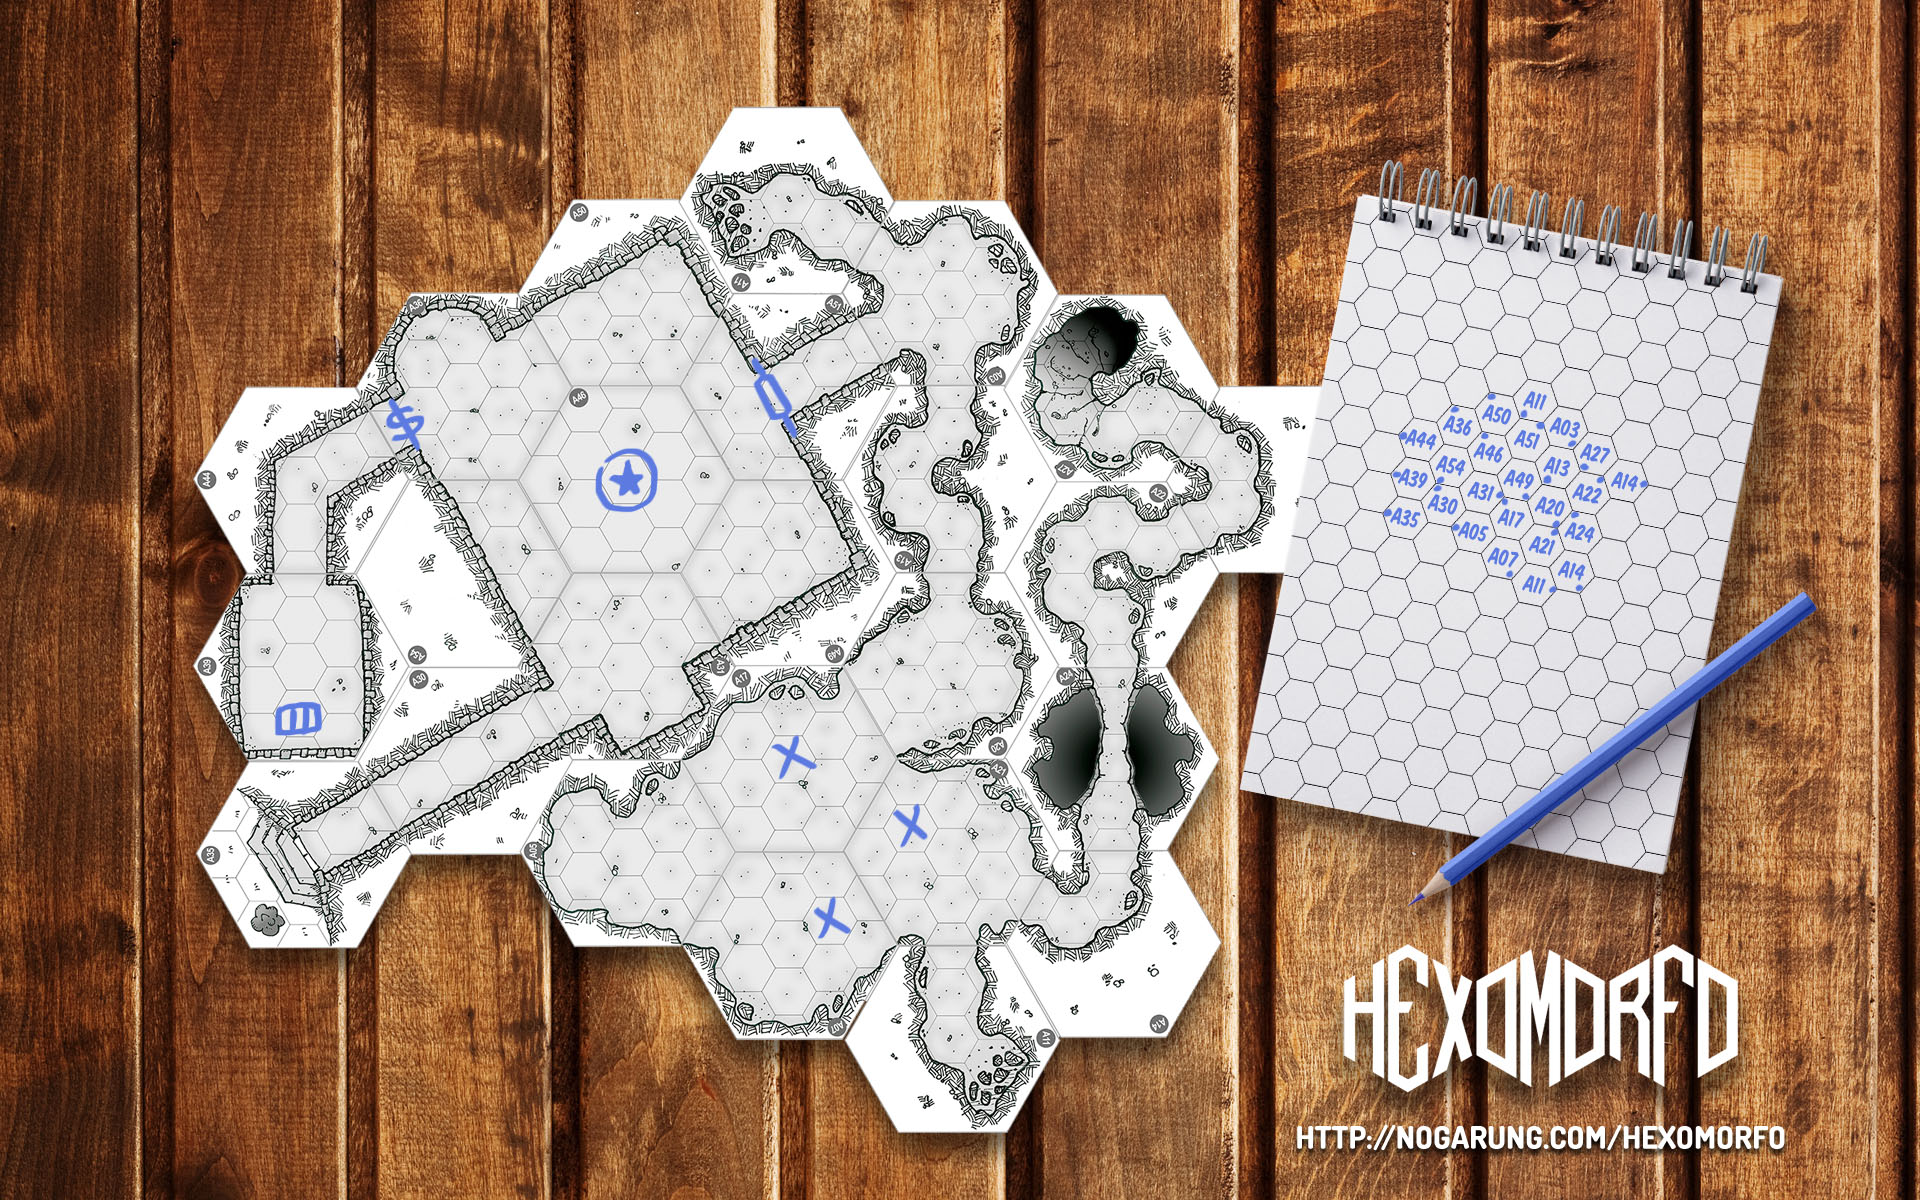
However with my purchase of Kickstarter for Tabletop Hex Terrain I’ve started to think about moving to smaller 4 inch hex tiles. However not just flat tiles but full three dimensional dungeons. This idea was reinforced when the Hexomorfo System was released. Plus 4 inch tiles would allow me to fit the wargaming niche as well because I could build them in one foot sections. However 4 inch battle tiles is a discussion for another post.
LINKS
Game Dev “Vertical vs. Horizontal”
Mapping with Master Hexes by Phil Wright. This is a great blog post and gets more indepth than I did for the actual reason for the size of my tiles.
Bat in the Attic “Mapping with Hexes”
Understanding Hexagon Tiles
Red Blog Games
Hexagon Measurement Calculator