CC3+ Geomorph Mapping

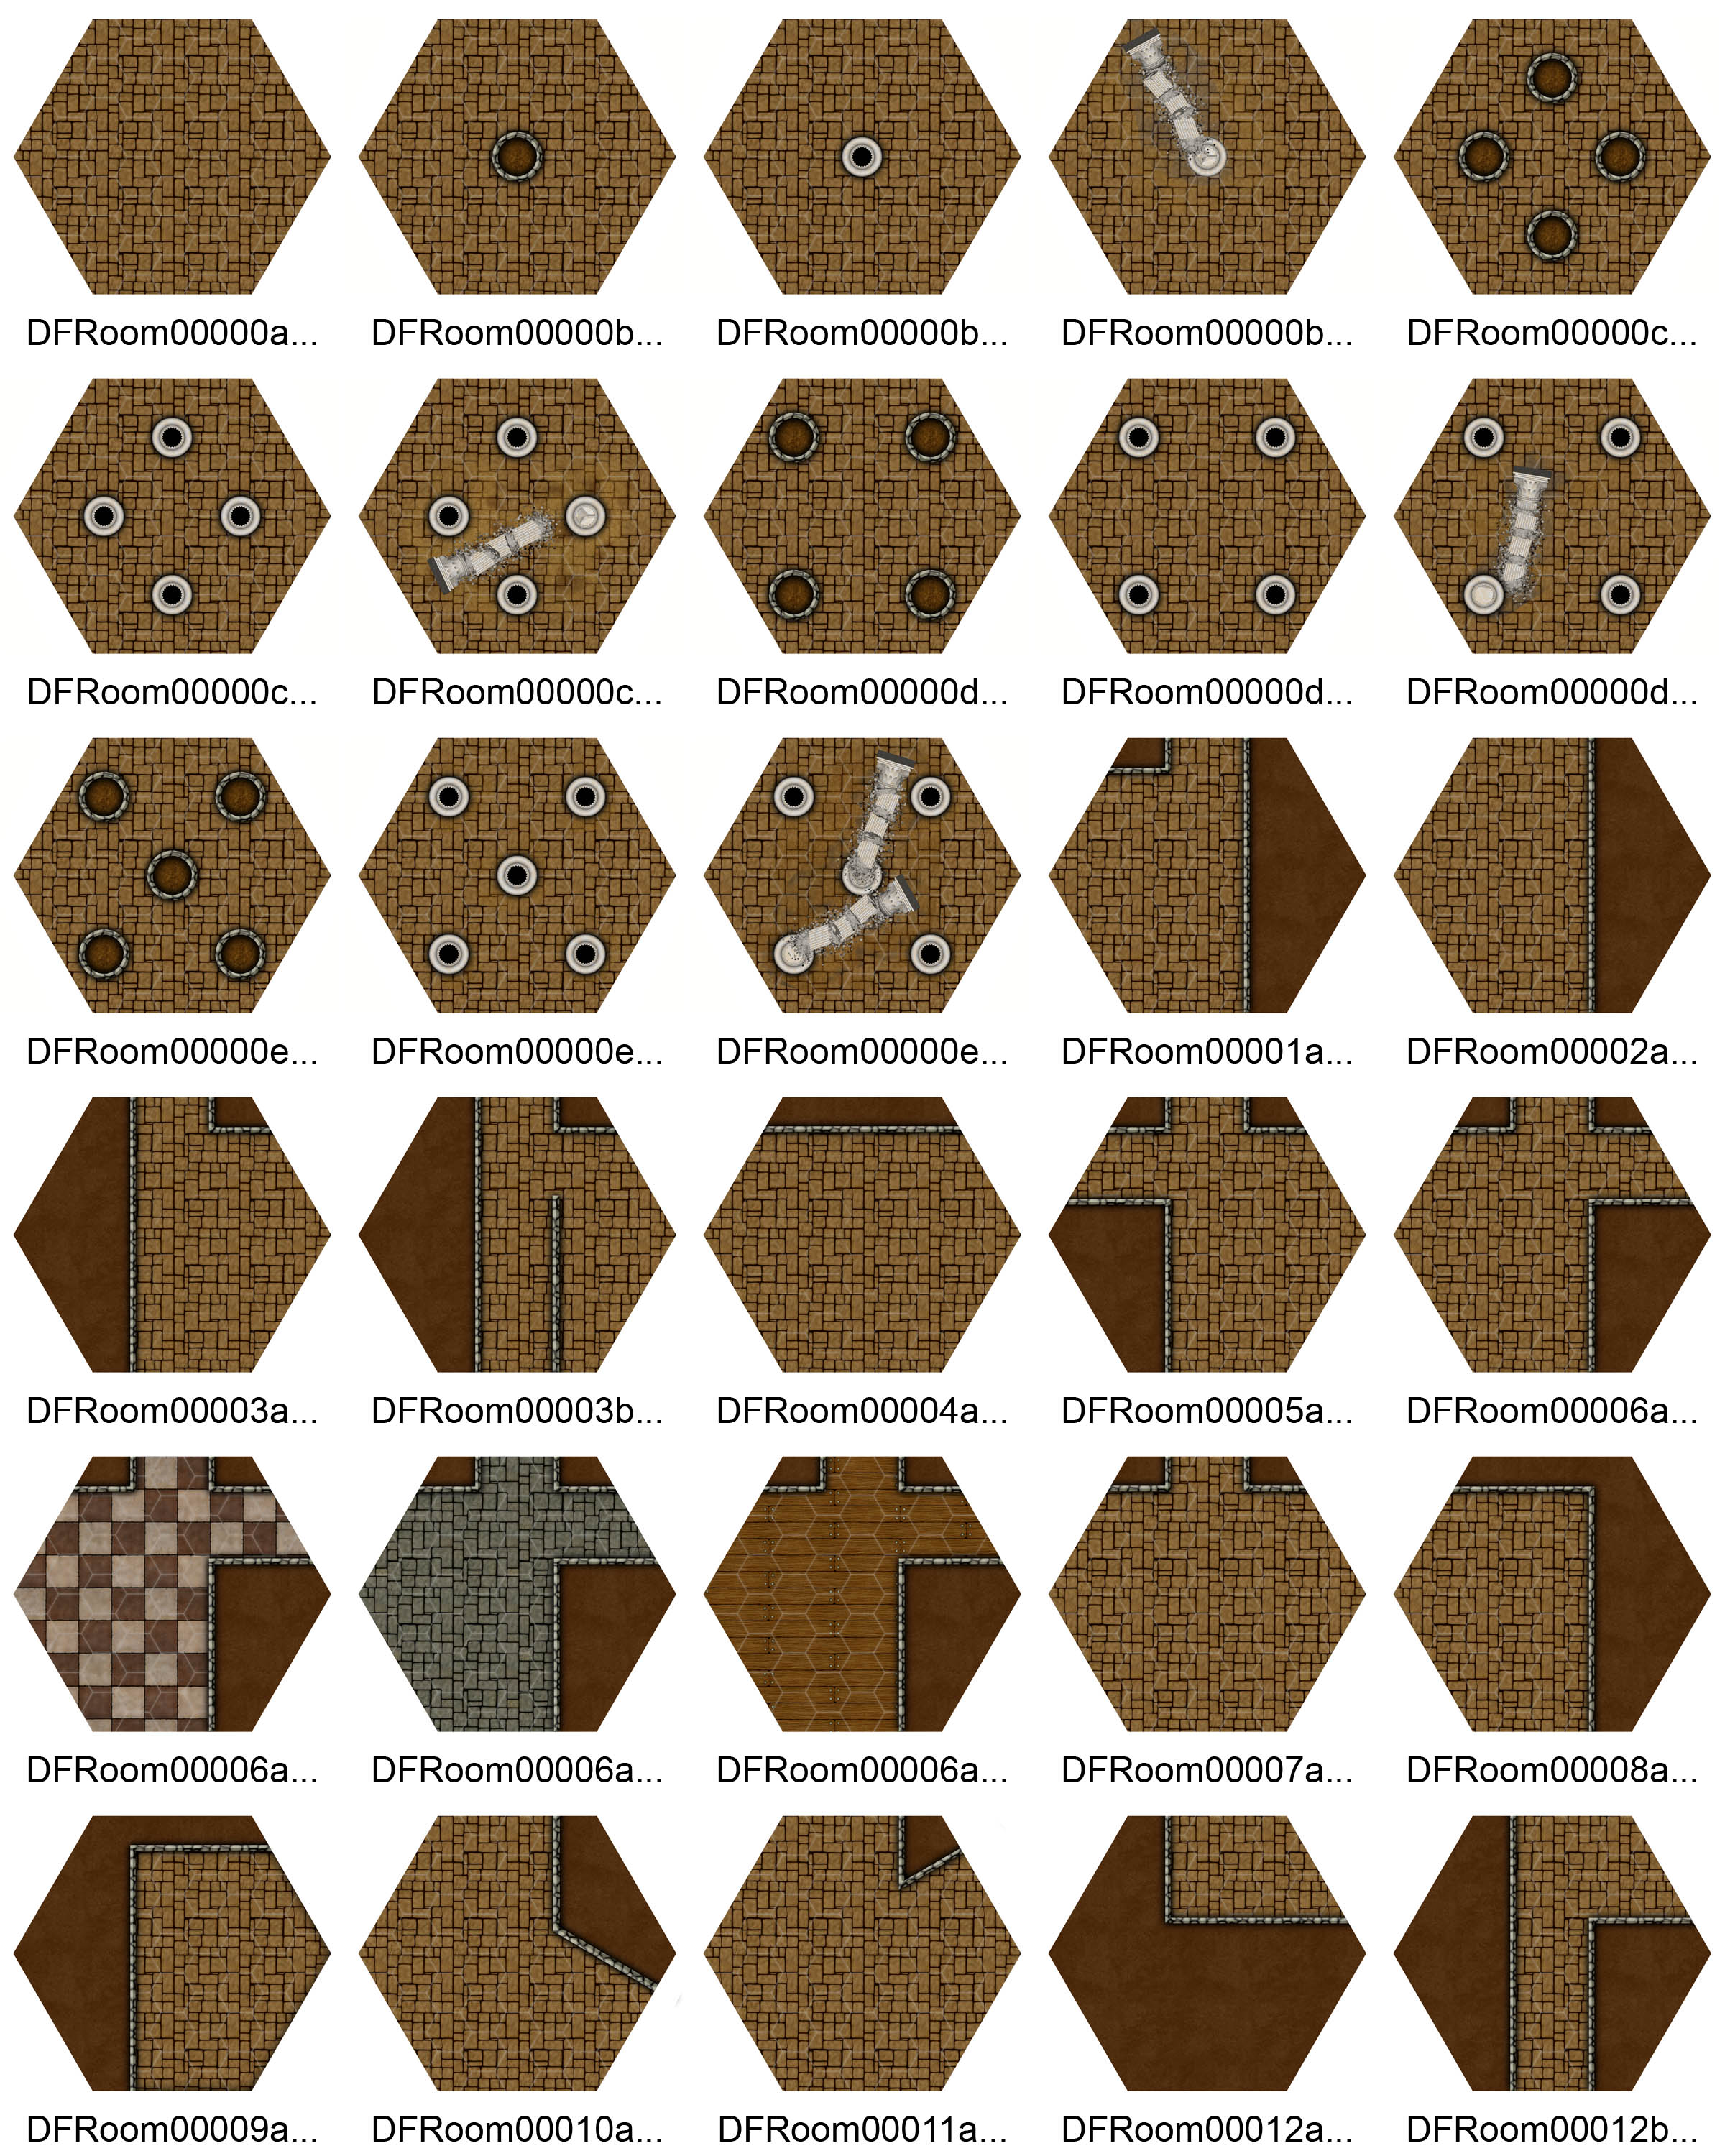
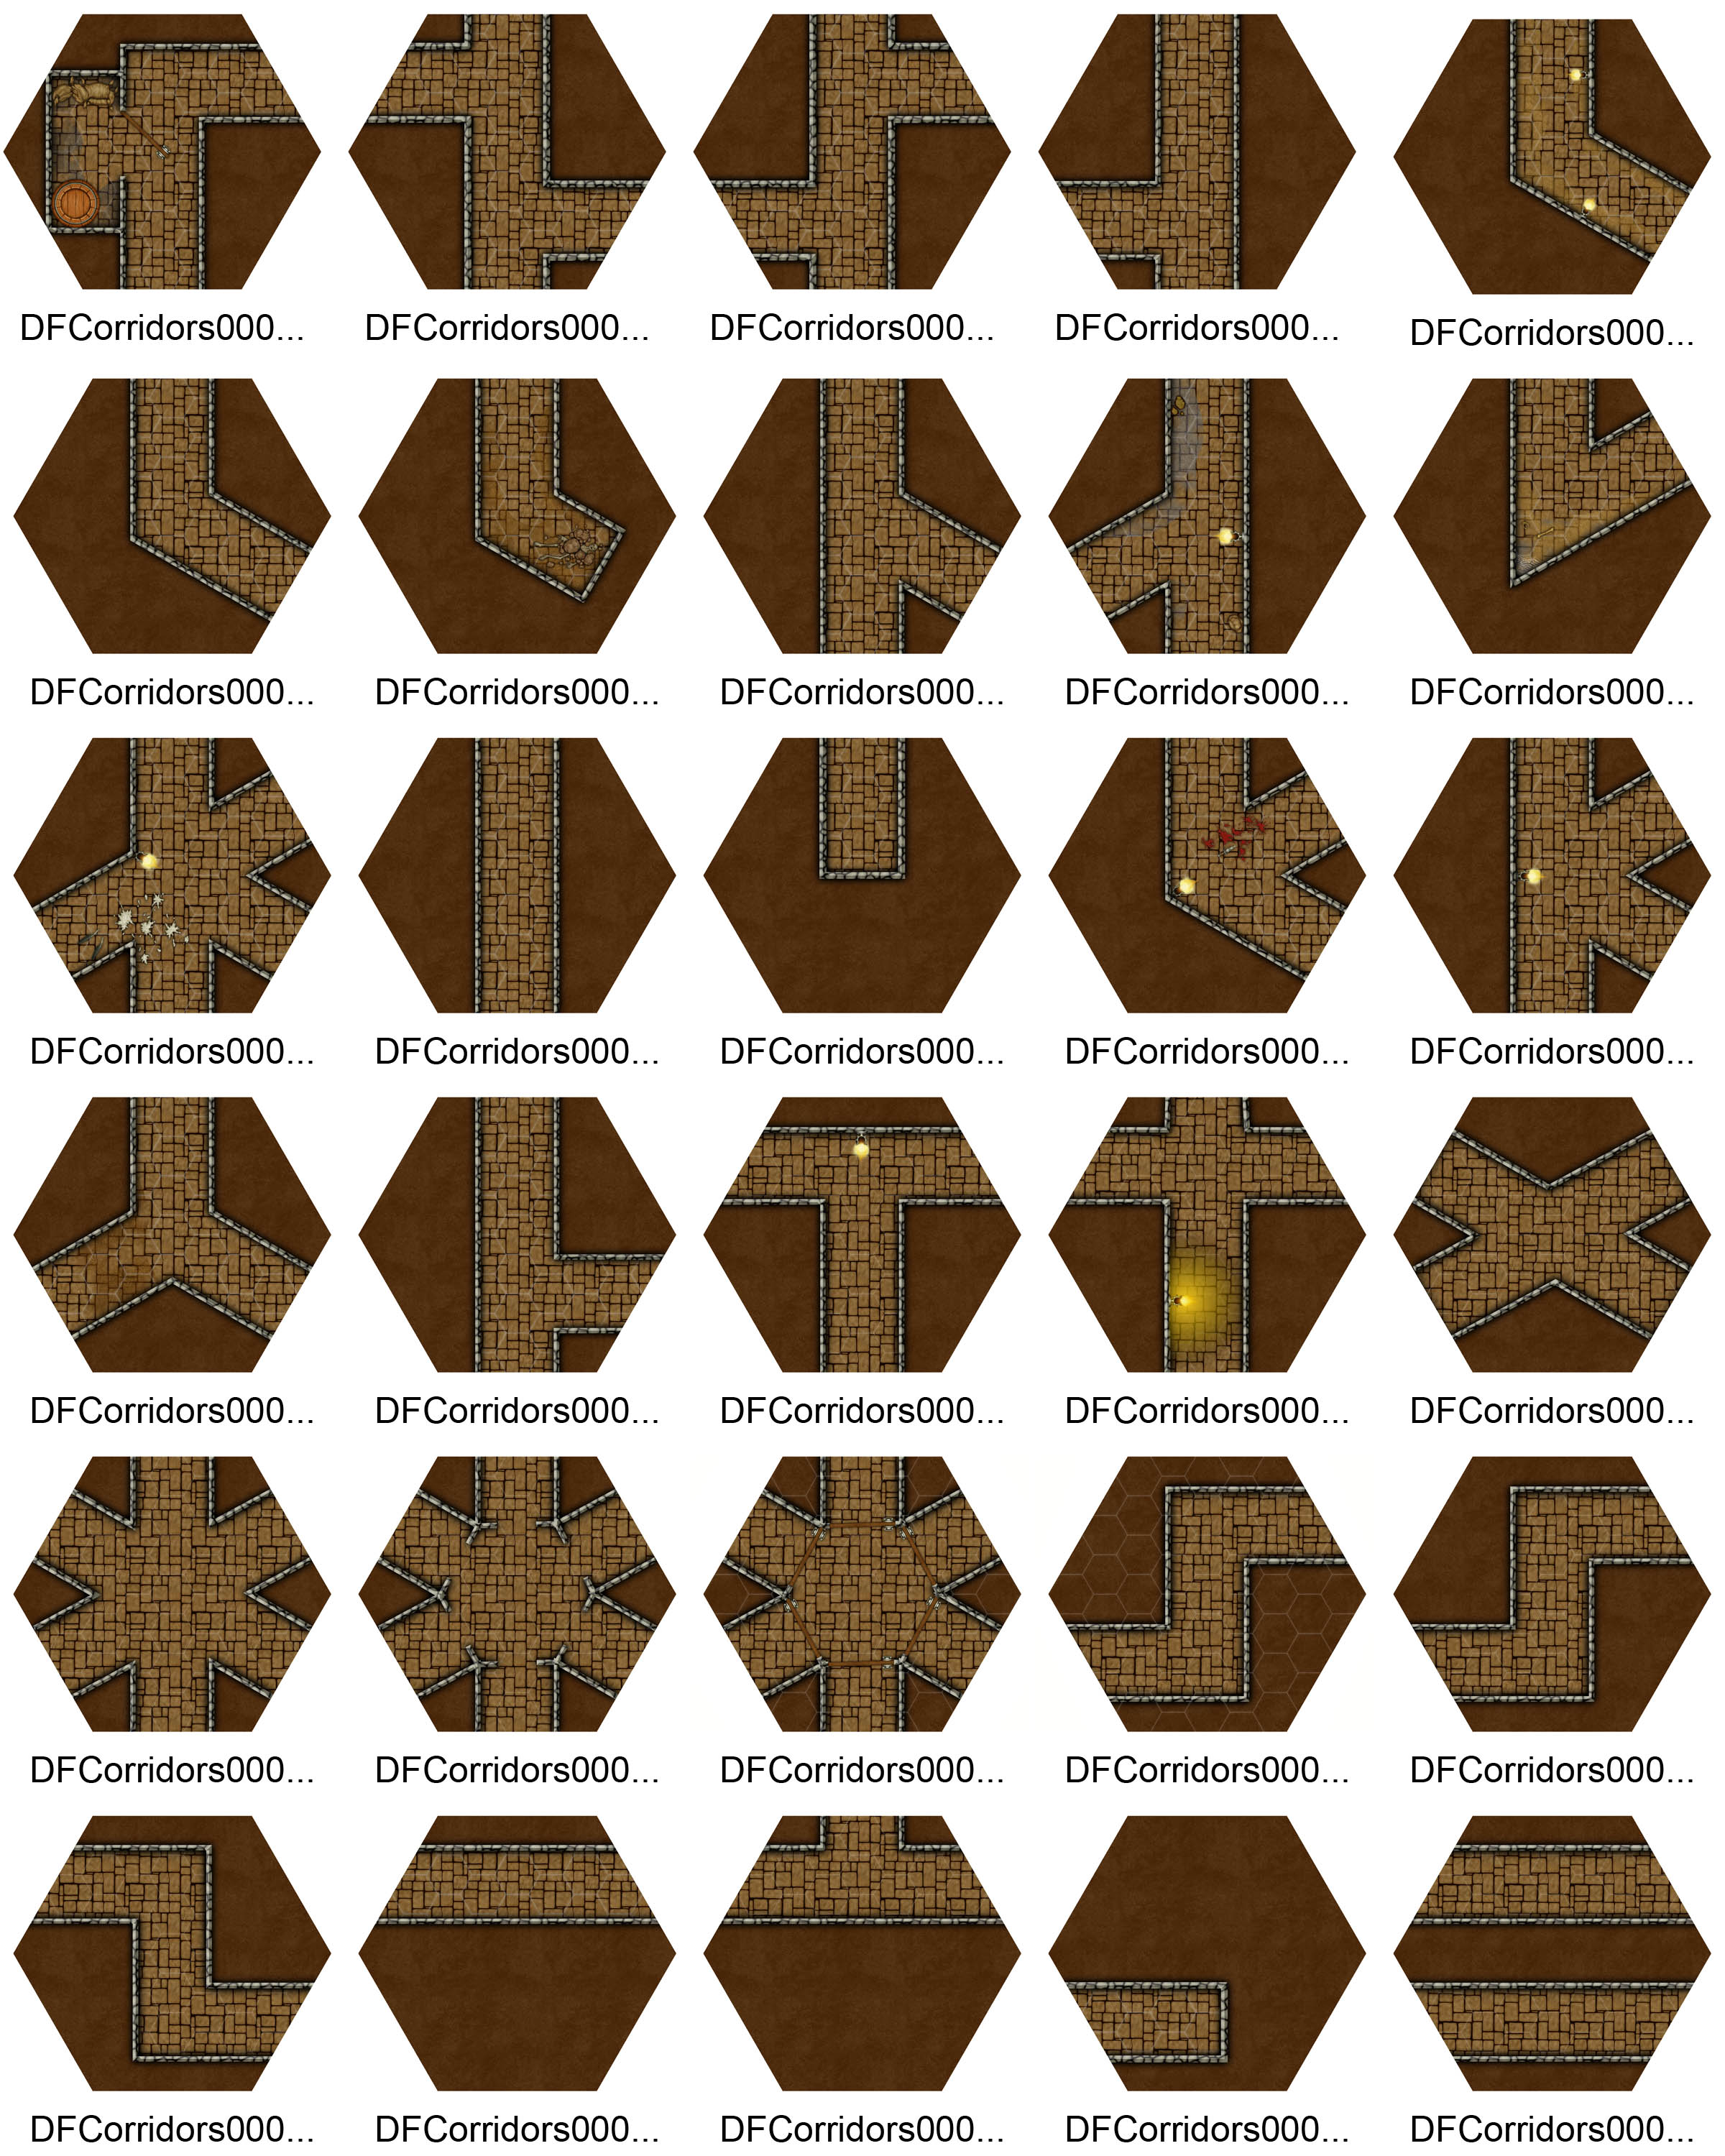
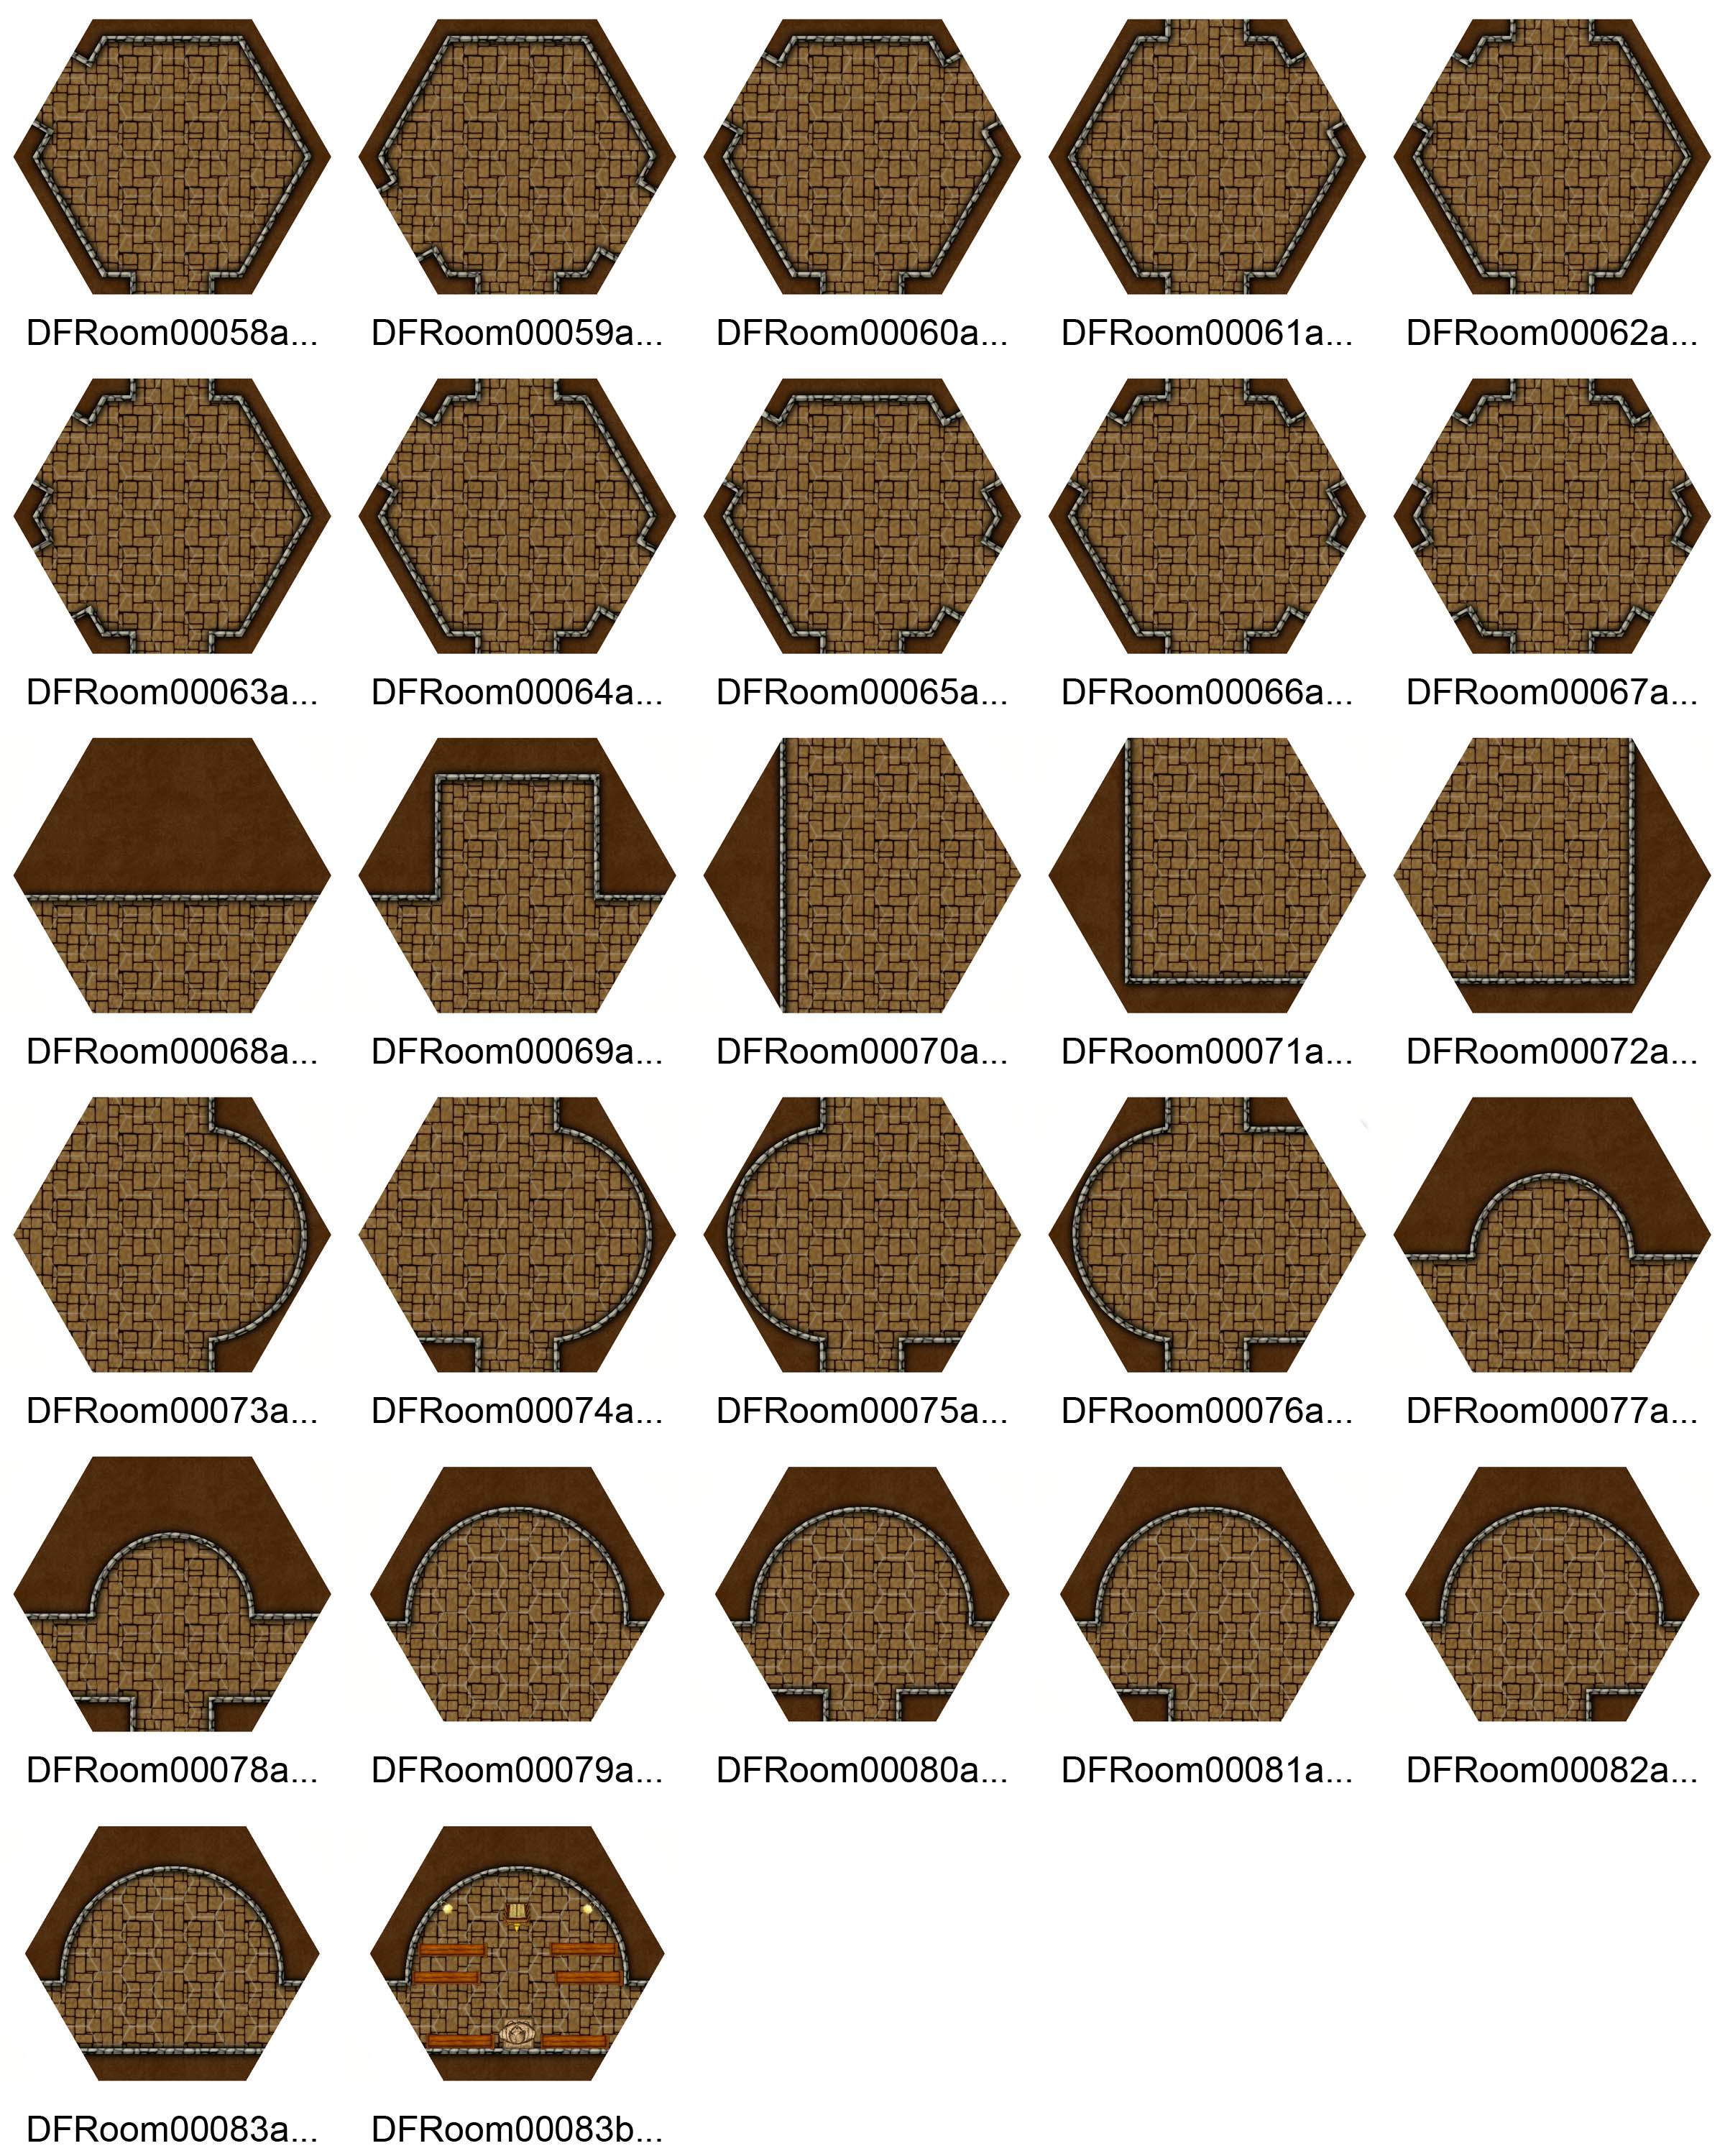
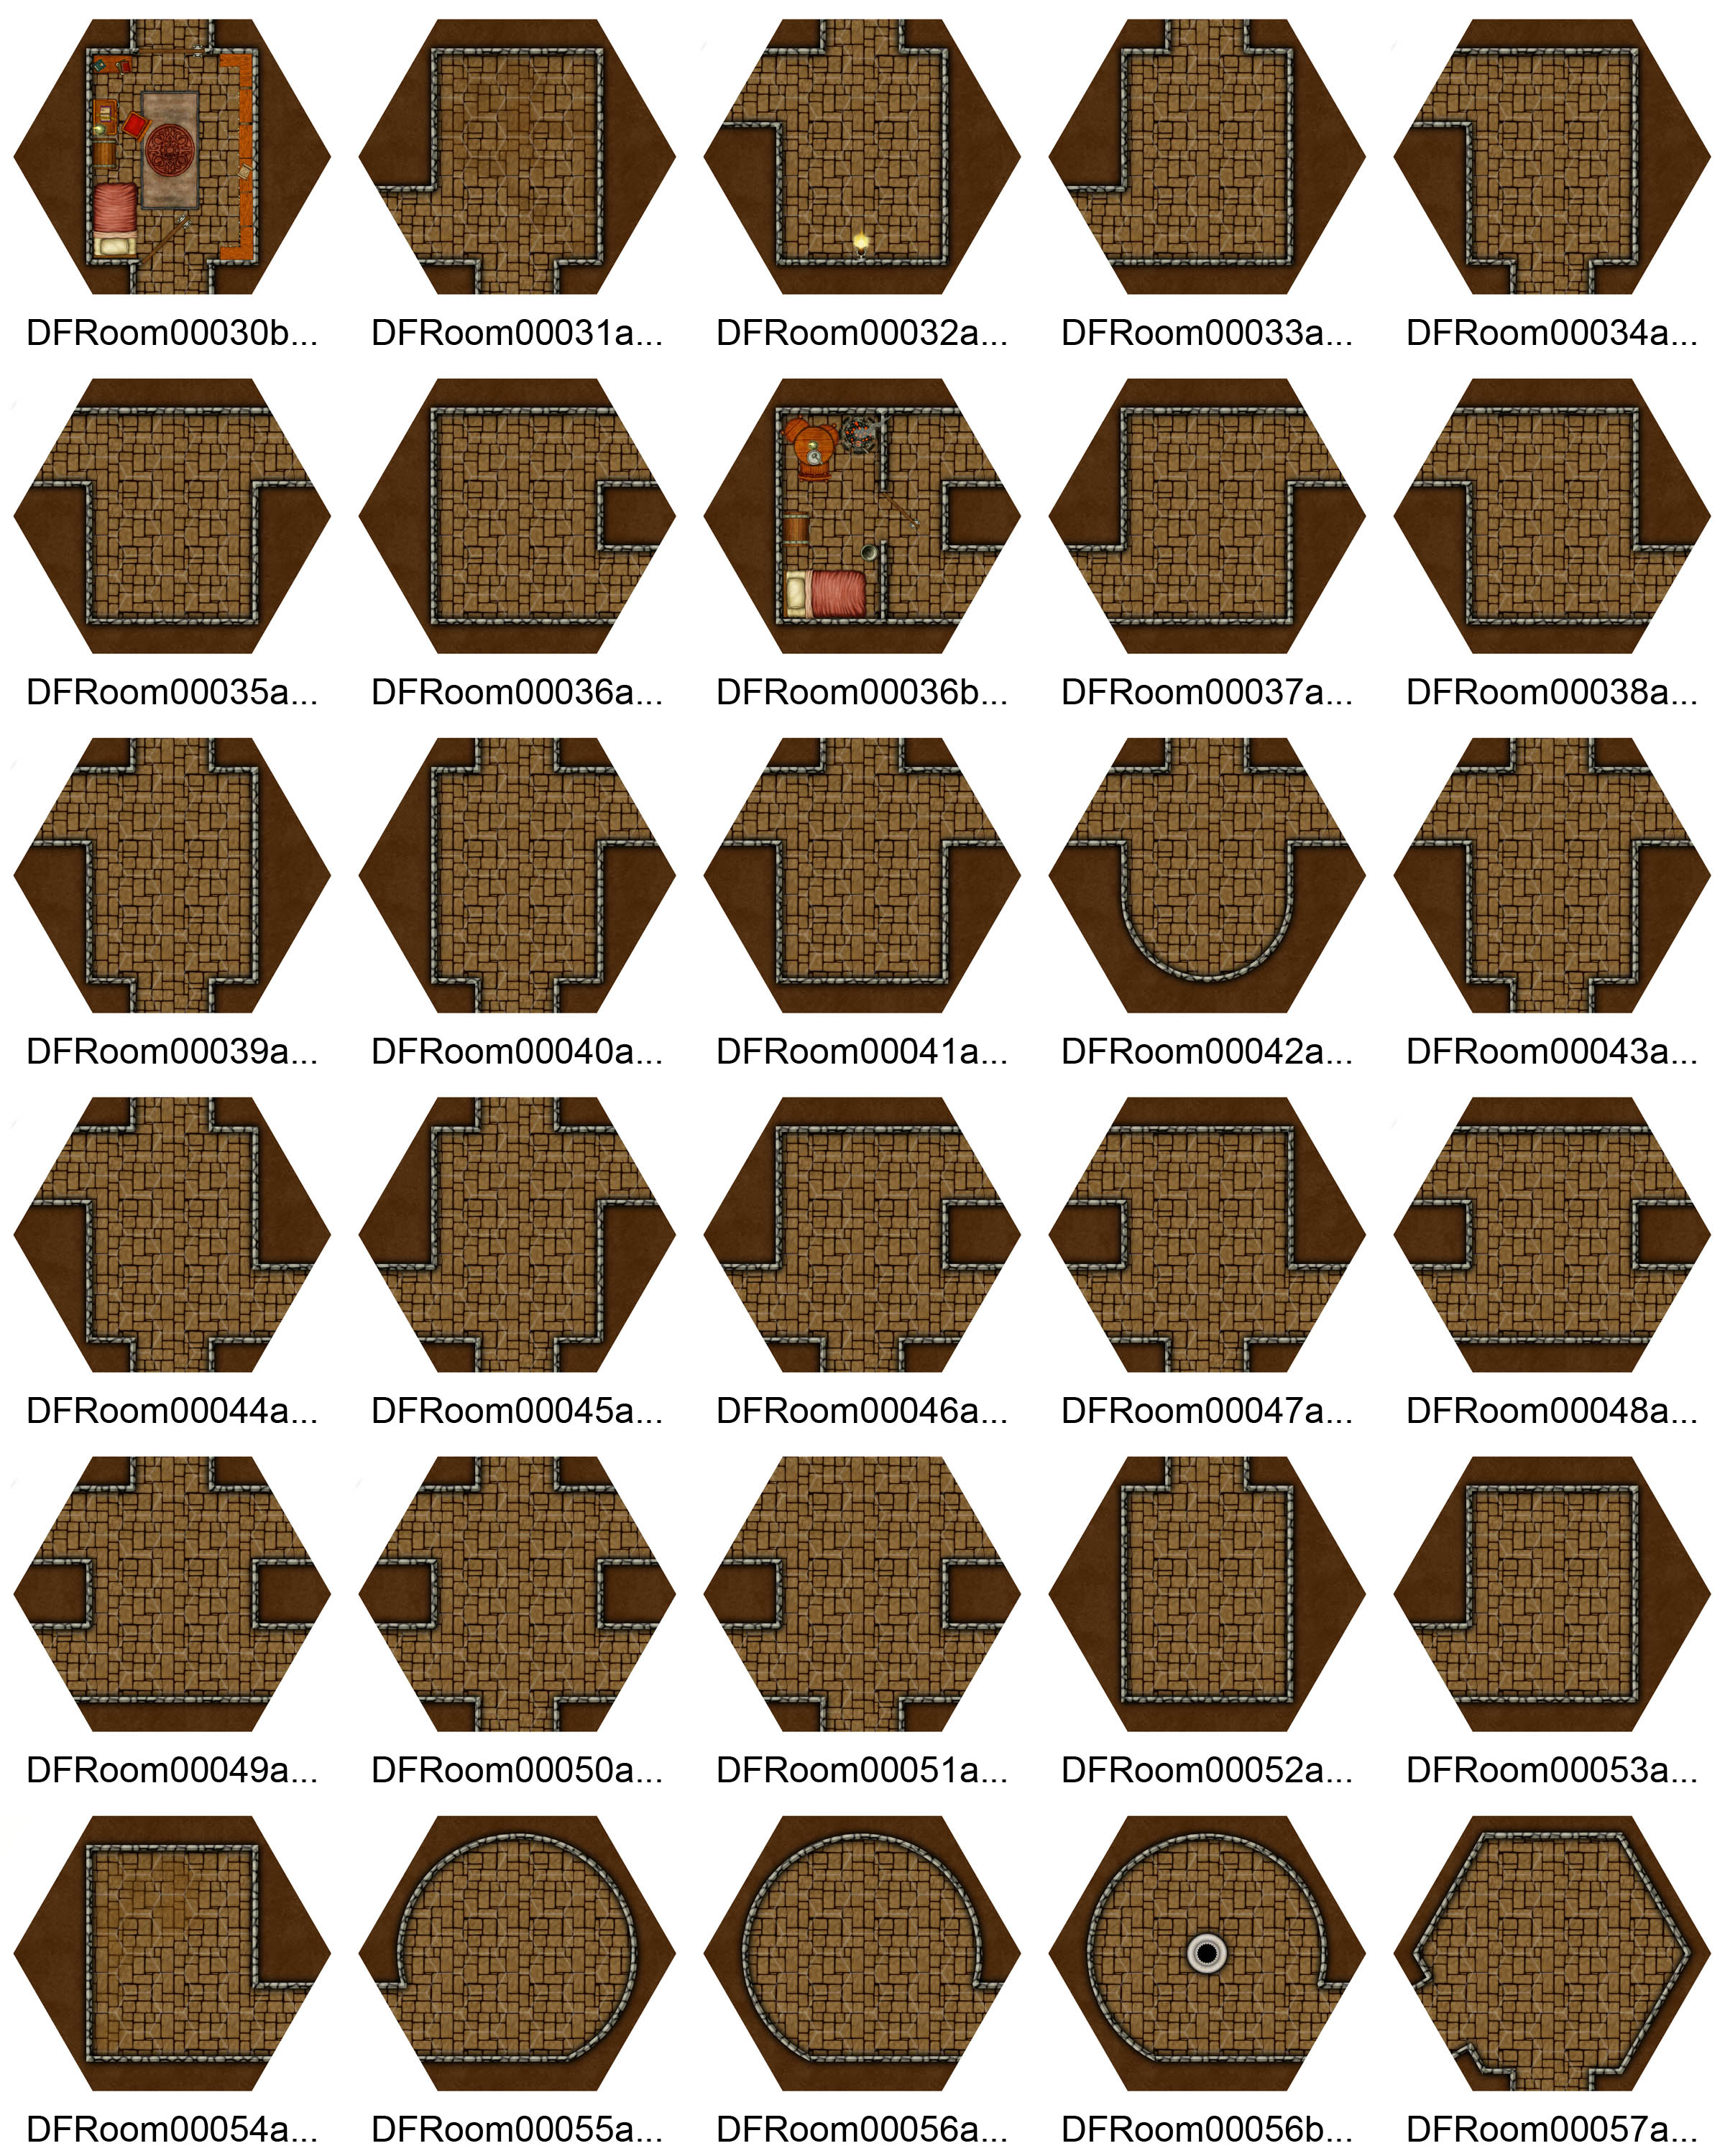
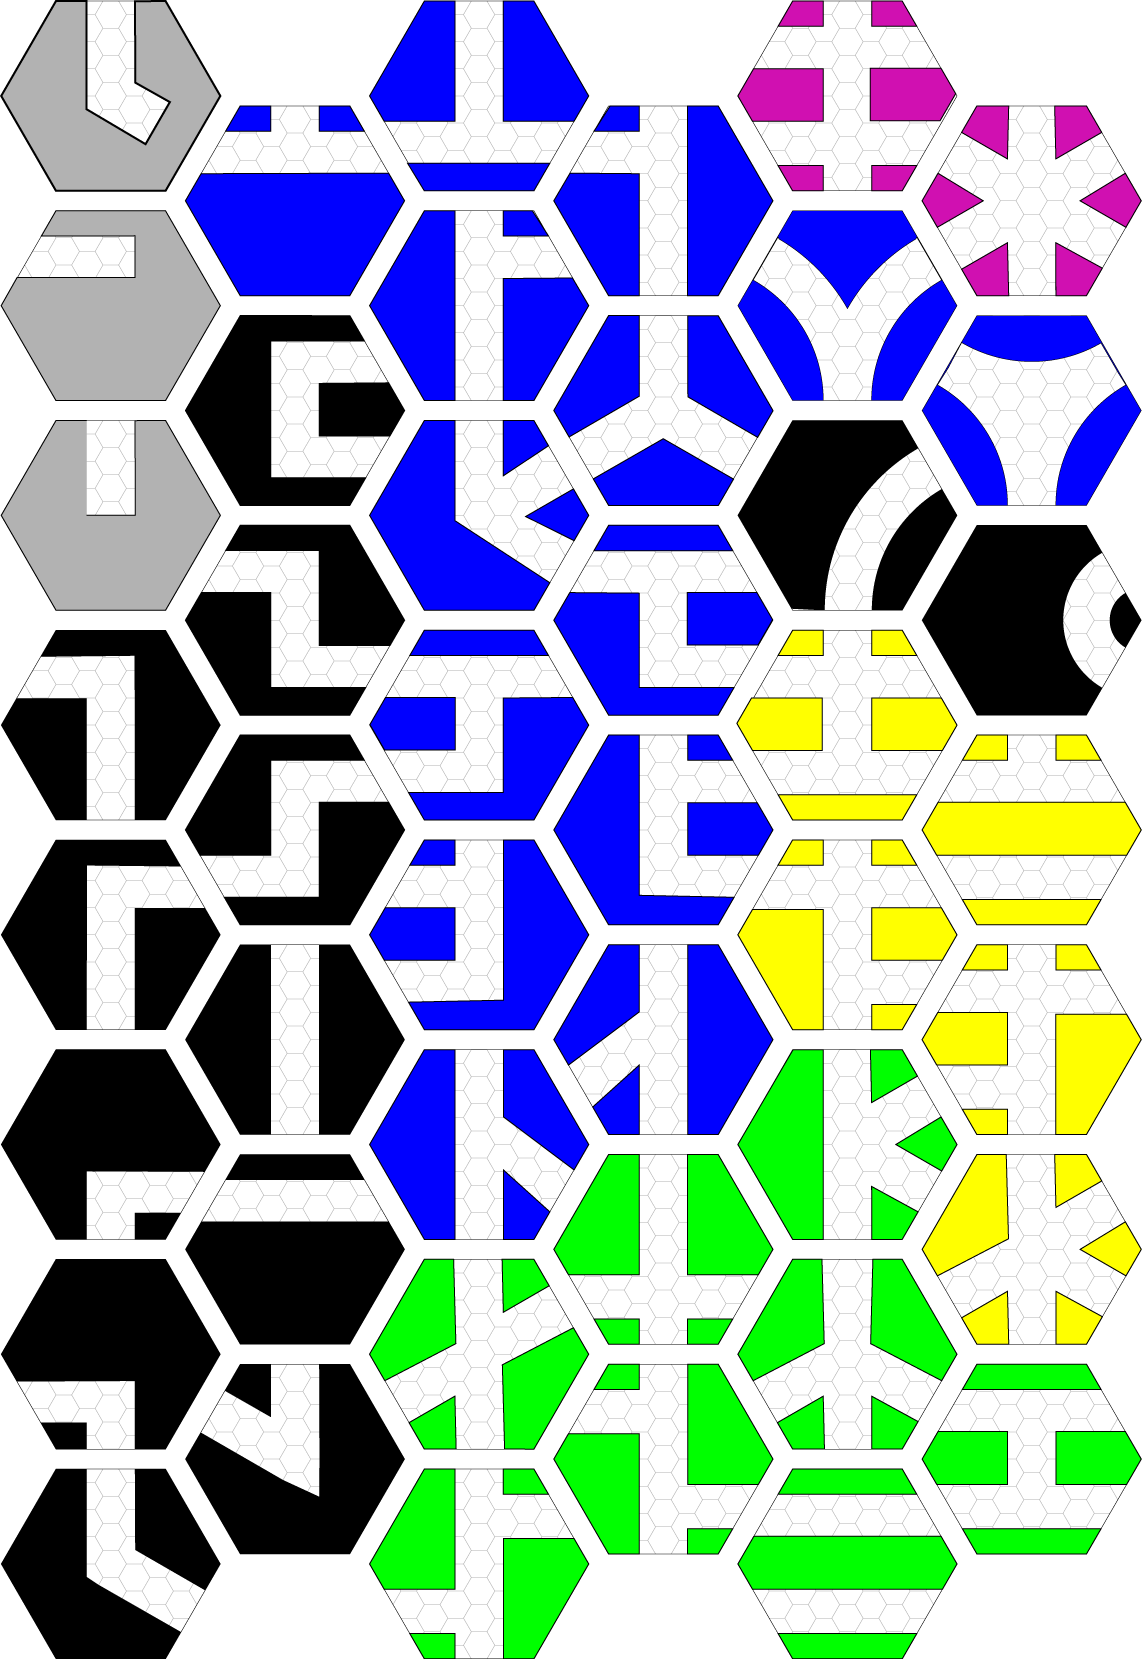
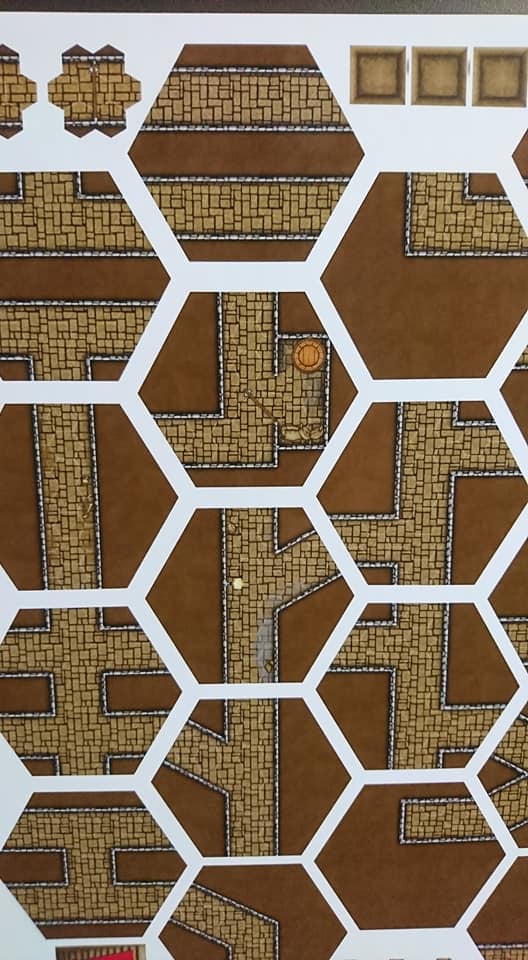
To take my mind off the day to day doldrum of work, home walk the dog, work, home walk the dog, and not being able to do much else I’ve started to get back into mapping with Profantay’s Campaign Cartographer 3+. I would like to be able to use all the Hex Geomorphs that I’ve designed along with some free style mapping that is not constrained within the seven or four hex boundaries (but still keeping them hex). The sheer number of outcomes for the Hex Geomorphs are staggering when you start to combine 3′, 6′, and 9′ passages and their connecting points on the face of the hex. So to help me organise a bit I started with the 6′ corridors using a style that mimics Ruins of the Undermountain which is one of my favourite Mega Dungeons of all time! I always liked the colour coded rooms of Core Room, Area of Interest, Teleport Area, etc.

This is not even half of what will eventually be all the 6′ connections.
The dungeon is all Geomorph while the cave is freestyle. The picture below was made from Room 1 of this map.

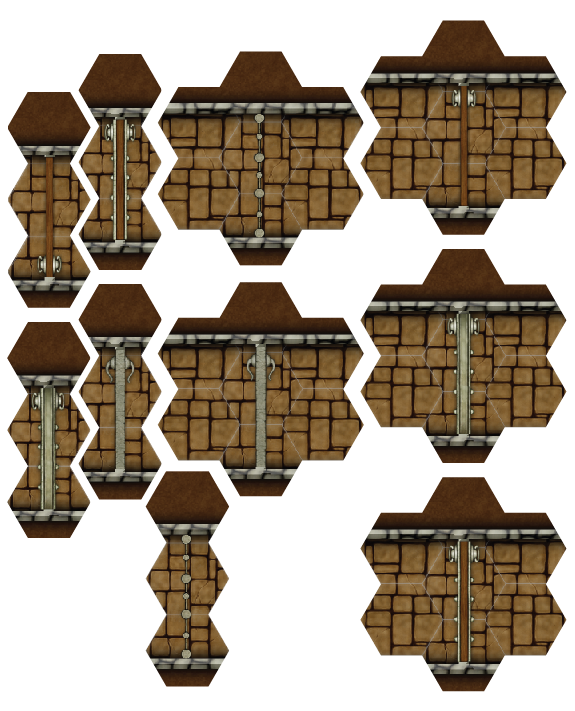
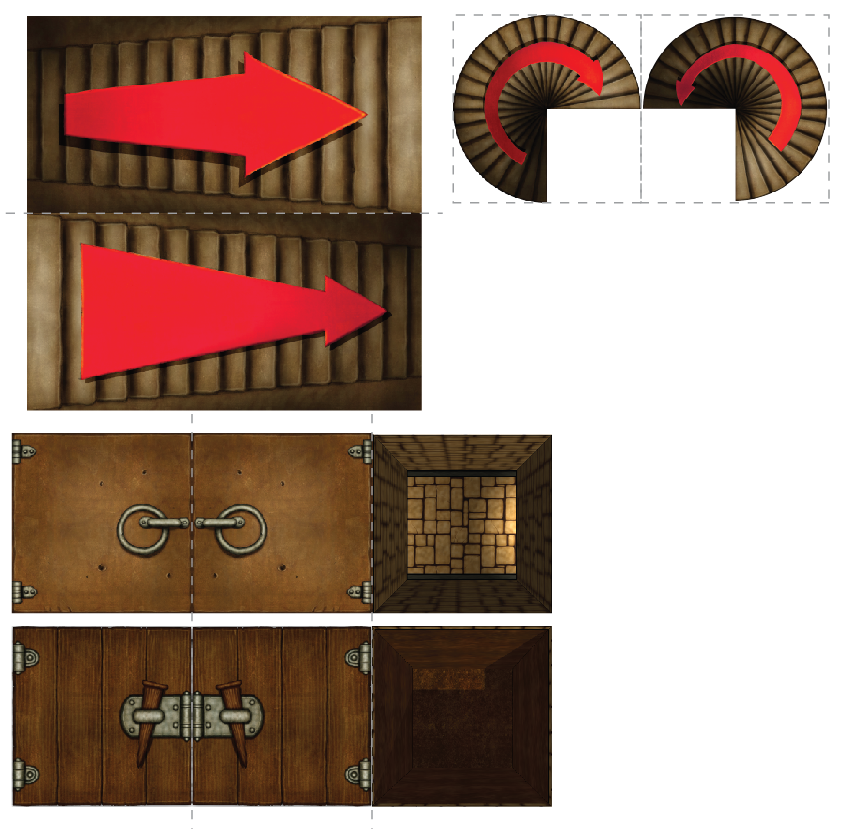
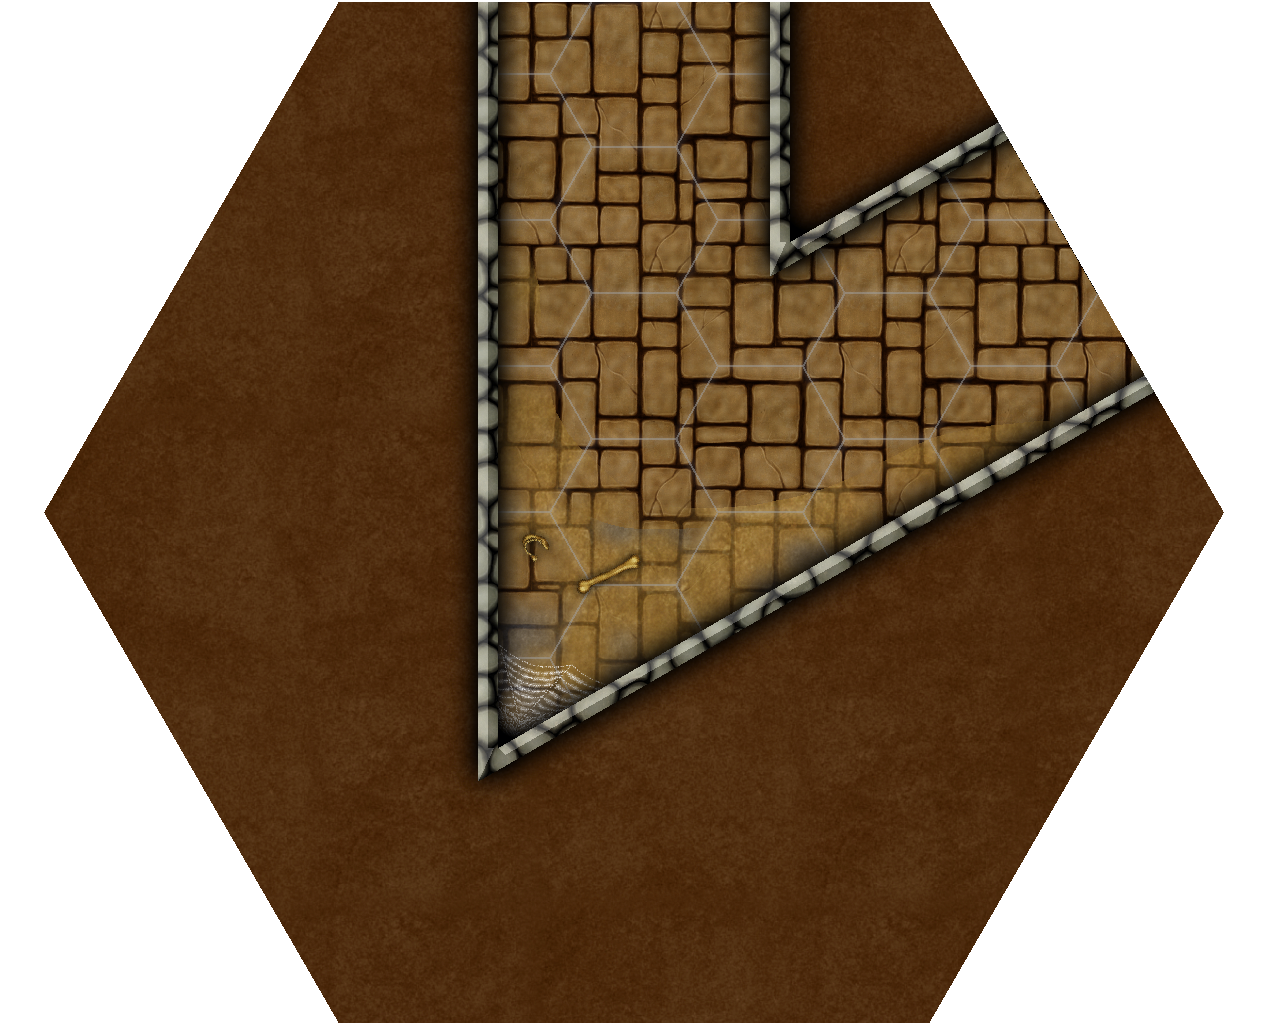
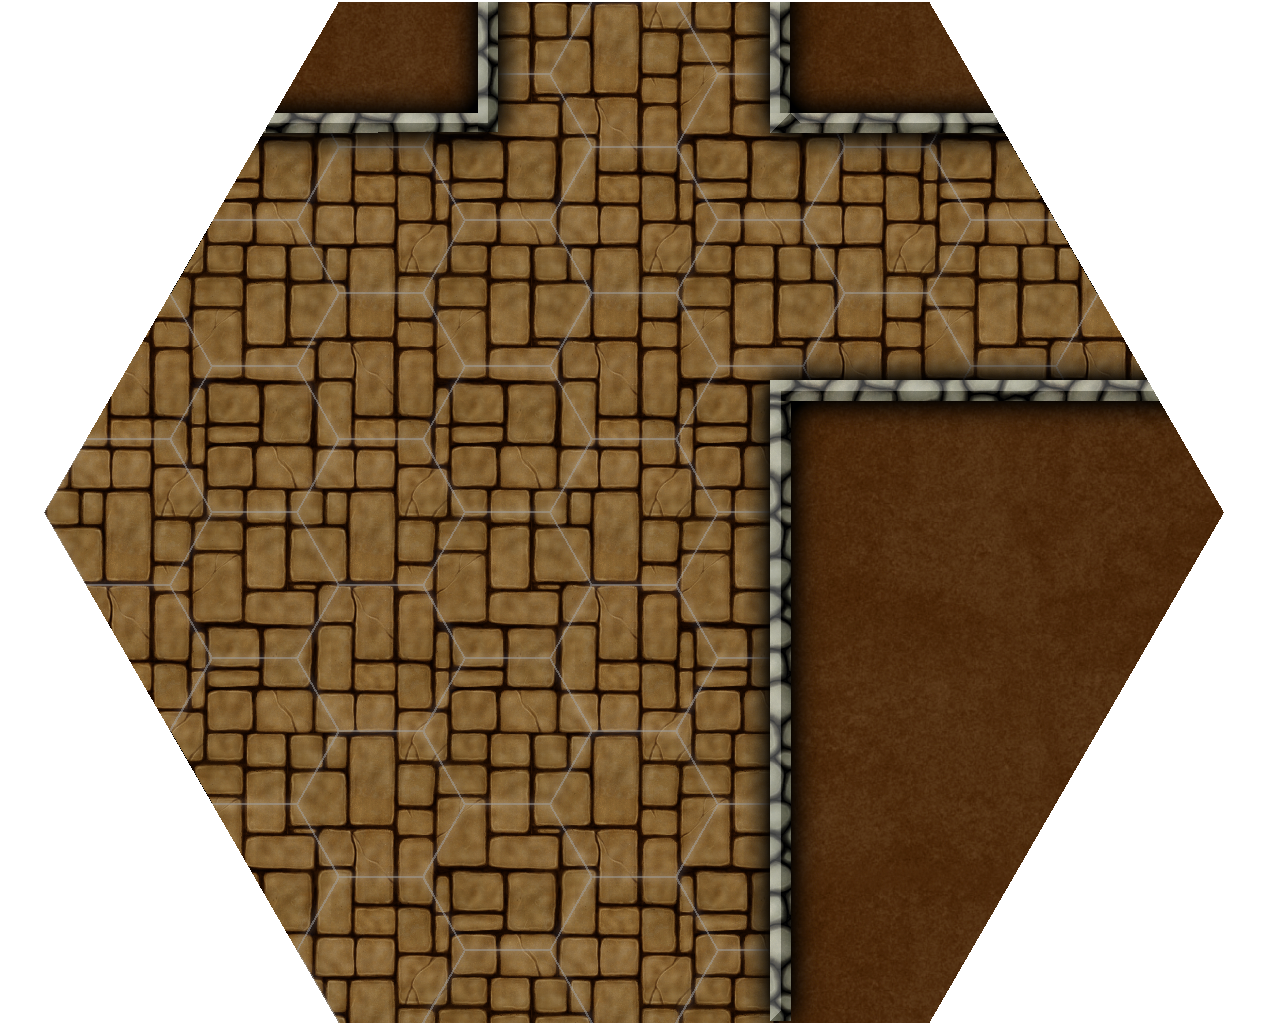
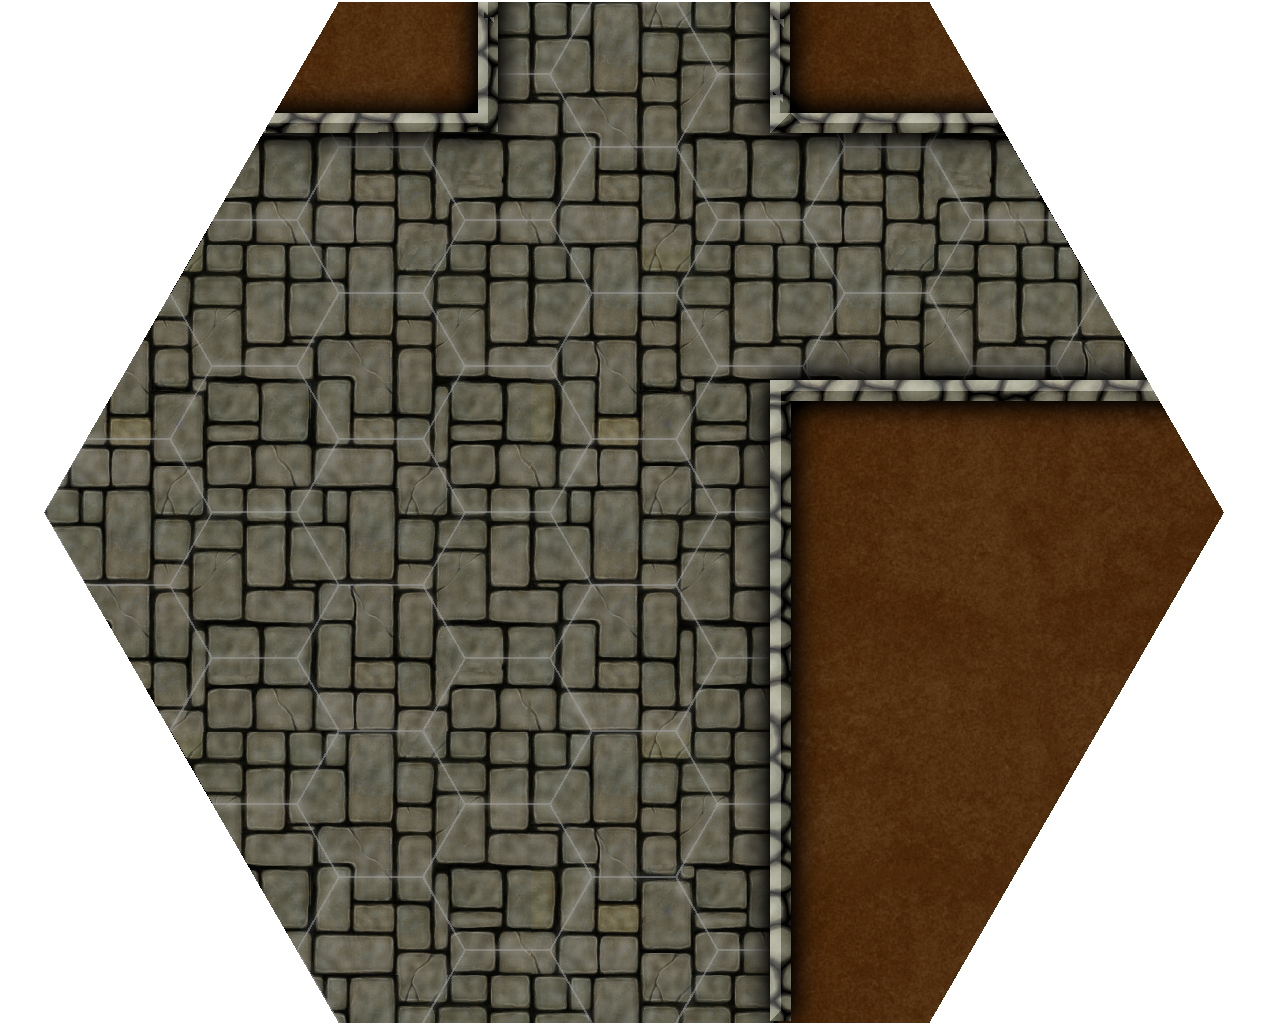
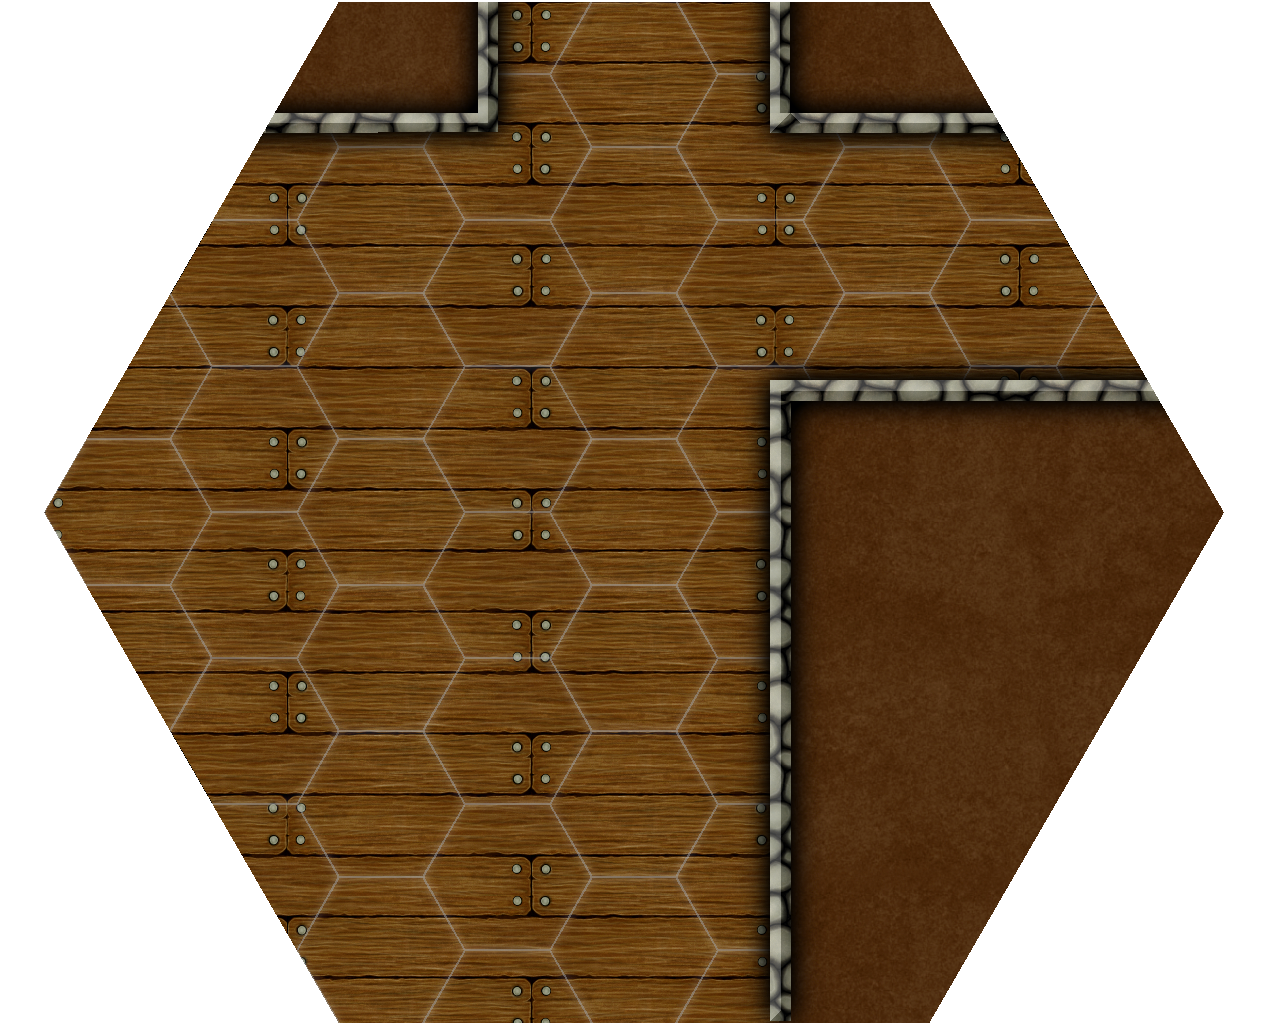
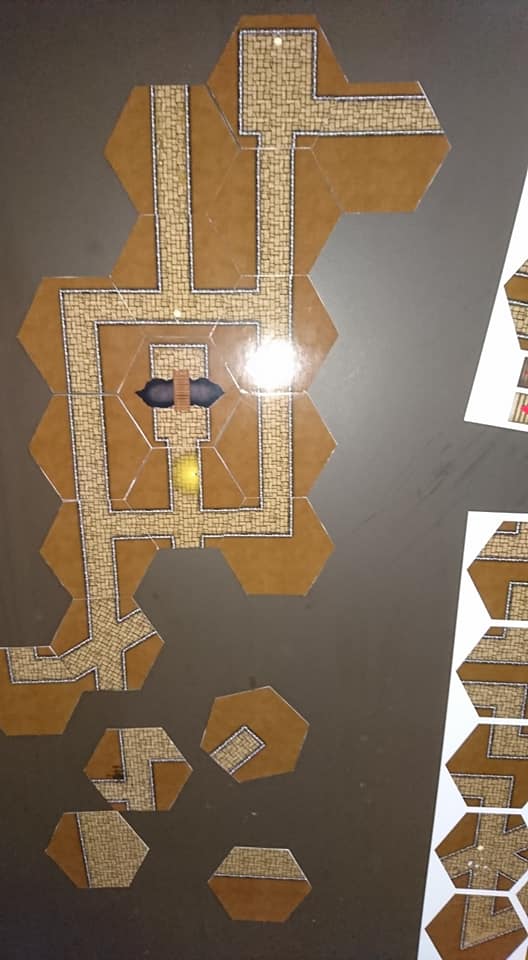
The great thing I find about using this old school style (is 1991 really old school?) is I can create them as symbols and just click, rotate, and place them where I want. Later when I have finished the set I can revisit it in a special saved version and then add walls. This way I will have Geomorph symbols in full texture that I can just place down and add dungeon dressing to later.

This dungeon room was transformed from Room #1 in the map above.
My template for making the 3′, 6′, and 9′ connections.

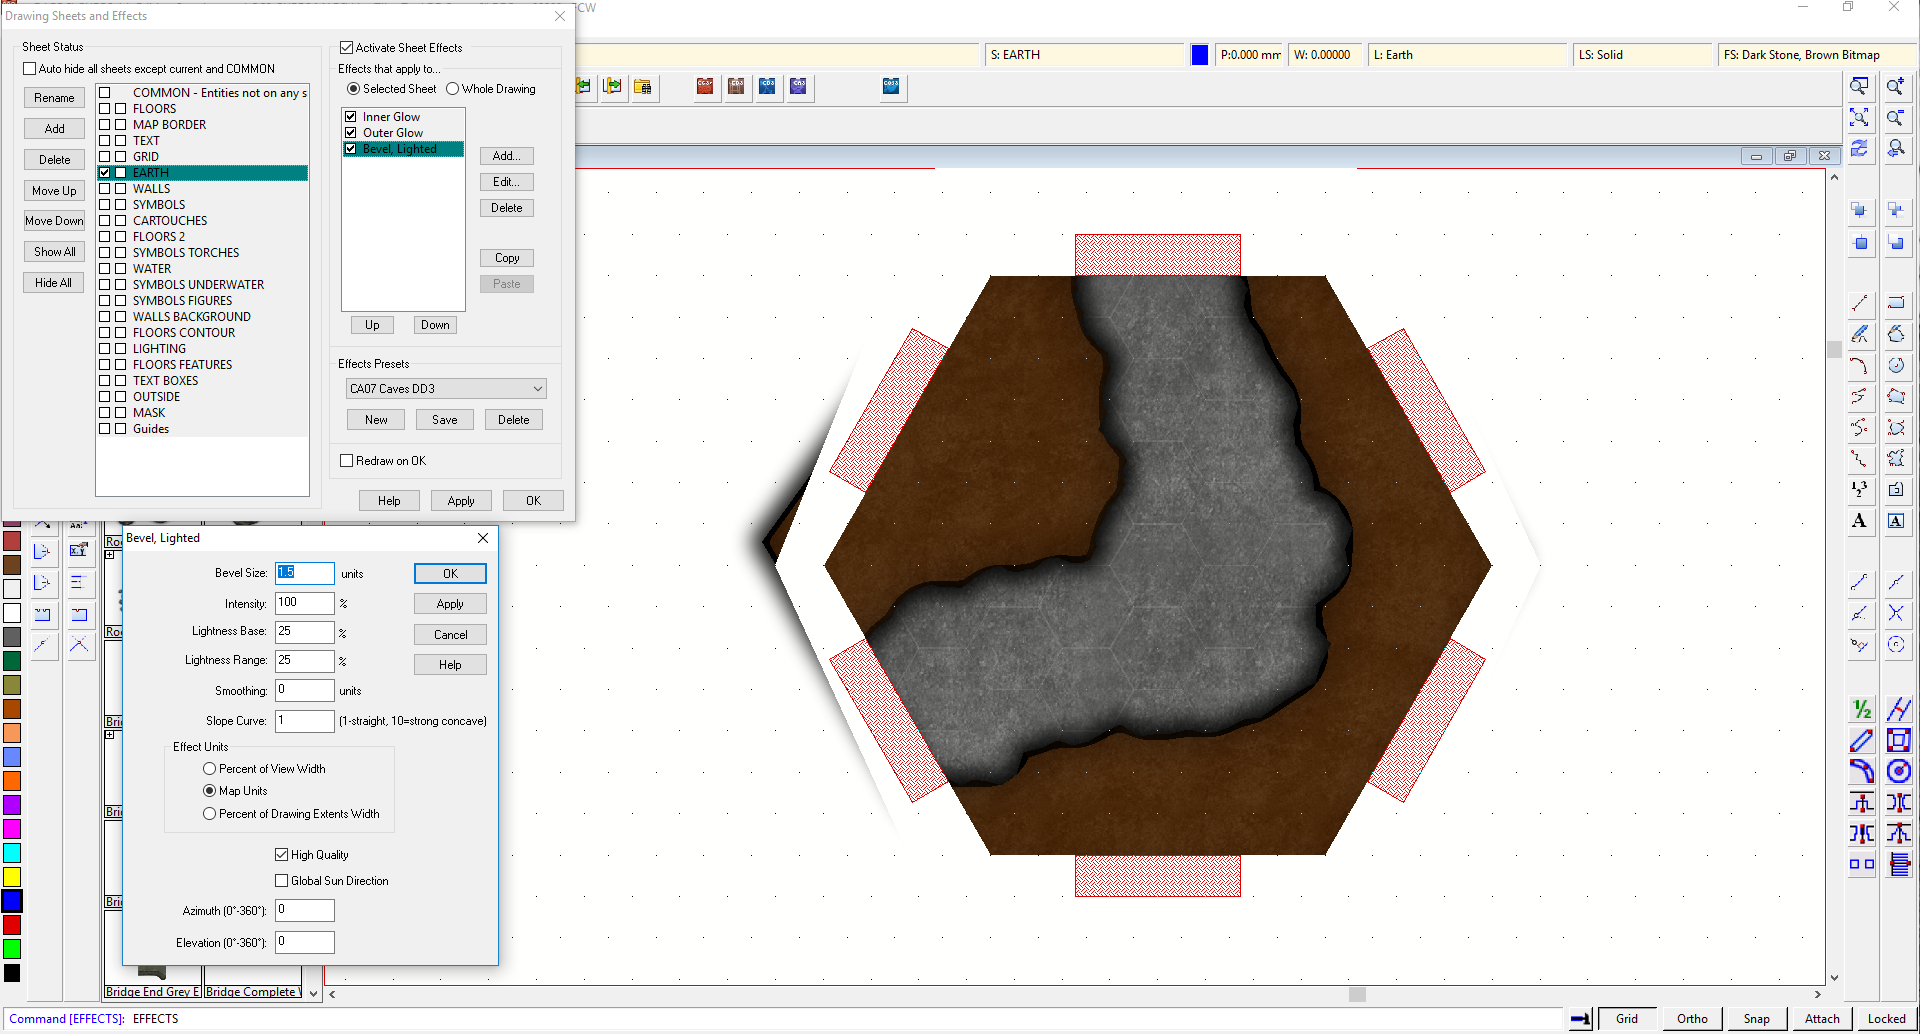
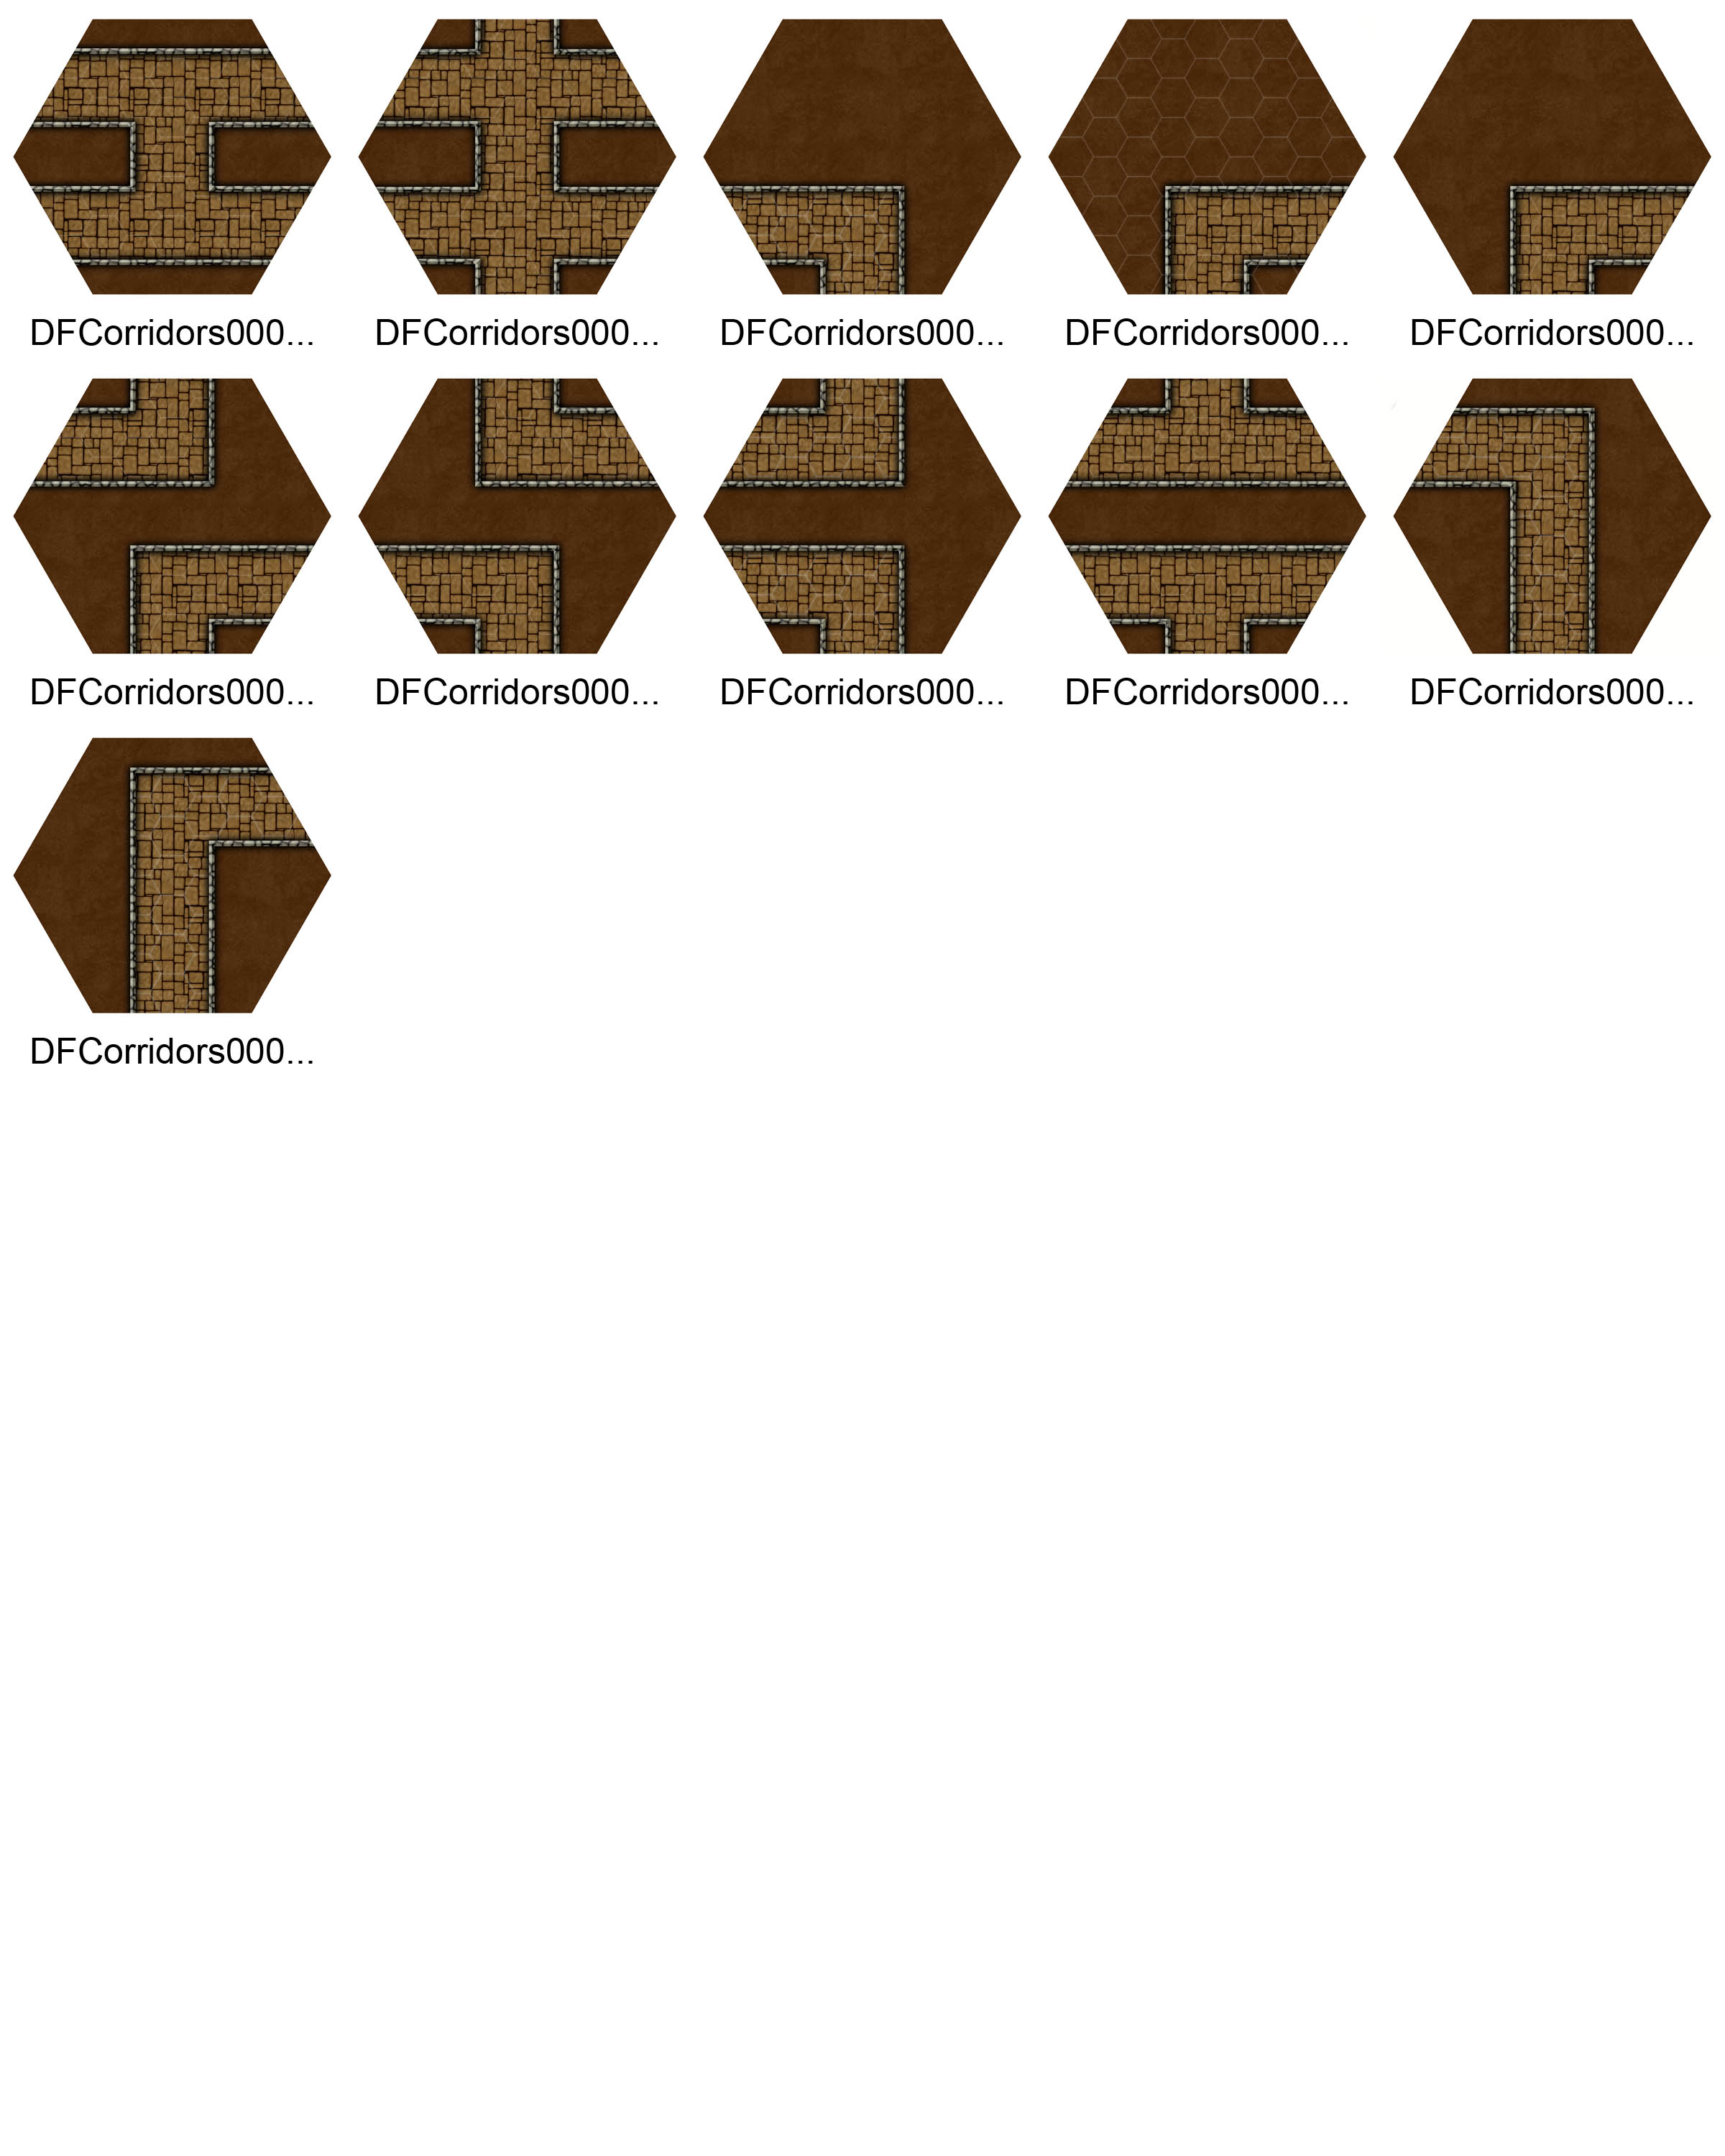
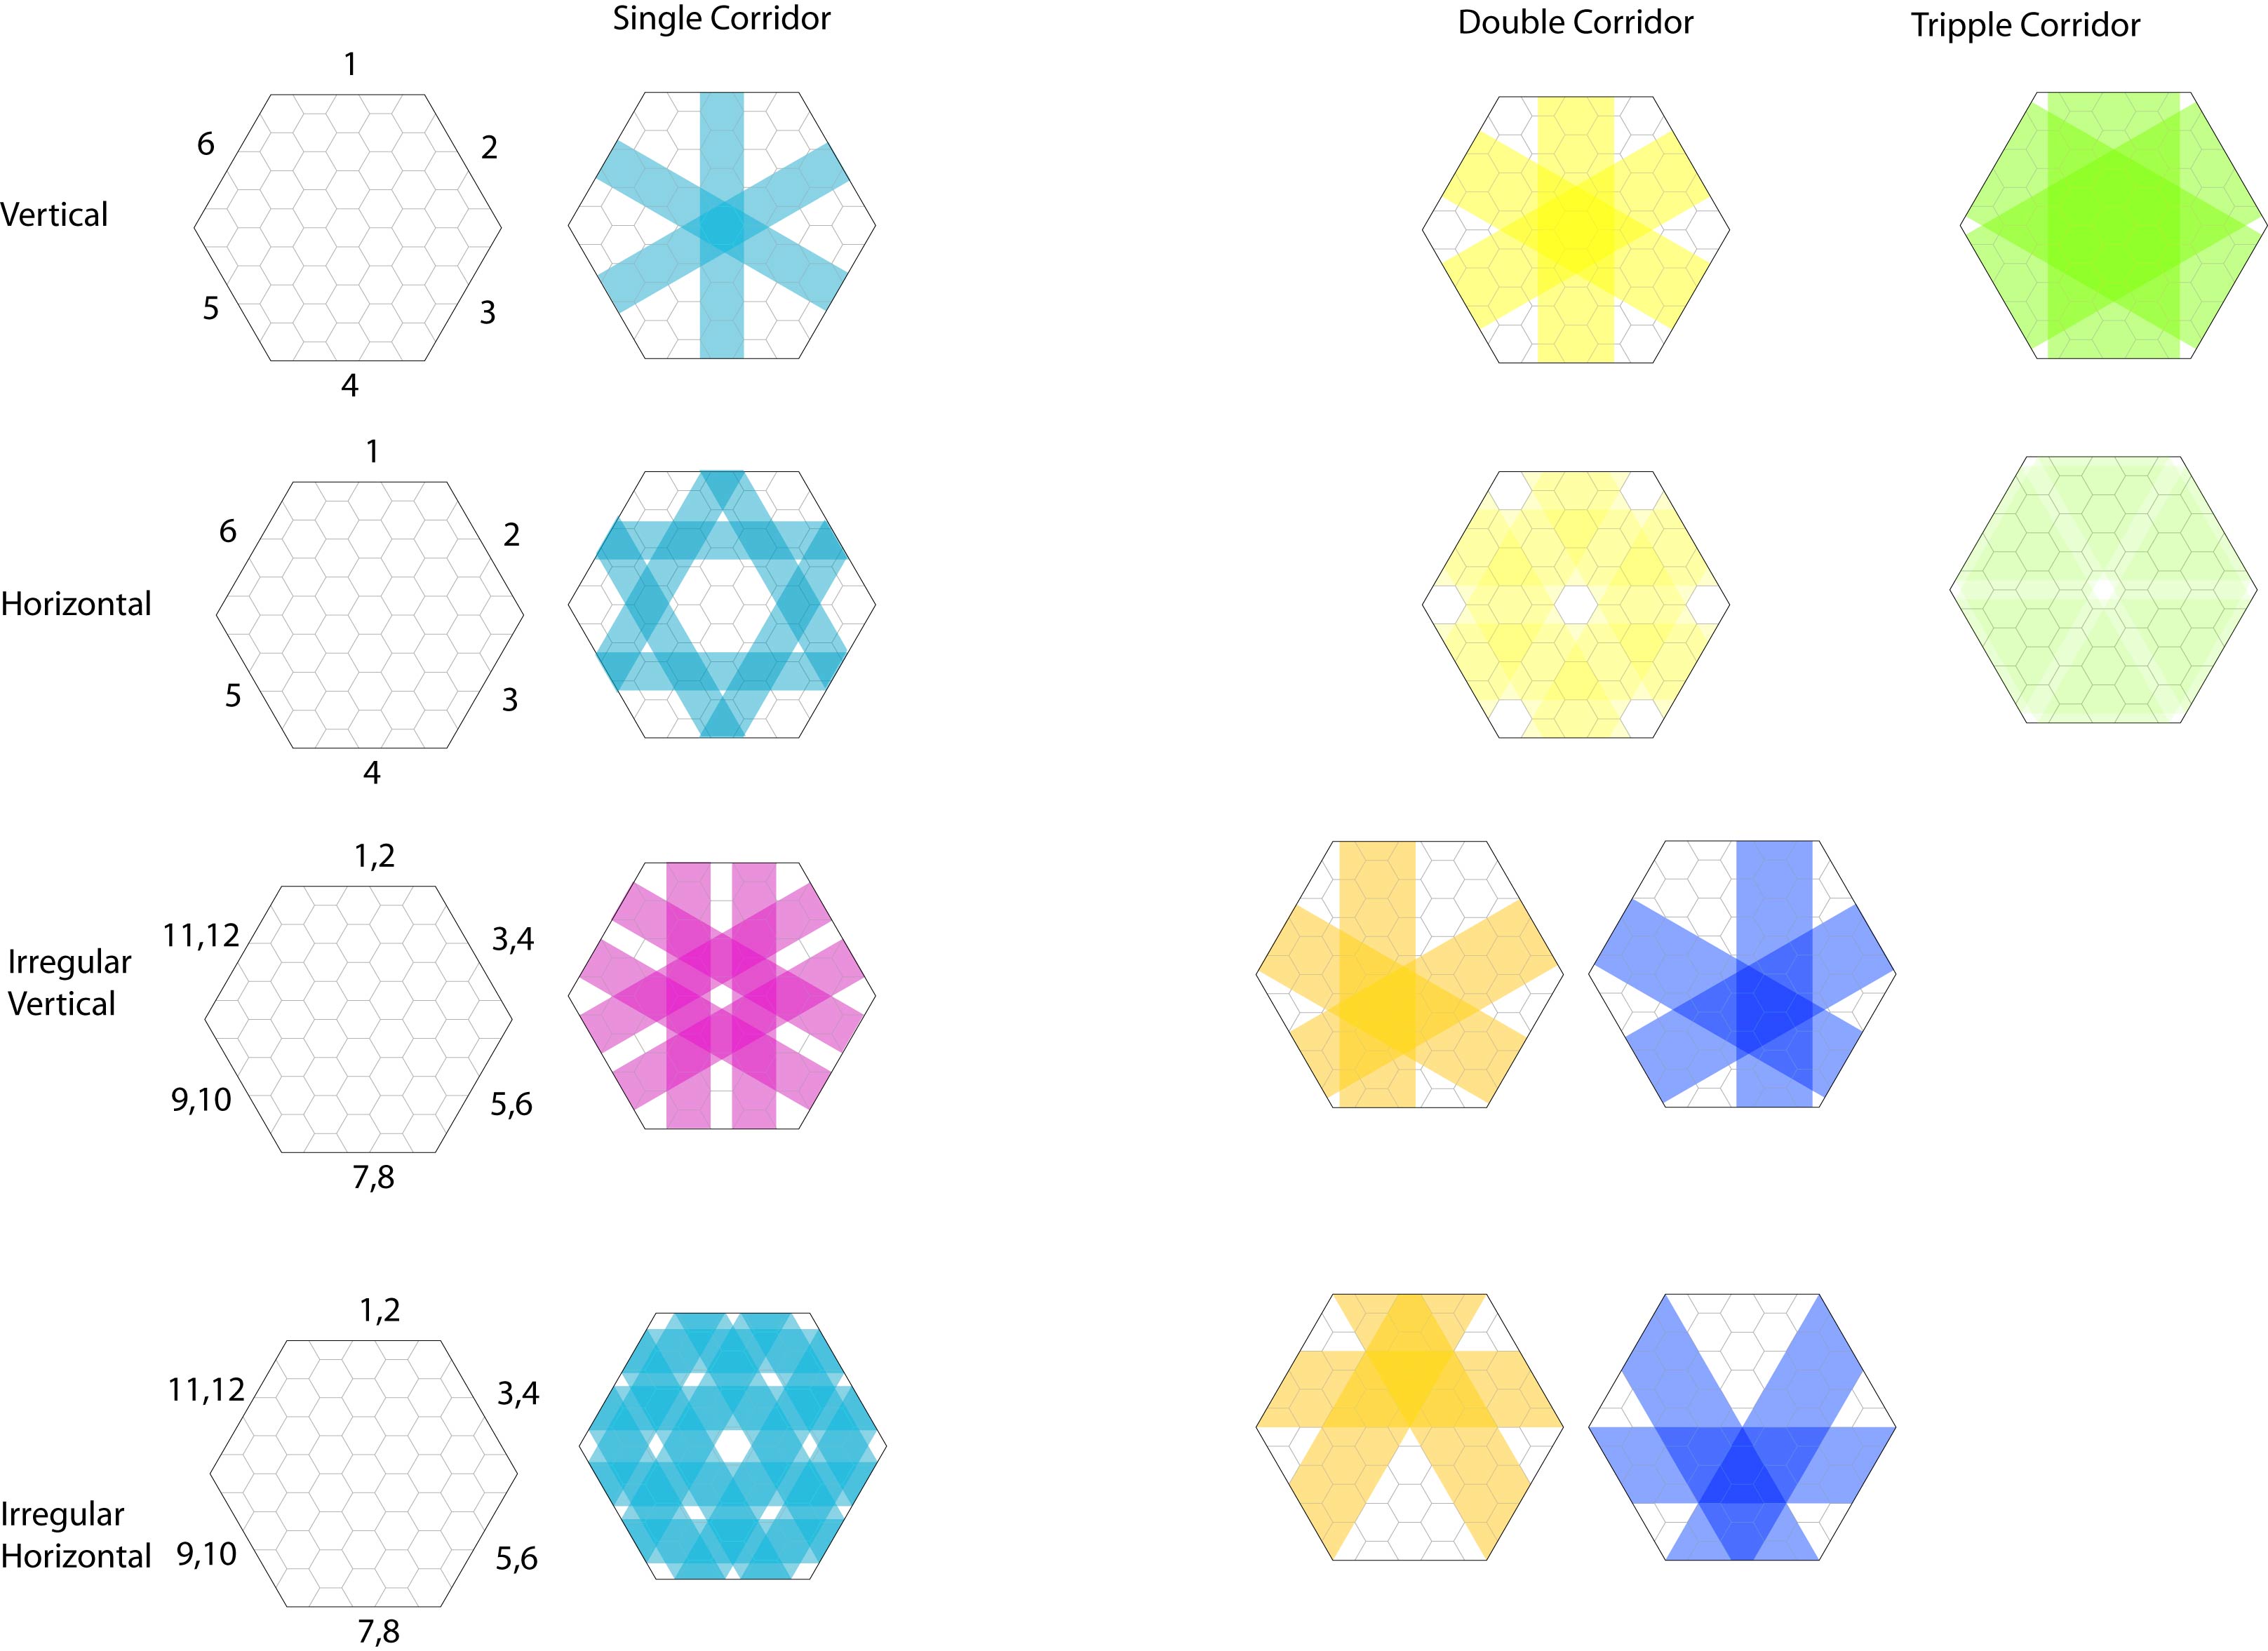
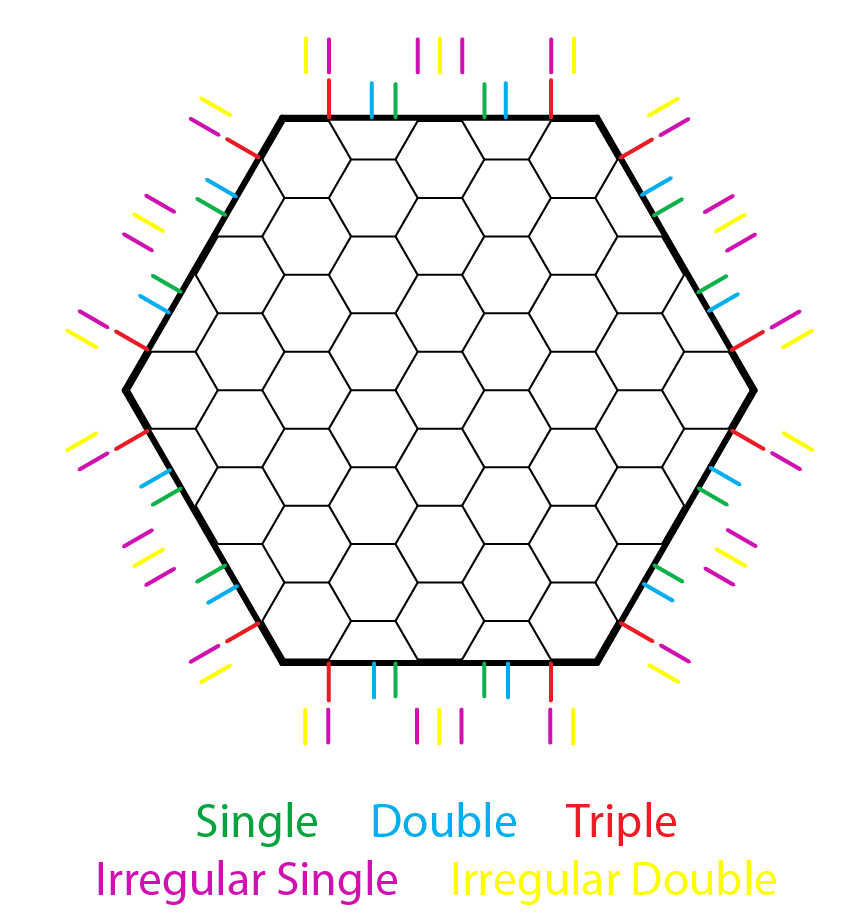
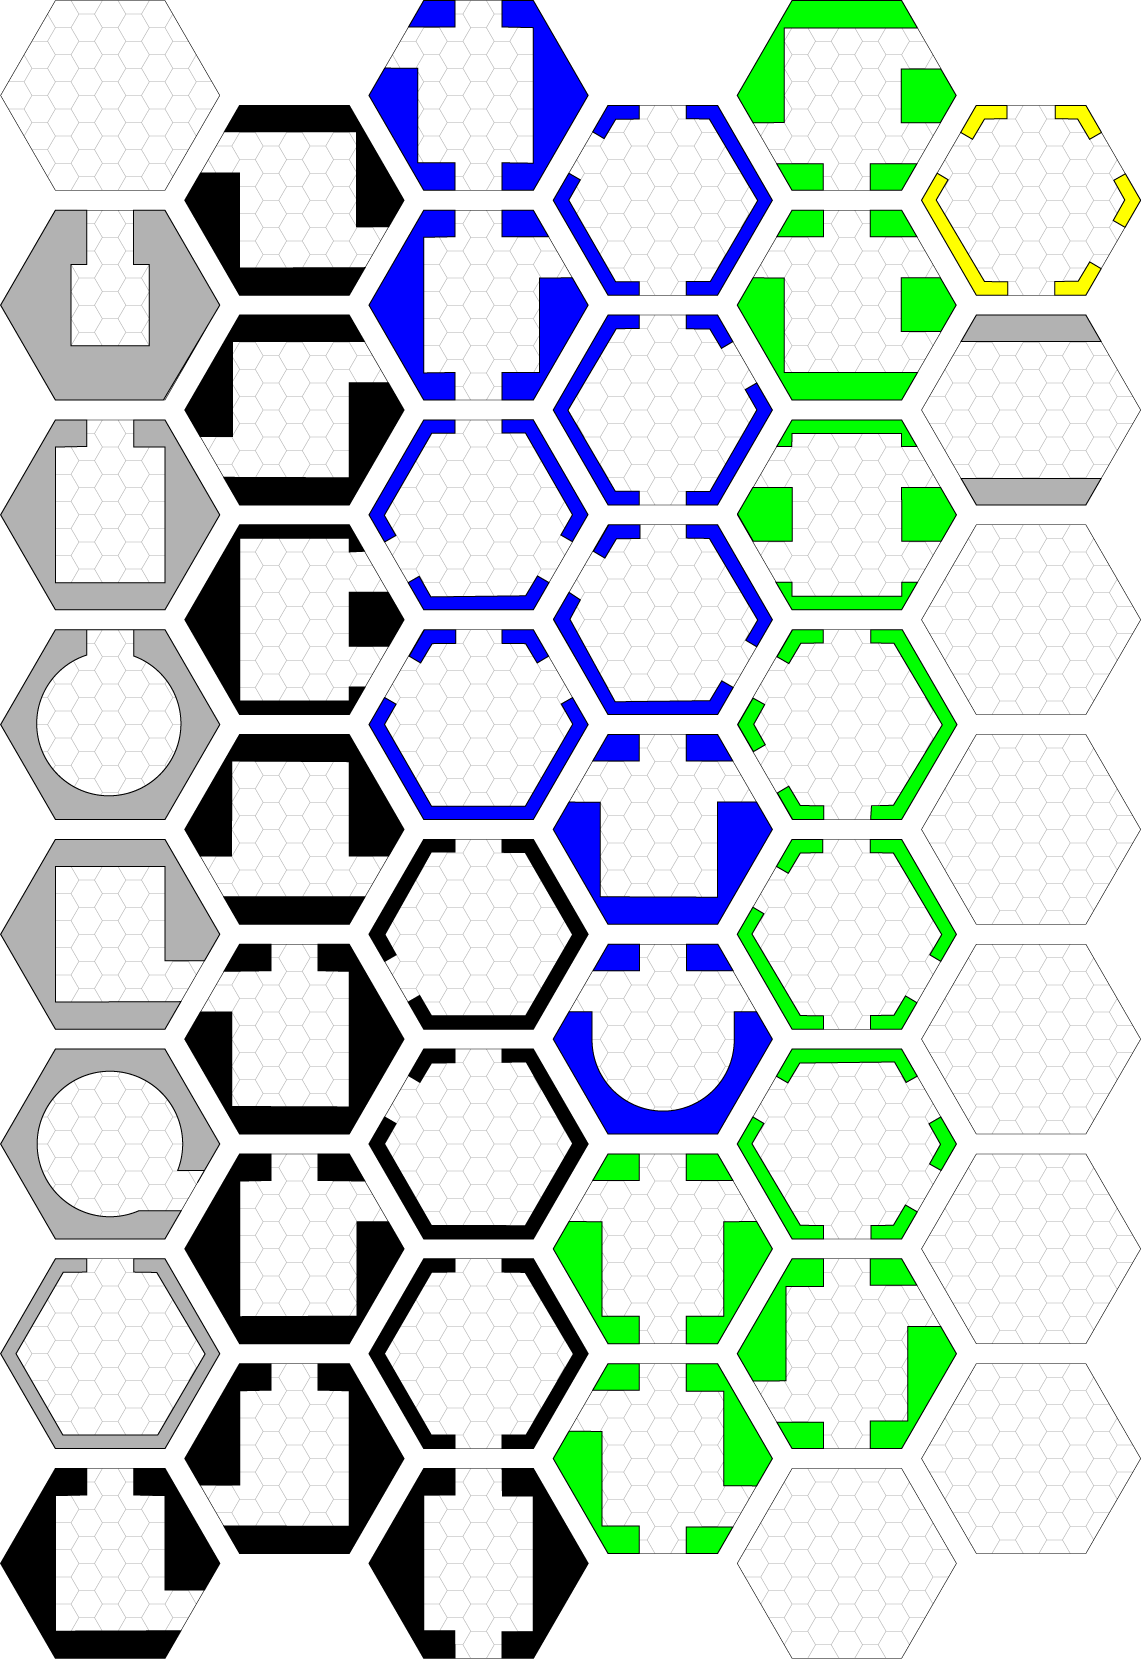
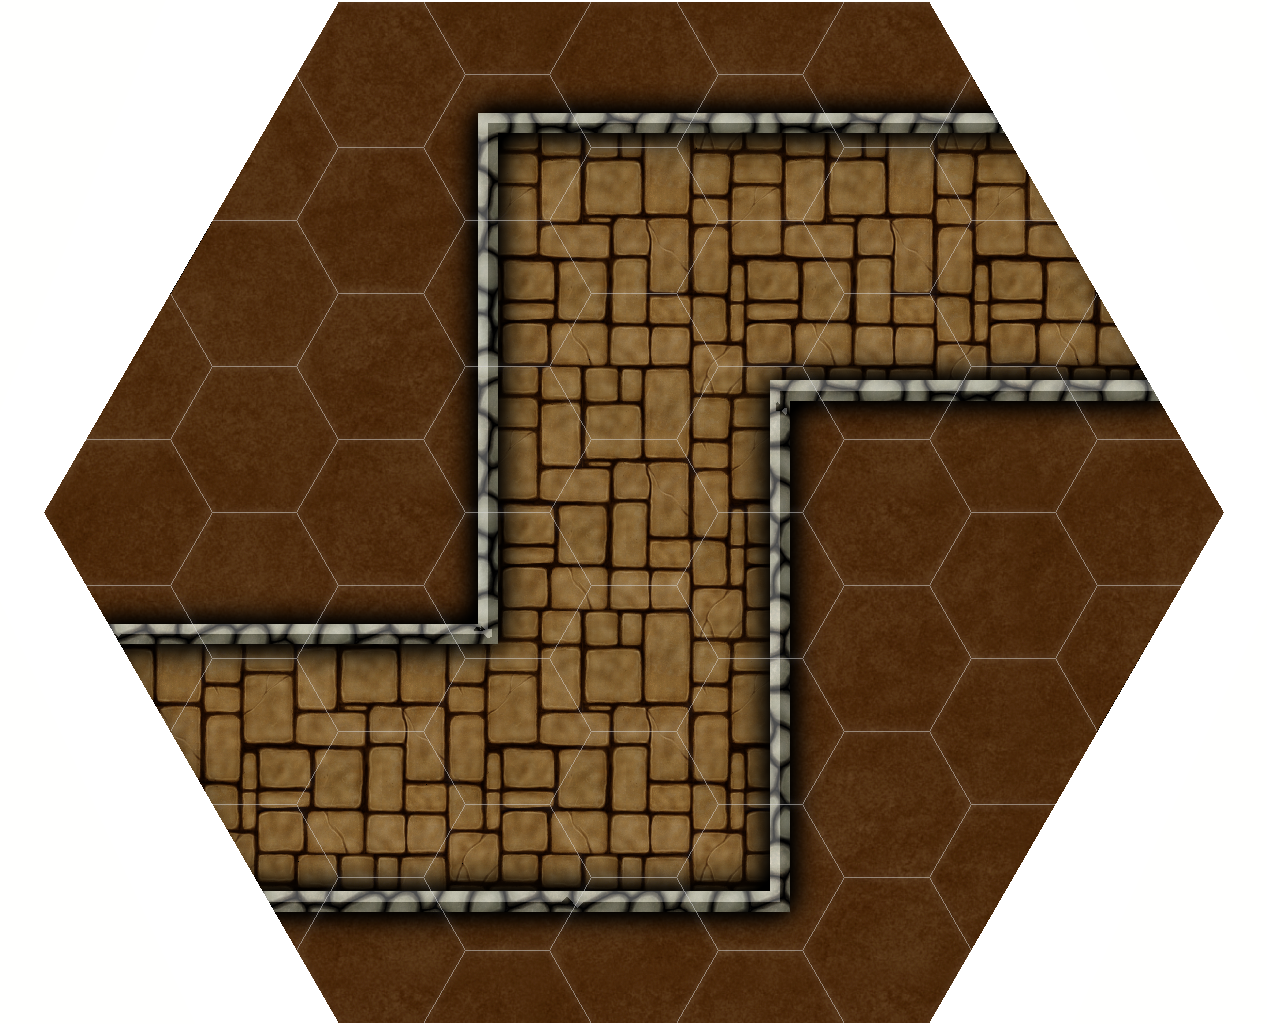
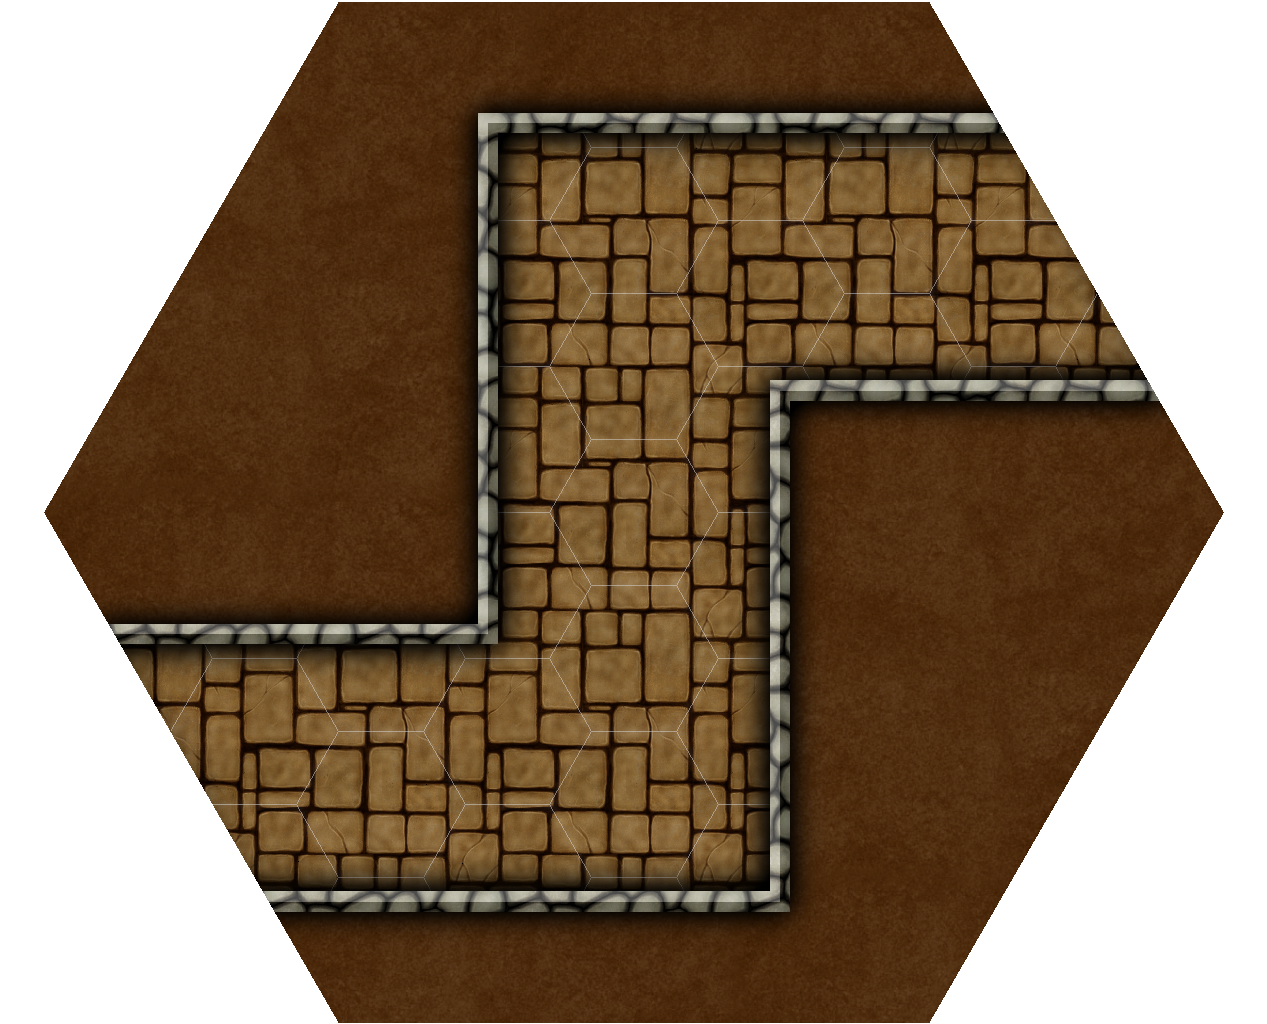
So I made three new layers called Template 3, Template 6, and Template 9 and froze them in CC3+. This way I can hide the layers I don’t need. As per usual the width of the horizontal corridors are slightly narrower than their vertical counterpart due to the 120° angle corners which makes the corridors interact at 30°

Single = 3′ with horizontal being roughly 2.61
Double = 6′ with horizontal being 5.21
Triple = 9′ With horizontal being roughly 7.8

There is no need to fill every bit of empty space

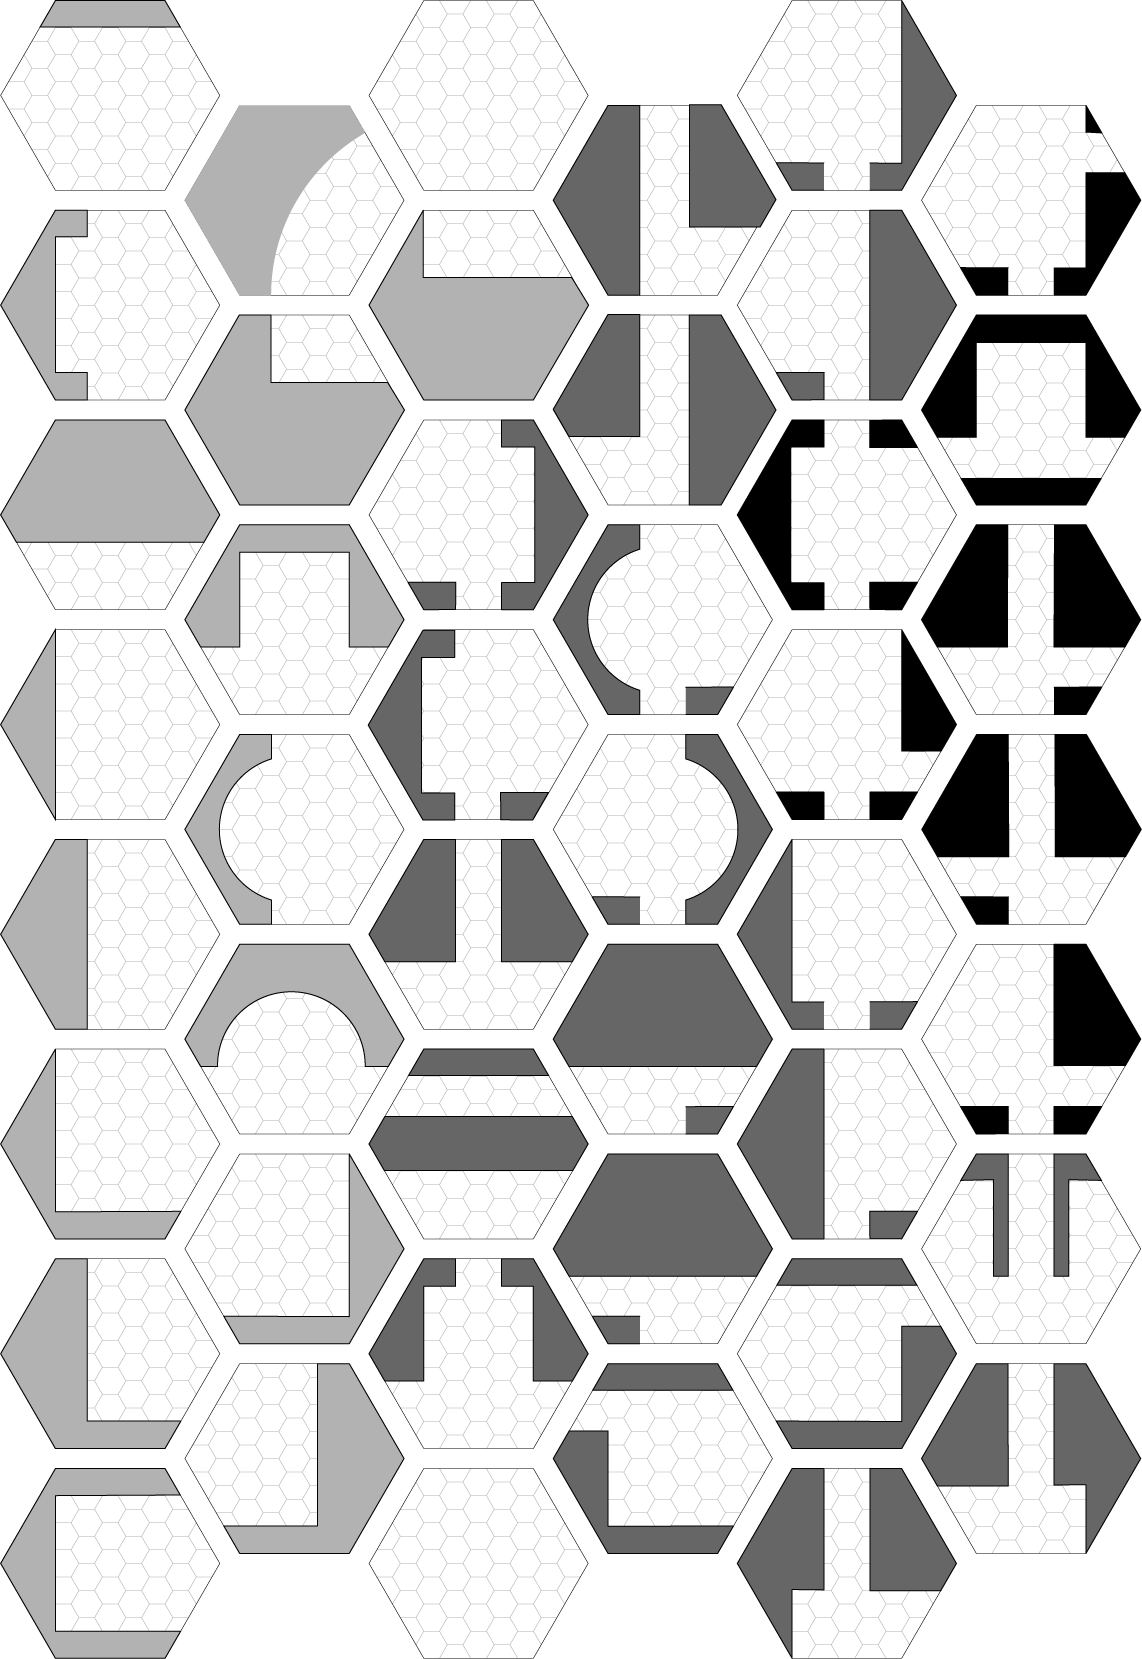
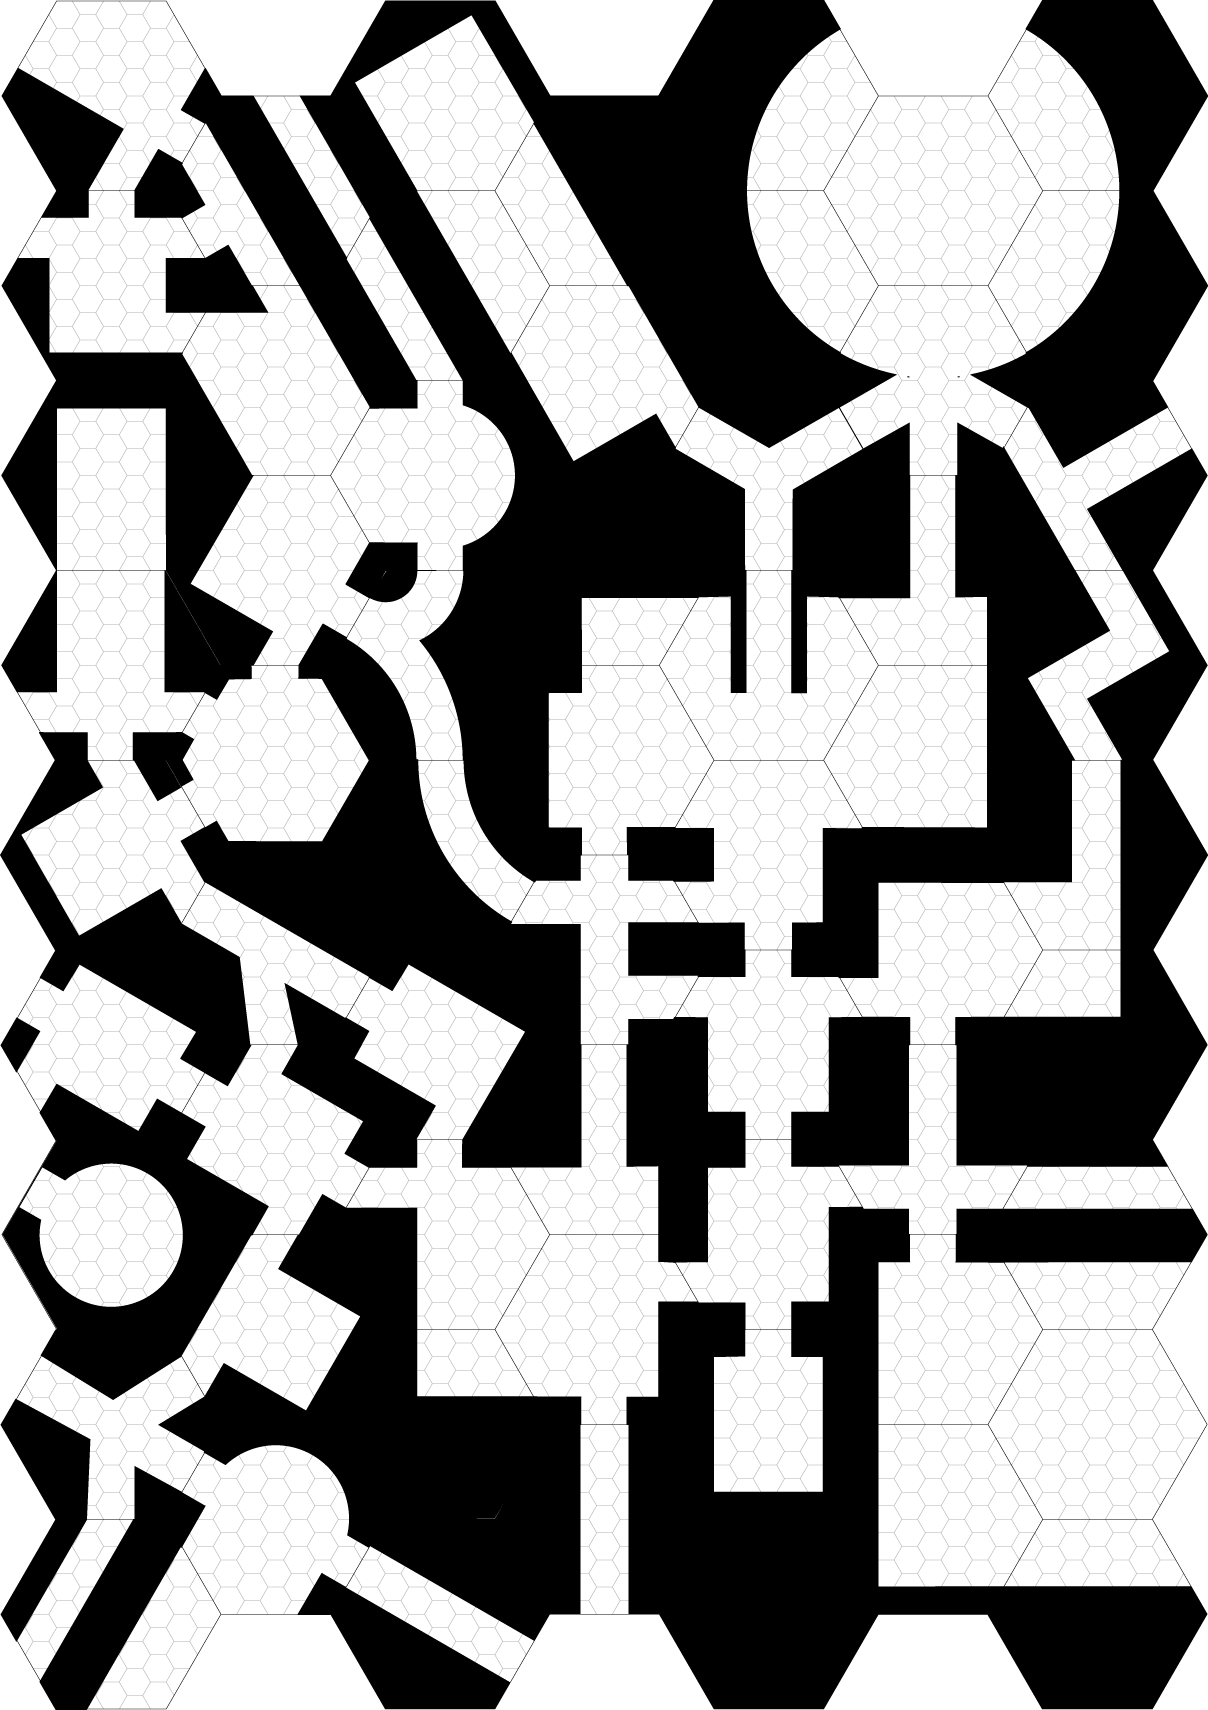
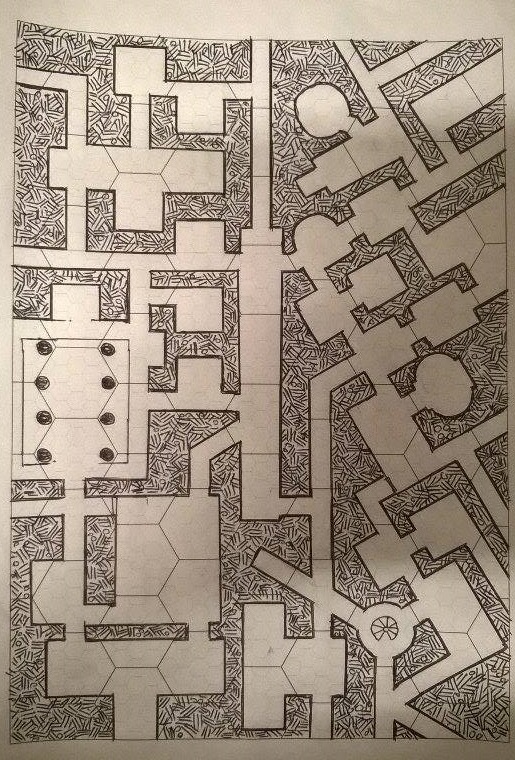
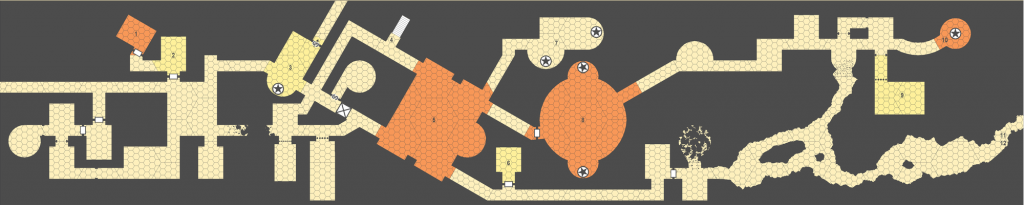
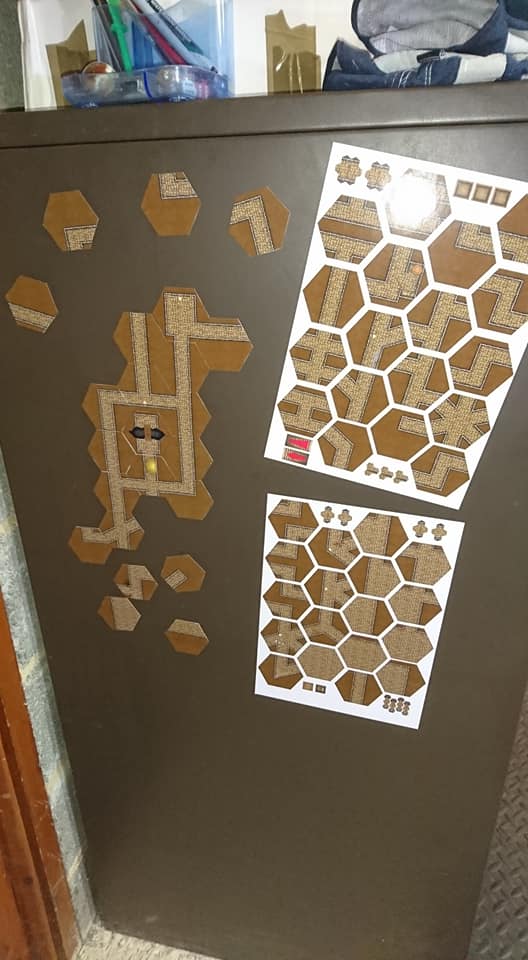
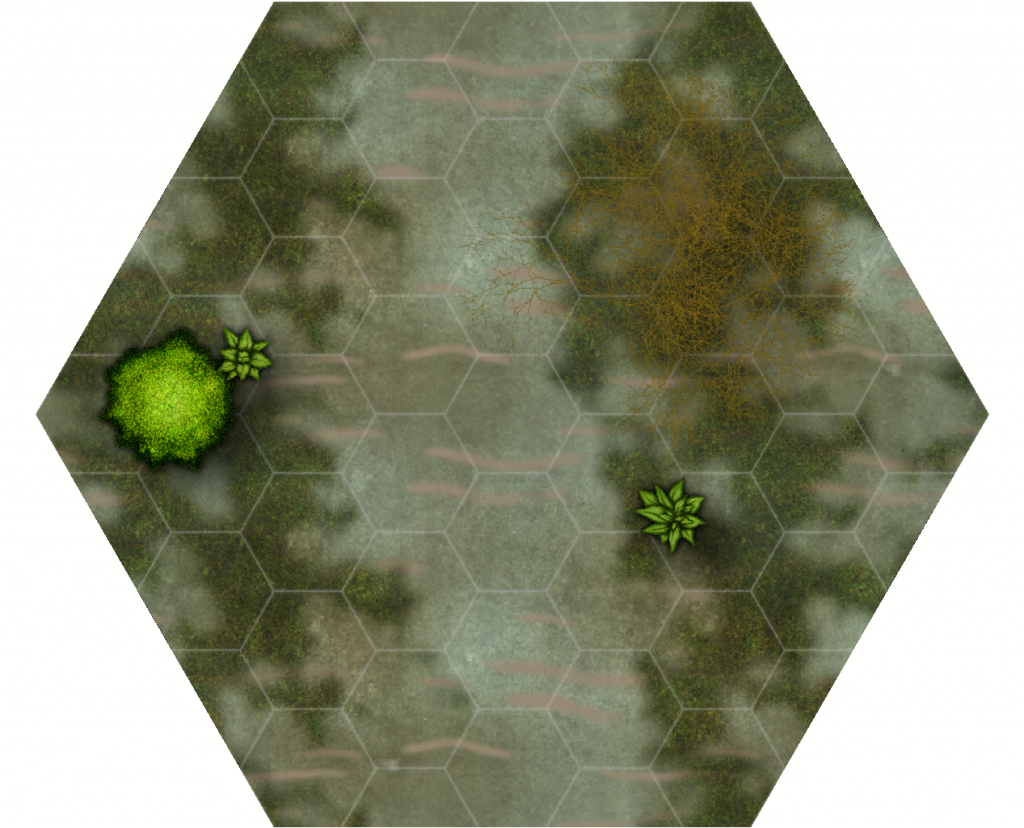
The map above was also made with a combination of free style and geomorphs. I would use this as a possible side encounter especially if I needed more time to finish the main scenario. Something like this can keep an adventure party busy and happy for an evening of gaming. Adding a series of portcullis down the 12′ corridor could give some tactical advantage/disadvantages and allow the thief like characters something to do.

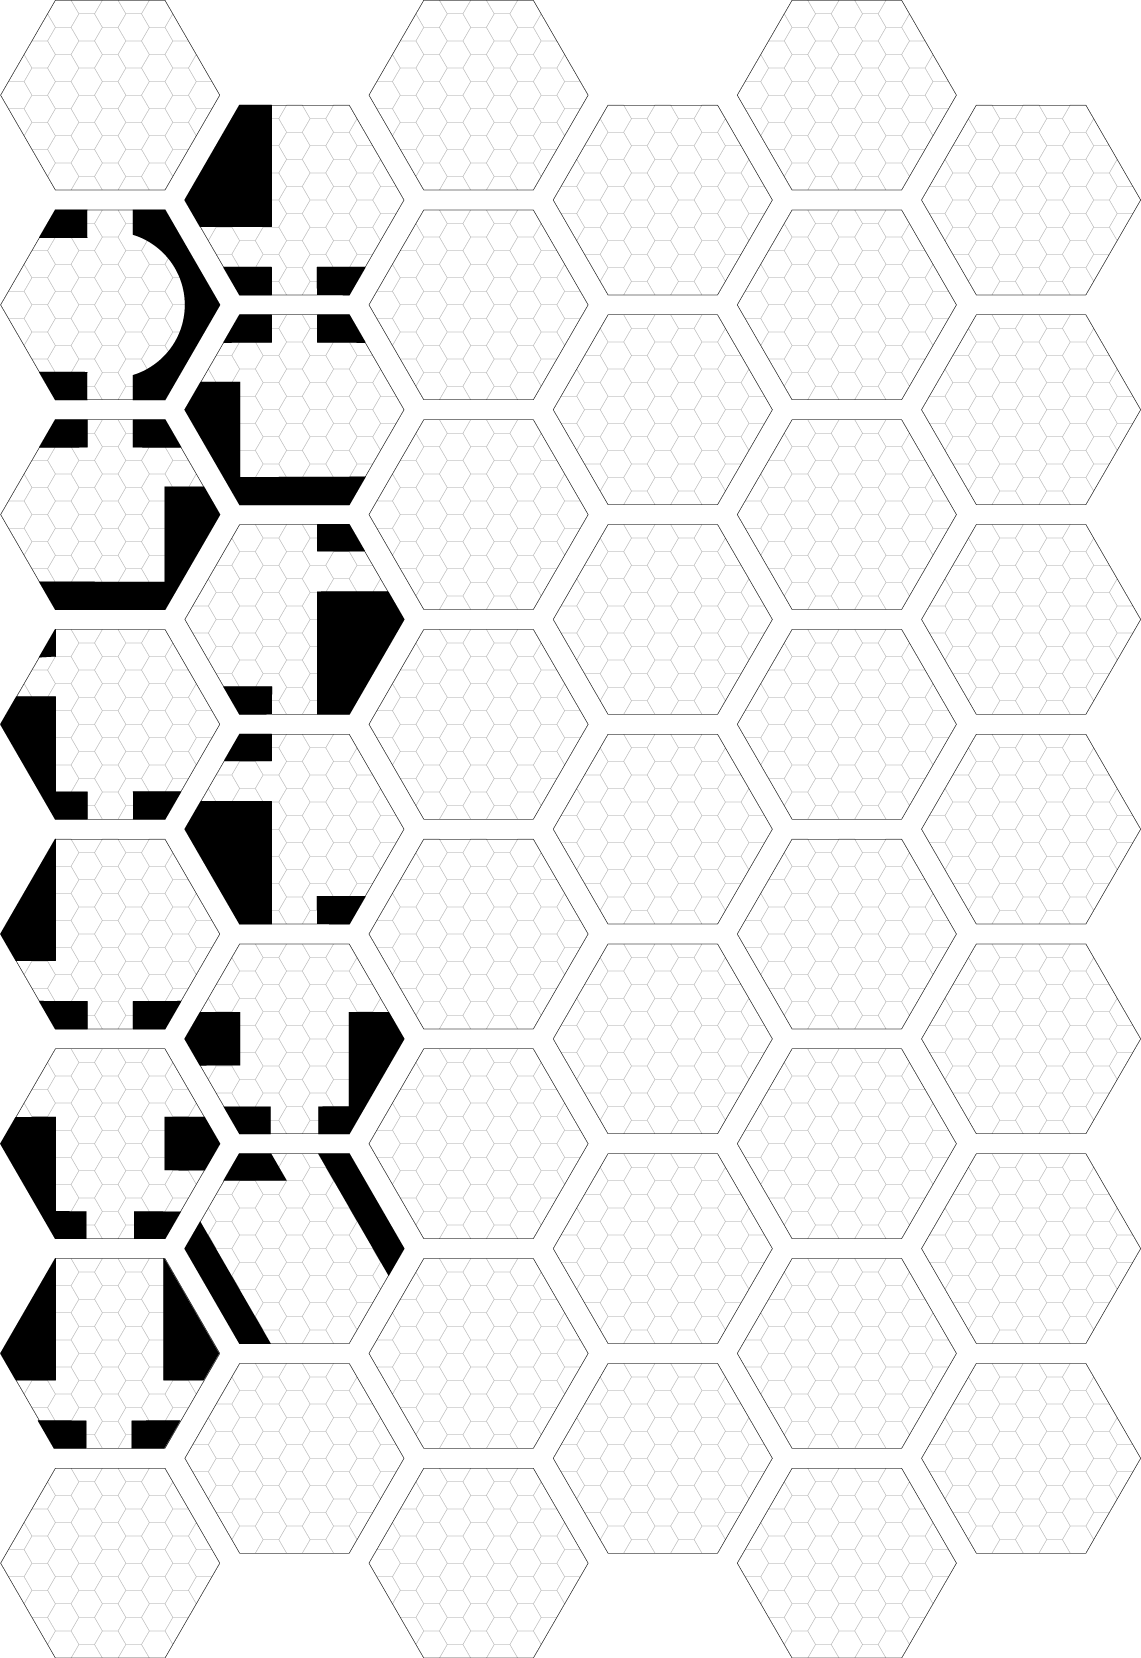
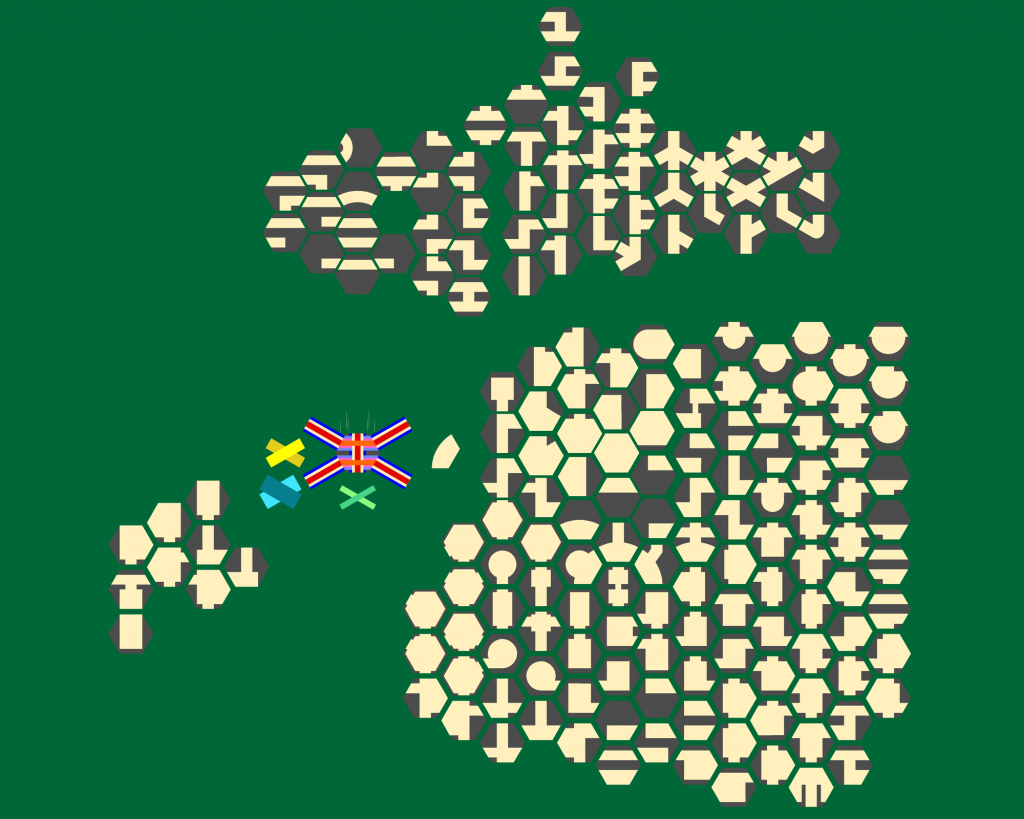
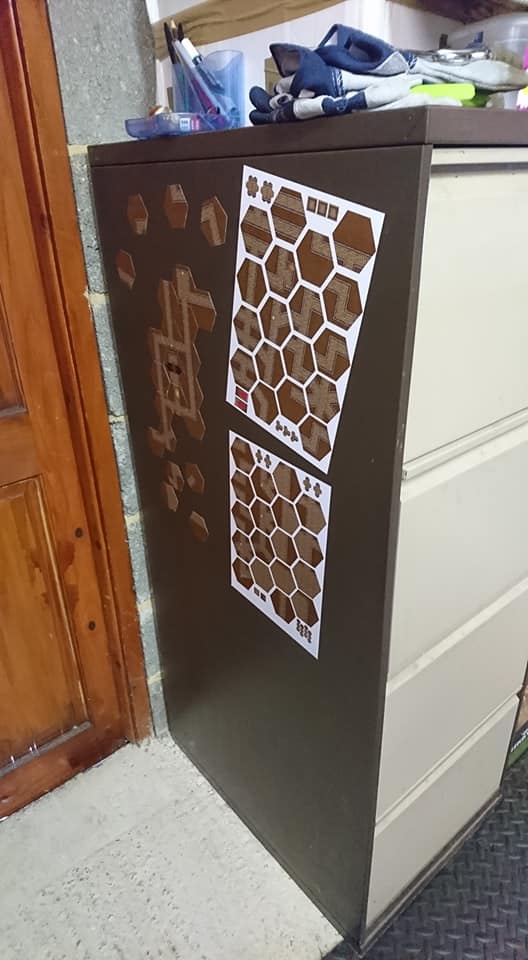
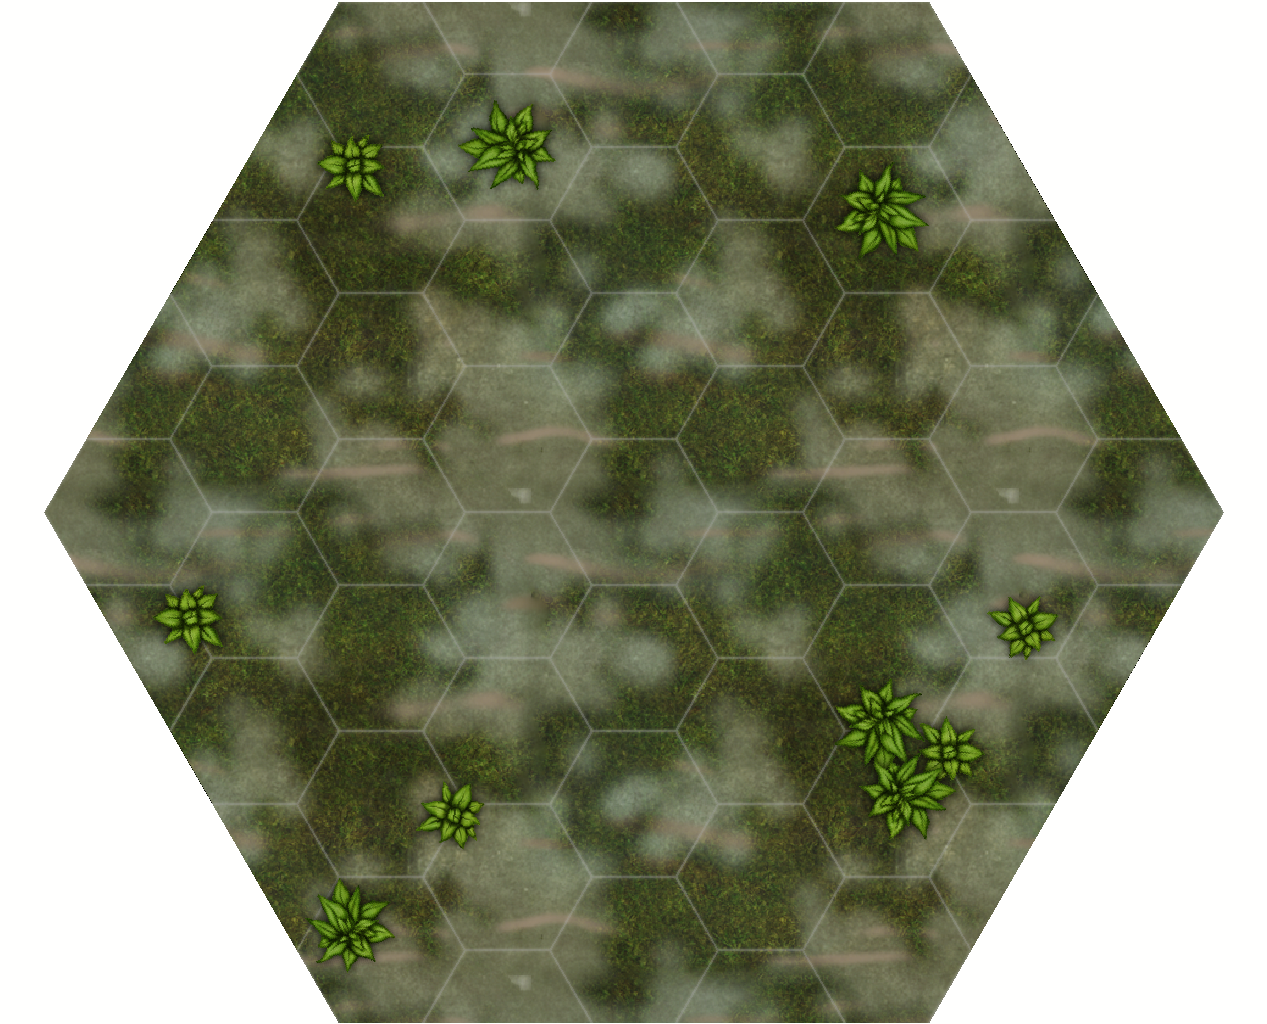
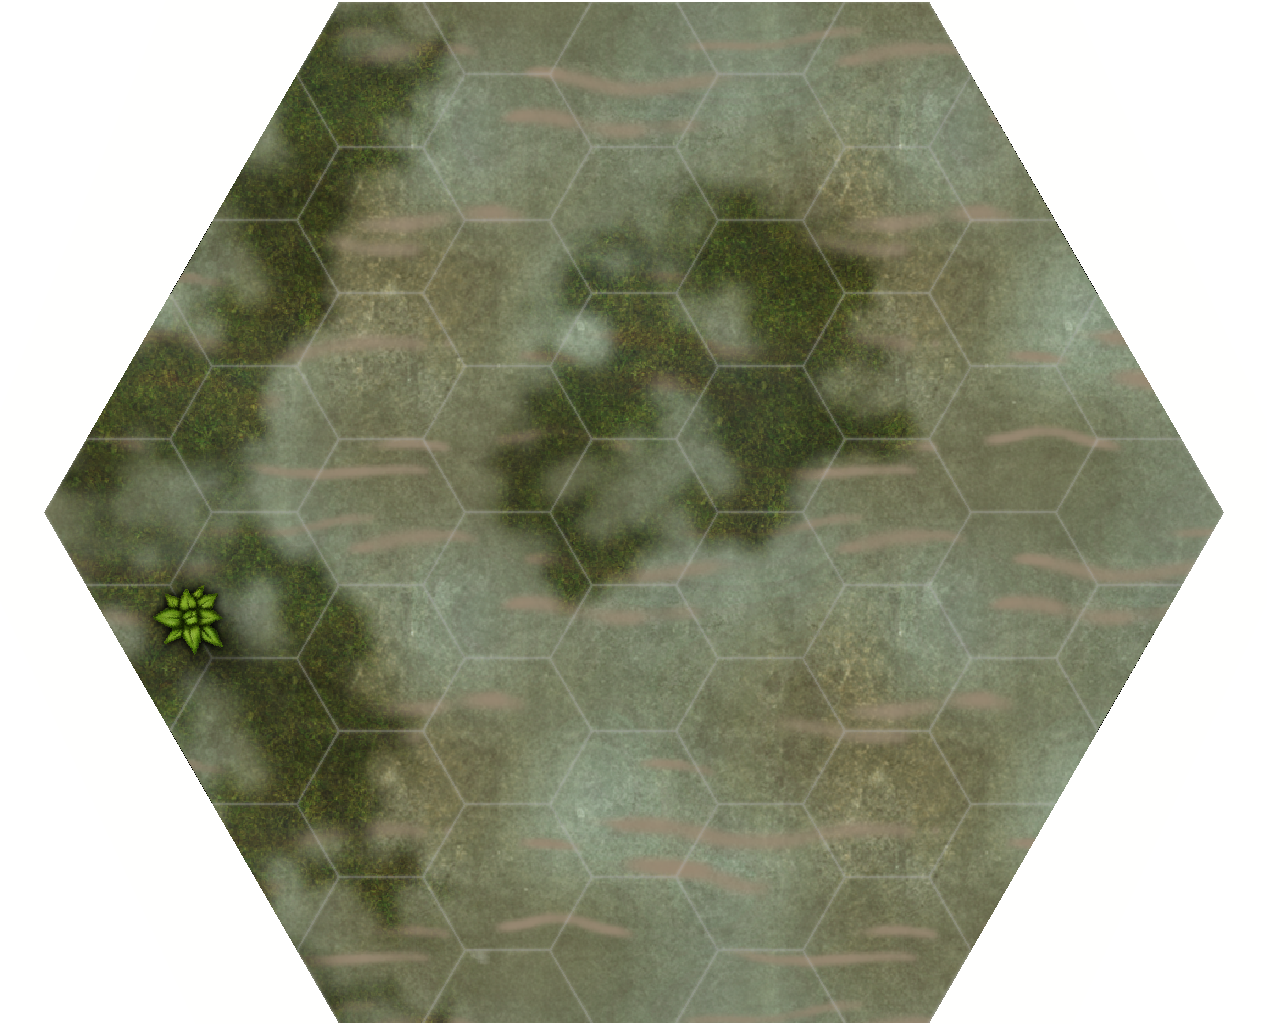
I’ve been experimenting with different shapes of dungeons rather than the normal rectangular paper size.

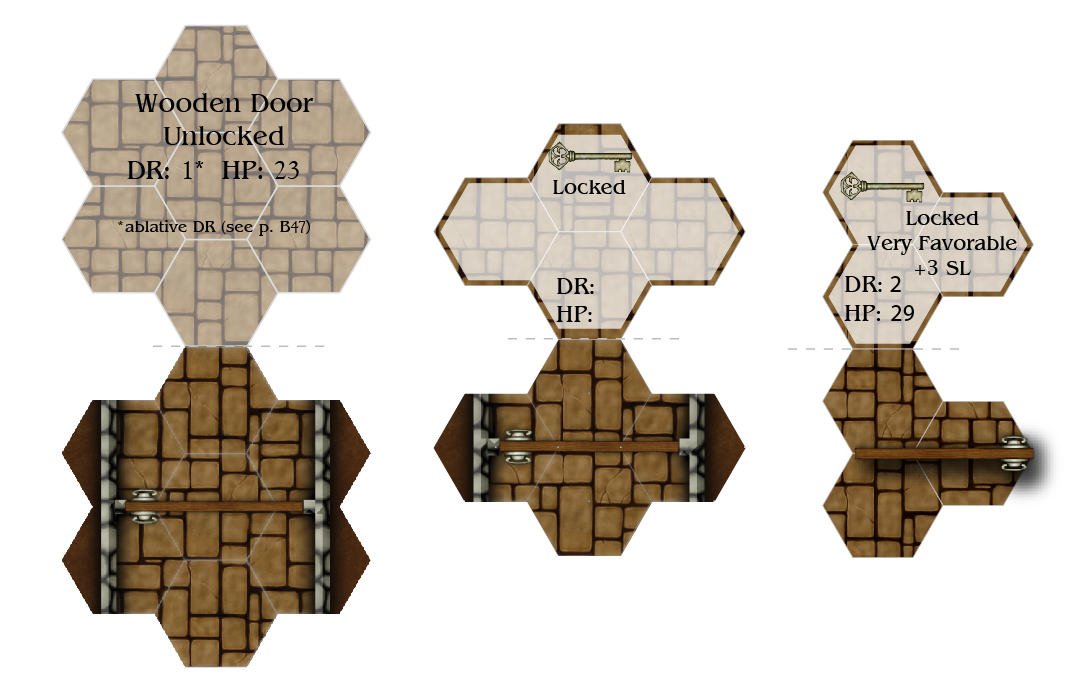
Next is to create a new batch of symbols that adds more old school style of mapping.

Mini Magnetic Battle Tiles

I found some A4 magnetic glossy sheets for inkjet printers. I wanted to see if i could print out the Battle Tiles at 2 inches vertical hexes. This way it can be a ‘mini map’ during play and I can pull out the appropriate 7 inch Battle Tiles during combat or special situations like trying to find traps and secret doors.

Testing them out on my metal filing cabinet.  I have a white board that we have used in the past for gaming and will be using that set on the table during play.

I am really pleased at the print quality that my Epson EcoTank ET-7750 was able to produce on these glossy magnetic sheets.  The stairs, doors, pits, and traps are a pain to cut out but they do stick to the top of the tiles allowing me to add features to the dungeon as well!

They cut better with a scissors then they did with the hobby knife. Now when we play I can place down the tiles as they explore the dungeons and they are just fun to play with on their own.

Swamp Adventures!

I’m working on a series of short encounters that can be strung together into a campaign.  Each encounter will include 3-7 Battle Tiles and possibly miniatures. The first part takes place in Lizard Man infested swamps.  
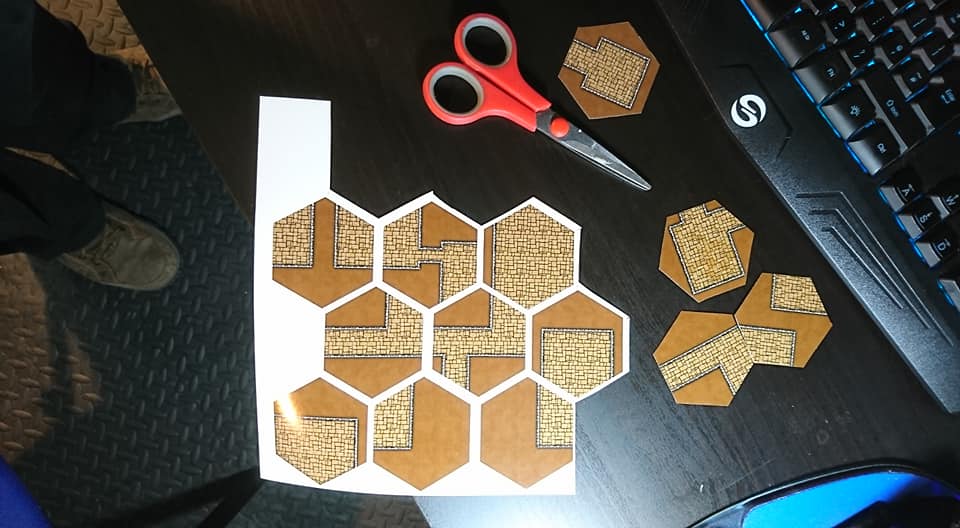
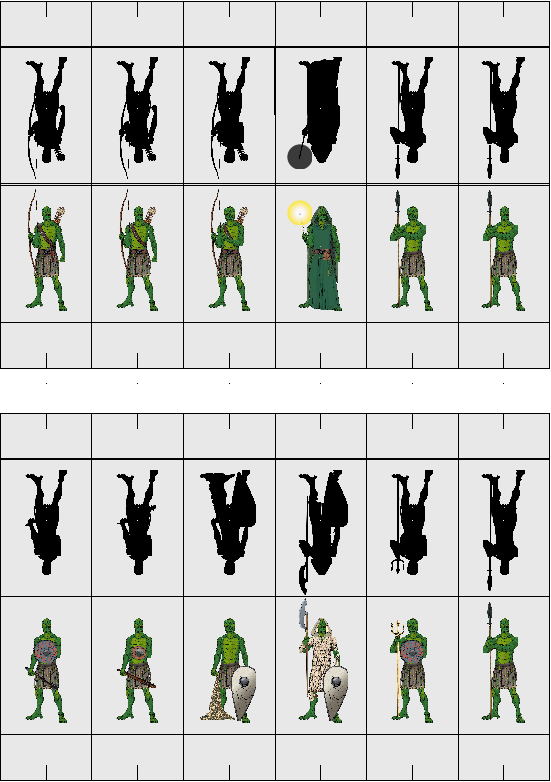
I’ve still have some work to do on the layers and sheet effects but these first attempts should give a general idea of what they will look like.  Now for the lizard men.

Made with Profantasy Software’s Character Artist 3

I’m hoping to get them printed on high quality gloss photo paper then mount them on 2mm greyboard so they will fit into the Black Hex Bases properly.  It is to bad that Character Artist does not provide the backs to the mini’s.

7 inch Cave Battle Tiles

I’m currently working on the caves and I’m not satisfied with how they currently look.

The problem is where the floor meets the walls.  Bevel won’t work because it is lighted.  So one Bevel will be darker than the other and then they cave walls won’t match when you rotate them.  Because it is six sides I can’t really do multiple walls and change the lighting dynamics.  Not only does that require an extreme amount of work (like crazy amount) it still will be a problem with some of the cavern options.

This is kind of what it is gong to look like.  Mind you I’ve added no detailing to the cave floor.  My focus is on the wall effects.  I want to offer the same background texture as the dungeon Battle Tiles that way they will match seamlessly.  I will make transition tiles as well.

As for professionally getting these printed I think I’m going to make them into A1 or A0 posters and hand cut and mount them myself.

New 7 inch Battle Tiles!

I just finished transferring my latest batch of 7 inch Battle Tiles to pdf.  You can get them HERE

I’m far from done with these.  I noticed some of the form fillable content didn’t work so I need to go back and fix those and three tiles are off so I’m fixing those as well.  I’ve come up with a few more tile designs that I hope to get started on soon.

Battle Tile Tokens

To reduce the extremely large number of tiles I’m creating I’m adding tokens around the tiles.  It may use a bit more ink but it also allows you to get more out of your photo paper as well.  The tokens will allow you to place stairs, traps, treasure, etc. anywhere you want on your tiles.

Door Tokens

 These three style door tokens will allow you place your doors within any area on the tiles for the wider Vertical Corridors.  Carefully cut them out with a hobby knife using proper safety procedures and you can then either glue one side and fold in half on the grey dotted line or cut them in half and glue them on to thicker card. The backs of the tokens will have information on the type of door.  To make this easier and more customizable for those of you using the tiles all token pdf’s will be form fillable. Which means you can enter your own data. The center token in the picture above is how they will all look with blank data fields where as the other two is a representation of how they will look with the information inserted by the user.

Test it out on this pdf for yourself!  You will have to download the pdf, Google Docs won’t let you use the form features in the preview.

Because the Horizontal Corridors have to be slightly reduced in width I have created two types of door tokens for each door type. These also will have a form option on the reverse side.

Here are some of the options you can place from getting from one level to another.  I manipulated the pit images in photoshop.  The top one is a pit down to another corridor directly below it and the bottom one is just a deep pit.  I probably should have placed a skeleton on the bottom for scale. If you fold the pit symbols on the grey lines and glue the trap door parts together then glue the bottom (pitt symbol) to a piece of thick card you can have a pit tile with a working door!

Now to make sure that the pdf’s can be used by both A4 and 8.5″x11″ I’ve placed a red rectangle on my sheet representing the size of 8.5″ by 11″. This will make sure none of the pieces will be cut off due to size. Everyone will have to print them with no margins though.

I’d be interested to know what kind of tokens people would like to see.

How to Label Battle Tiles

I’ve gotten a few suggestions on labeling the tiles but I’ve not yet decided exactly how I am going to do it.

Number of corridor connections depending on the width of the corridors and the direction they are facing (horizontal or vertical)

I am kind of curious how someone who could turn these into a random generator would label these.  I’m almost tempted to break it down per wall connection as the room walls follow the different wall connection points as such…

This gives a possible of 11 points that a wall can connect to. Although the chances of needing most of them are slim.

For the most part if you’re making a dunging with the majority of it with the double width corridors you will be using the Double and possible the Irregular Double wall connections.

I’d like to come up with some kind of labeling system that would allow me to label them in a clockwise direction starting at the top of the hex.  That way if I realise I forgot an option it won’t end up at the end of the list with other odd sorts but would at least be grouped with tiles that are similar in some aspects.  Also a system like that might come in handy if ever I find someone willing to make a random dungeon generator with these tiles.

So the photo above would be categorized from the top of the hex with a Double Wide Left side Vertical wall, next side is Left Side Double Corridor , then nothing, then a Double Wide Corridor, 5th side also a double wide corridor then nothing.

The middle tile would have nothing, nothing, Right Side Double Corridor Wall, Open space, Left Side Horizontal Double Corridor, nothing.

The last tile would have nothing, Double Wide Corridor, Double Wide Horizontal Corridor, Double Wide Vertical Corridor, Double Wide Horizontal Corridor, Nothing.

Now to somehow figure out how to use that in some kind of labeling.  I’m up for any suggestions!  If you think you have an easier solution please let me know.

7″ Battle Tiles

I’ve gotten some positive feedback from my 7″ tiles so I thought maybe I could round them out a bit more before continuing on with the 4″ battle tiles.  To organise things I started to plan out some of the shapes in Adobe illustrator.  Here are just some of the tiles I’ve come up with for double wide corridors (6′)

So just a few!  I’ve color coded them based on how many corridor connections are available.  Here is just a quick example of what could be created with these tiles.

I’ve also been cleaning up the tiles a bit by adding another layer to hide unused grids. I think it looks much cleaner with the new build.

I’ve also been working on adding a bit of dirt and grime, not to all tiles as you really need generic tiles, but just a few of them. By creating a ‘Dirt’ layer with different transparencies and edge faders it can make some tiles look really disused.

Also with Campaign Cartographer I can easily change the backgrounds to allow for different style maps.

Want to plan your dungeon?  Check out my hex graph paper that I made in Illustrator.

Now this is where I’m going to get a bit cheeky.  I’d like to offer these in black & White OSR style which Profantasy Software has in The Cartographer’s Annual 2015 so if you can spare the dosh and donate a couple of quid (dollars) then I’ll be able to get a few new styles and offer those up for free like I do with all my hobby designs.

paypal.me/JCMorrison


7 inch hex Battle Tiles

I’d like to share the 7 inch hex Battle Tiles that I made back in 2009. You can read about it HERE on the Profantasy forums.

You can get them HERE

For more information on the battle tiles click on the tags to other posts concerning Geomorphs.

If you end up using them please share pictures and if you tend to use them often and you need a new tile then please let me know and I’ll whip one up for you.

Hand Drawn Map

I got bored at work so I drew this dungeon using tiles from the 4″ Hex Geomorphs.  The nice thing about hand drawing them is it allowed me to see that I could come up with a few new tiles that will increase the modular construction of the dungeons.  This is only like my second time trying the cross hatch fill that is really popular these days. I still need more practice at it.

I made a portrait and landscape versions of the hex grid in Adobe Illustrator and you can download the pdf HERE